As you work in Excel, you may want to concatenate, combine, or join values in multiple columns into a single column in Power Query to, for example, format data for reporting.
I will show you how to concatenate multiple columns in Power Query using options on the Graphical User Interface (GUI) of the Power Query Editor and the Power Query Formula Language (M).
Concatenate Two Columns in Power Query
Suppose you have the below dataset in an Excel worksheet.
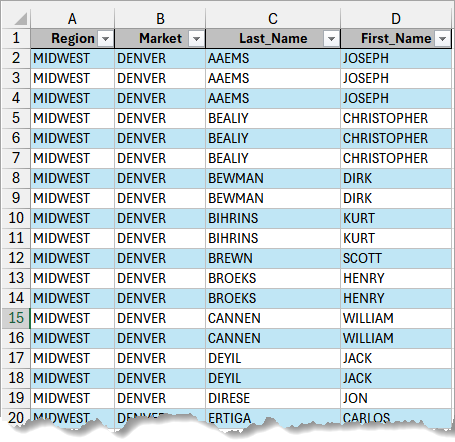
You want to combine the Last_Name and First_Name columns into a single column named Employee in Power Query.
Here’s how to do it:
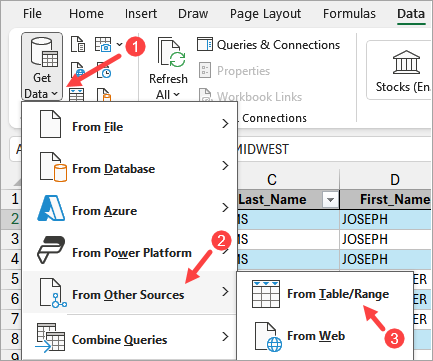
- Select any cell in the dataset.
- Click the Data tab, open the Get Data drop-down on the Get & Transform Data group, hover over the From Other Sources option, and select the From Table/Range option on the submenu.
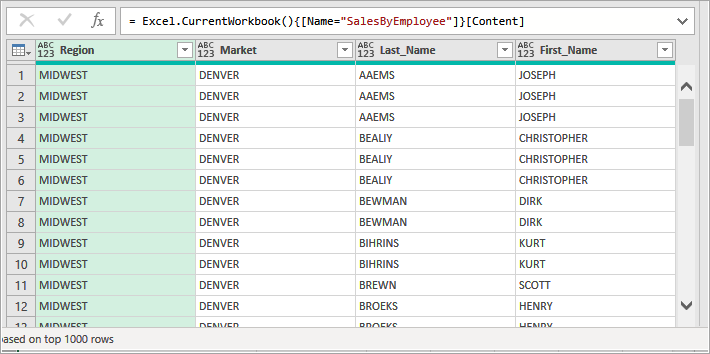
The above step loads the table data onto the Power Query Editor.
To create a new Employee column by combining Last_Name and First_Name, use either the Merge Columns or Column From Examples options in the Power Query Editor, or write a custom formula using the Power Query Formula Language (M ).
Method #1.1: Use the Merge Columns Option
Use the Merge Columns feature to merge the values of the Last_Name and First_Name columns into an Employee column, separating the values by a specified delimiter such as a comma, tab, or semicolon.
Here’s how to do it:
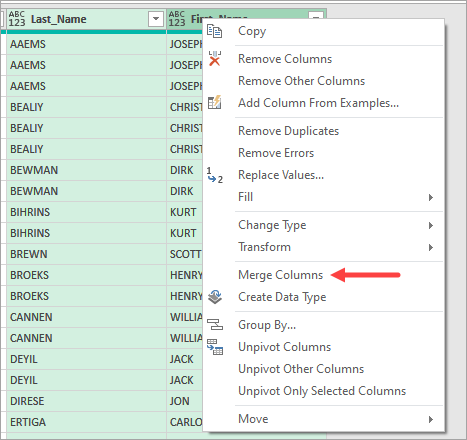
- Select the two columns by clicking the header of the Last_Name column, holding down the CTRL key, and clicking the header of the First_Name column.
- Right-click either header of the selected columns and select Merge Columns on the shortcut menu.
The above step activates the Merge Columns feature.
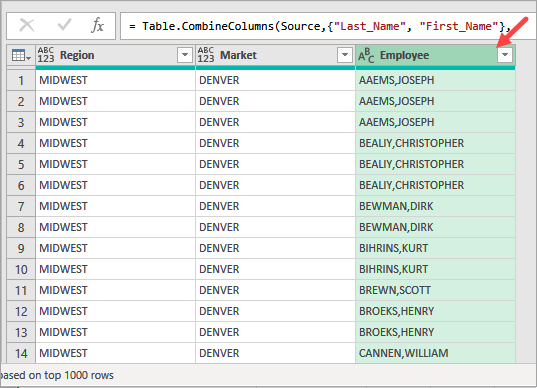
- On the Merge Columns feature, select an appropriate separator on the Separator drop-down, type ‘Employee’ on the ‘New column name’ box, and click OK.
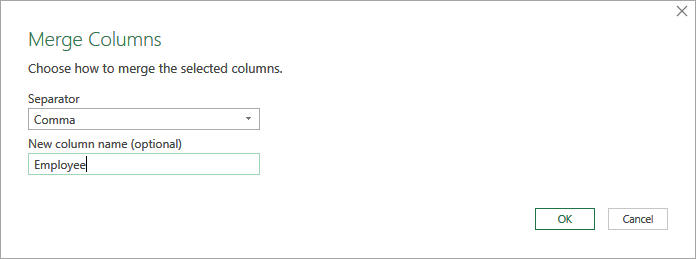
The above step removes the original two columns, replacing them with a new Employee column containing their combined values.
- Load the query results back into your Excel sheet.
Method #1.2: Use the Column From Examples Option
You can use the Column From Examples feature to create a custom column combining data from the Last_Name and First_Name columns based on a few examples you provide.
Like Excel’s Flash Fill, Power Query uses smart detection to understand the example pattern you give and automatically populates the new column according to the pattern.
Use the steps below to concatenate the Last_Name and the First_Name columns using the Column From Examples feature.
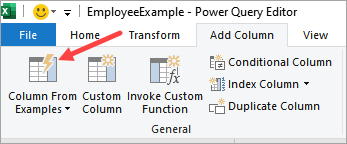
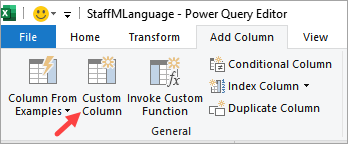
- Open the Add Column tab and click the Column From Examples command button on the General group.
The above step adds Column1 to the far right of the Preview pane and changes the pane to look like the screenshot below.
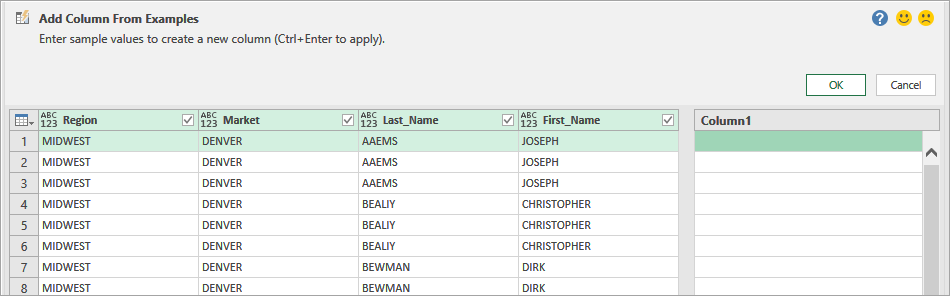
- Type the example ‘AAEMS, JOSEPH’ in the first row of Column1 and press CTRL + Enter.
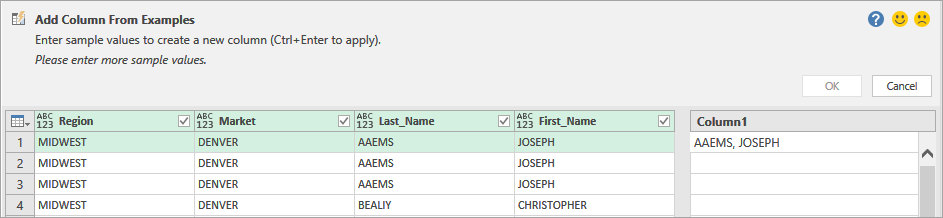
- Click OK.
Note: Depending on how varied the data is in the source columns, you might need to provide additional examples to help Power Query detect the pattern accurately.
Power Query populates the new column according to the example/s you provided.
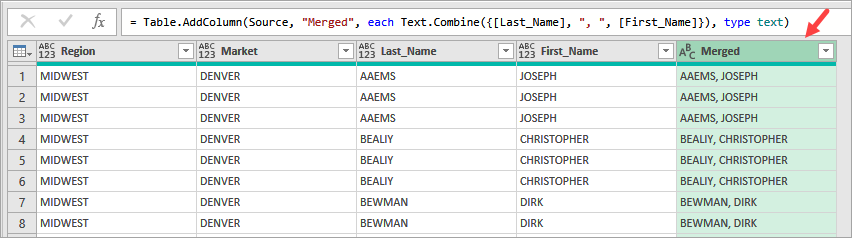
You can rename the new ‘Merged’ column to an appropriate name and load the data back into Excel.
- Load the query data back into your Excel worksheet.
Note: When you use the methods above, the merged column will always be of text data type, regardless of the original data types. This means that if you merge numeric columns, the merged column can’t be used for mathematical calculations unless you convert it back to a numeric data type.
Method #1.3: Use the Power Query Formula Language to Concatenate Text Columns
Use the below steps to concatenate the Last_Name and First_Name columns into a new Employee column using the Power Query Formula Language.
- Open the Add Column tab and click the Custom Column command button on the General group.
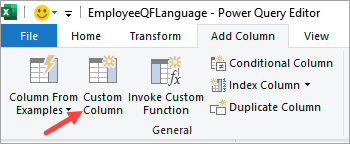
The above step opens the Custom Column dialog box.
- On the Custom Column dialog box, place the cursor in the formula area after the equal sign and do the following:
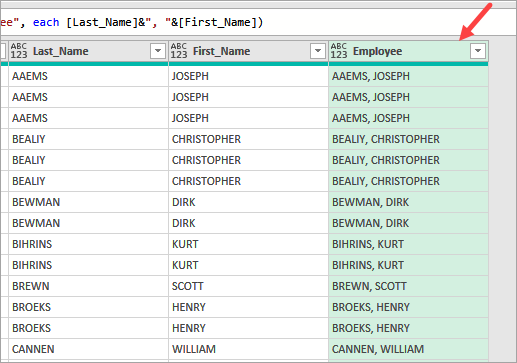
- Double-click the Last_Name column on the Available columns box on the right. You will see [Last_Name] pop in the formula area.
- After [Last_Name], type the text: &”, “&. This text will ensure the values in the two columns are separated by a comma.
- Double-click the First_Name column on the Available columns box on the right. You will see [First_Name] pop in the formula area.
- On the New column name input box, enter ‘Employee.’
Your Custom Column dialog box should look like the one below.
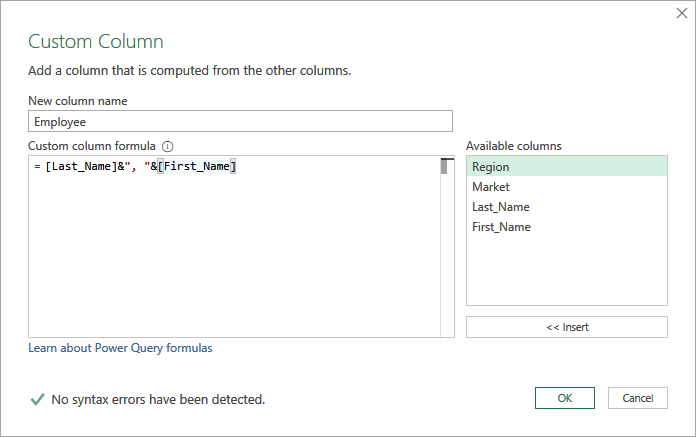
Notice the message ‘No syntax errors have been detected’ at the bottom of the dialog box. Whenever you create or modify a formula, check that the message confirms no errors have been detected.
- Click OK to add your new column with combined values.
- Load the transformed data back into your Excel worksheet.
Concatenate Text and Number Columns in Power Query
Suppose you have the dataset below in an Excel worksheet.
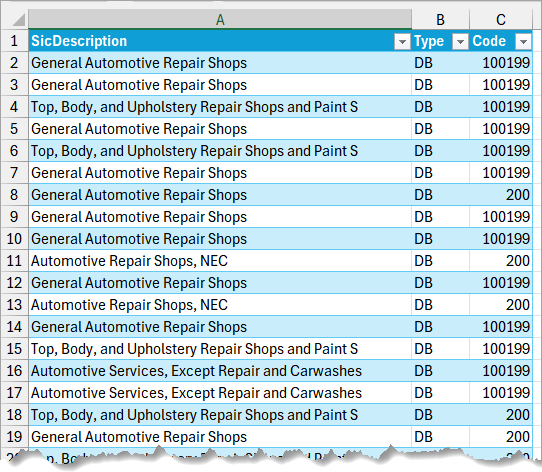
In Power Query, you want to combine the text column Type and the numeric column Code into a single column called ShopCode.
After loading the table data onto the Power Query Editor, use the Merge Columns or Column From Examples options in the Power Query Editor as explained in Method #1.1 and Method #1.2.
You will get an error if you try using the Power Query Formula Language (M ), as explained in Method #1.3. I will show you how to do it differently so that you do not get an error.
Method #2.1: Use the Power Query Formula Language to Concatenate Text and Numeric Columns
Use the below steps to concatenate the Type and Code columns into a new ShopCode column using the Power Query Formula Language.
- Open the Add Column tab and click the Custom Column command button on the General group.
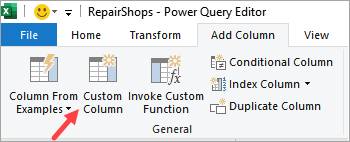
The above step opens the Custom Column dialog box.
- On the Custom Column dialog box, do the following:
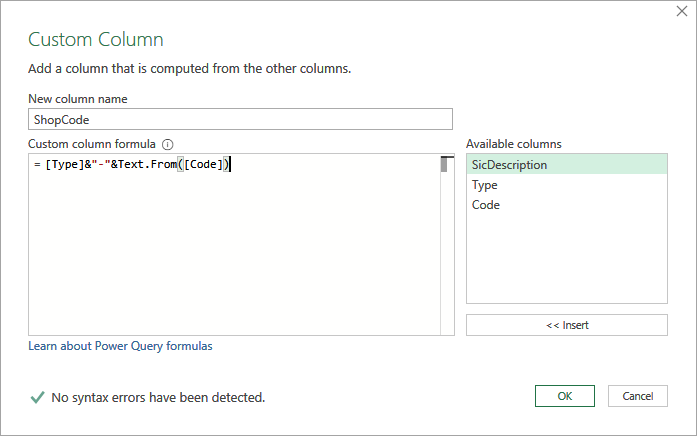
- On the New column name input box, enter ‘ShopCode.’
- Place the cursor in the formula area after the equal sign and type in the text [Type]&”-“&Text.From([Code]).
Your Custom Column dialog box should look like the one below.
- Click OK to add your new column with combined values.
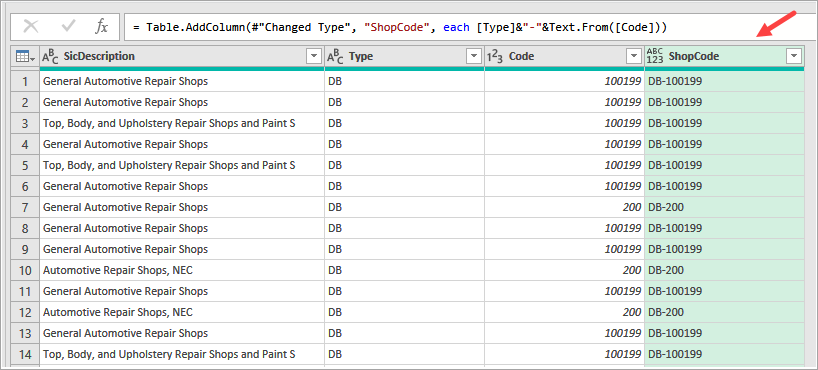
This formula =[Type]&”-“&Text.From([Code]) combines the text values from the Type column and numeric values from the Code column, separated by a hyphen. The formula uses the ‘Text.From’ function to first convert the numeric values in the Code column to text.
- Load the transformed data back into your Excel worksheet.
Concatenate Text and Date Columns in Power Query
Let’s say you have the dataset below in an Excel worksheet.

You want to combine the values from the Name and JoinDate columns into a new column called CombinedInfo. The combined values should form a sentence that indicates when each staff member joined, such as ‘Alice joined on January 15, 2024.’
You can achieve this using the Column From Examples option on the GUI of the Power Query Editor and a custom formula in Power Query Formula Language (M).
Method #3.1: Use the Column From Examples Option on the GUI of Power Query Editor
Use the steps below to concatenate the Name and JoinDate columns in the desired manner using the Columns From Examples feature.
- Open the Add Column tab and click the Column From Examples command button on the General group.

The above step adds Column1 to the far right of the Preview pane and changes the pane to look like the screenshot below.
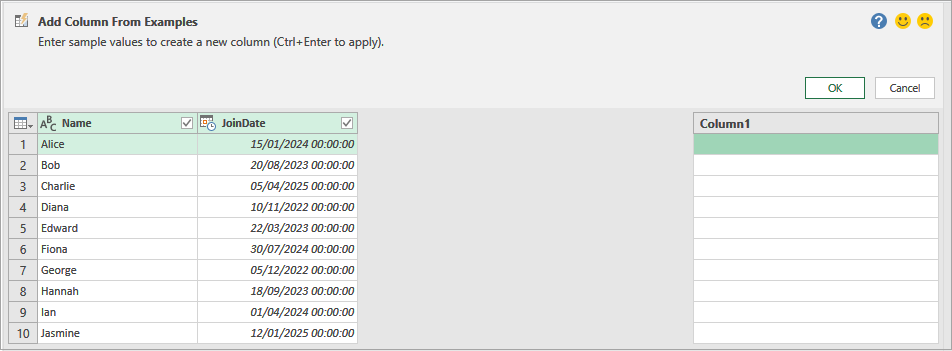
- Type the examples ‘Alice joined on January 15, 2024’ and ‘Bob joined on August 20, 2023’ in the first and second rows of the Custom column, and press CTRL + Enter.
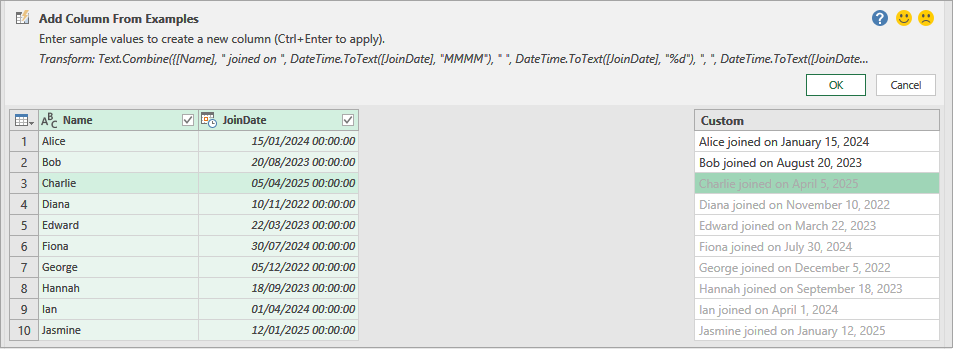
Notice that Power Query gives you suggestions of subsequent entries in grey.
- Click OK.
Power Query populates the custom column according to the examples you provided.
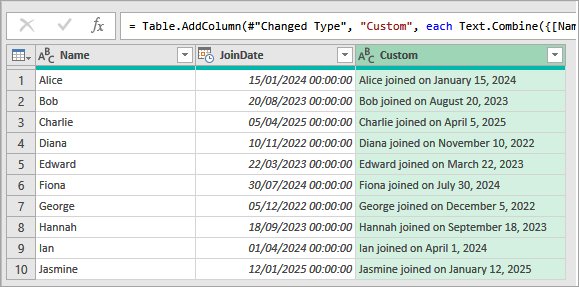
- Double-click the header of the custom column and rename it CombinedInfo.
- Load the transformed data back into your Excel worksheet.
Method #3.2: Use the Power Query Formula Language to Concatenate Text and Date Columns
Use the below steps to concatenate the Type and Code columns into a new ShopCode column using the Power Query Formula Language.
- Open the Add Column tab and click the Custom Column command button on the General group.
The above step opens the Custom Column dialog box.
- On the Custom Column dialog box, do the following:
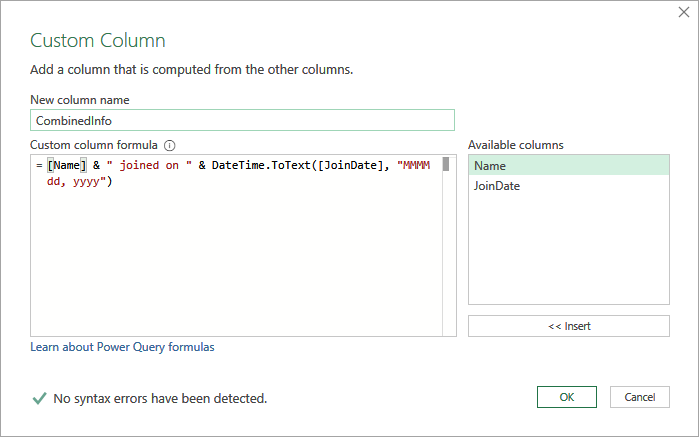
- On the New column name input box, enter ‘CombinedInfo.’
- Place the cursor in the formula area after the equal sign and type in the text [Name] & ” joined on ” & DateTime.ToText([JoinDate], “MMMM dd, yyyy”).
Your Custom Column dialog box should look like the one below.
- Click OK to add your new column with combined values.

The formula combines the Name column and the JoinDate column into a single text string, with the JoinDate formatted as ‘MMMM dd, yyyy’ (e.g., ‘January 15, 2024’)
- Load the transformed data back into your Excel sheet.
I have shown you how to join multiple columns in Power Query using options on the GUI of the Power Query Editor and the Power Query Formula Language (M). I hope you found the tutorial helpful.
Other Power Query articles you may also like:
- Getting Started with Power Query
- Remove Null Values in Power Query
- Remove Duplicates in Power Query
- VLOOKUP in Power Query
- IF Then Else in Power Query
- Calculate Date Difference in Power Query (Days, Months, Years)
- Get Today’s Date in Power Query
- Find Maximum Value in a Column in Power Query
- Power Query Functions