Table.RenameColumns function in Power Query is used to rename one or more columns in a table.
Syntax
Below is the syntax of the Table.RenameColumns function in Power Query.
Table.RenameColumns(
    table as table,
    renames as list,
    optional missingField as nullable number
) as table
where:
- table as table – The source table containing the columns you want to rename. This is typically the output from a previous step in your query or a table you’ve loaded into Power Query.
- renames as list – A list that specifies which columns to rename and what their new names should be. Each rename instruction is written as a pair: {“CurrentColumnName”, “NewColumnName”}. You can rename multiple columns by including multiple pairs: {{“OldName1”, “NewName1”}, {“OldName2”, “NewName2”}}.
- missingField – optional – This optional argument controls what happens when you try to rename a column that doesn’t exist in your table. Think of it as an “error handling” setting:
- MissingField.Error (default) – Power Query will stop and show an error message if you try to rename a column that doesn’t exist. This is the safest option because it alerts you to potential mistakes in your column names.
- MissingField.Ignore – Power Query will simply skip over any column names that don’t exist and continue processing the ones that do. This is useful when you’re applying the same rename operation to multiple tables that might have slightly different column structures.
Now, let’s look at a practical example where you can use this function.
Table.RenameColumns Example
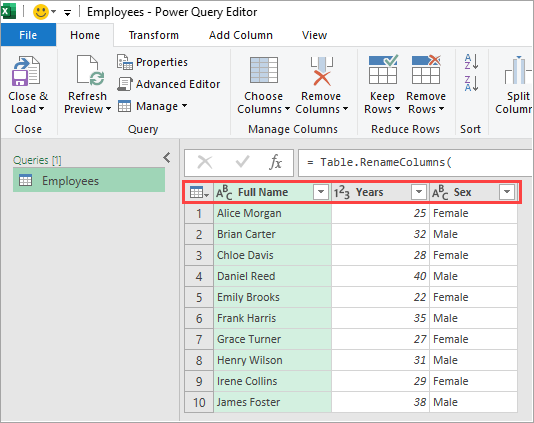
Suppose you have the ‘Employees’ table below in a worksheet.
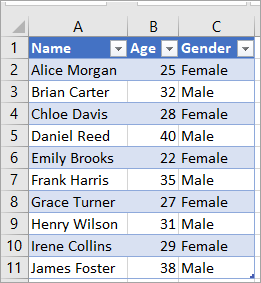
You want to rename the columns in Power Query to Full Name, Years, and Sex.
Here’s how you can do it:
- Select a cell in the table.
- Open the Data tab and click the From Table/Range option on the Get & Transform Data group.
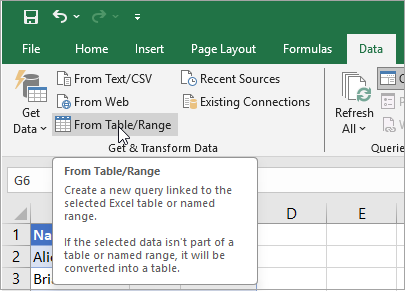
The above step loads the table data in Power Query Editor.

- Open the Home tab in Power Query Editor and click the Advanced Editor option on the Query group.
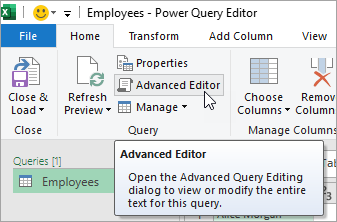
The Editor will look like the example below.

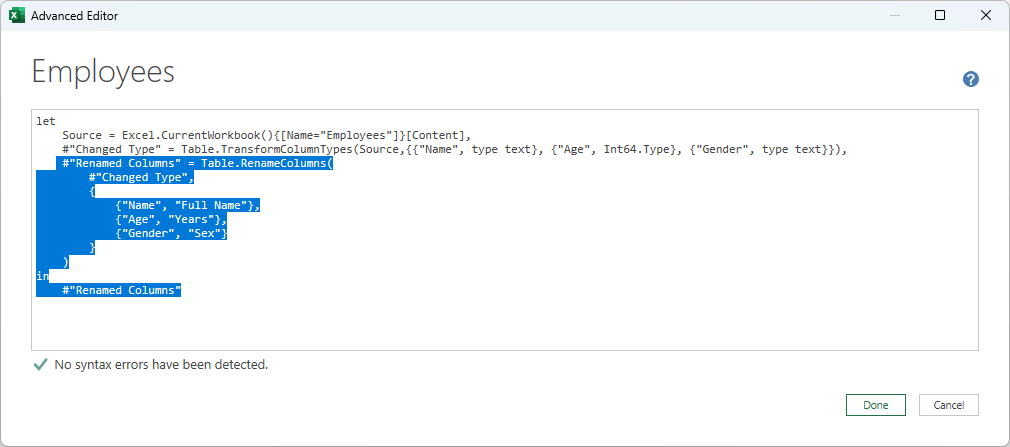
- Copy the ‘Rename Columns’ step below and add it below the existing ‘Changed Type’ step.
#"Renamed Columns" = Table.RenameColumns(
        #"Changed Type",
        {
            {"Name", "Full Name"},
            {"Age", "Years"},
            {"Gender", "Sex"}
        }
    )
in
    #"Renamed Columns"
The Advanced Editor should now look like the example below.
- Click the Done button on the Advanced Editor.
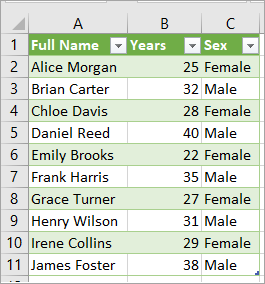
Power Query executes the ‘Rename Columns’ step, renaming the table column names.
- Click the Close & Load button on the Close group.
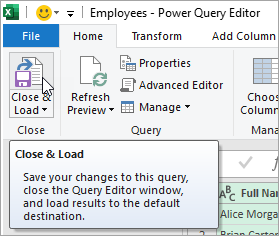
The above step saves the changes to the query, closes the Power Query Editor window, and loads the results to a new worksheet.
Real-life Scenario Application
You can use the Table.RenameColumns Function in Power Query to standardize column names from multiple monthly reports.
Imagine you are an HR manager in California’s main office and receive monthly employee datasets from different regional offices.
- California report columns that all other reports must match: Name, DOB, Dept
- Texas report columns: Full_Name, BirthDate, Department
- Florida report columns: EmployeeName, Date_of_Birth, Division
You want to combine all these reports into a master table in Power Query.
Before appending them, the column names must match exactly; otherwise, Power Query will treat them as different columns.
To achieve this, use the Table.RenameColumns function, as explained in the example above, to standardize the column names of Texas and Florida reports. You can then append the reports to a master table.
I have shown you how to use the Table.RenameColumns function in Power Query. I hope you found the tutorial helpful.
Other Power Query articles you may also like: