
If you have a decision with a few moving parts, like splitting work across two locations for the lowest cost, Solver in Excel can find the best answer for you.
It changes the cells you pick until a target formula hits its highest, lowest, or exact value.
The catch is that Solver only works within the limits you set, and it ships switched off. So there’s a bit of setup first.
In this tutorial I’ll enable Solver, build a small cost model, add the rules it has to respect, and read the result.
Step 1: Set Up the Data and Objective Cell
Solver needs three things on the sheet before you open it:
- An objective cell: the formula you want to minimize or maximize.
- Variable cells: the cells Solver is allowed to change.
- The numbers behind the rules it must follow.
Here I have a returns problem.
My team has 500 returned units this week that passed inspection and can be restocked.
I can route them to two restock centers, each with its own handling cost per unit and a capacity limit.
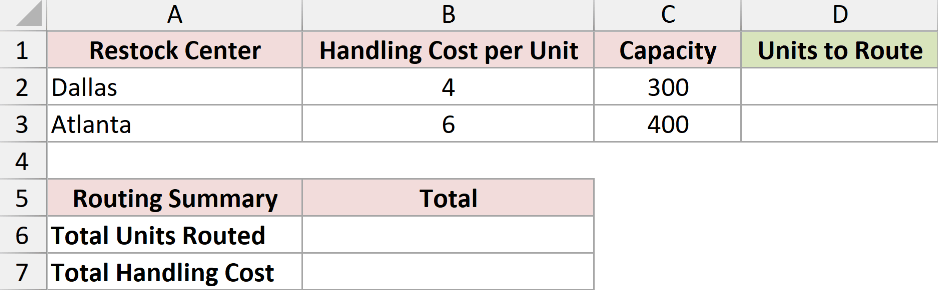
The Dallas center charges $4 per unit but only has room for 300 units.
The Atlanta center charges $6 per unit with room for 400 units.
Column D (Units to Route) is empty for now.
Those are the two cells Solver will fill in.
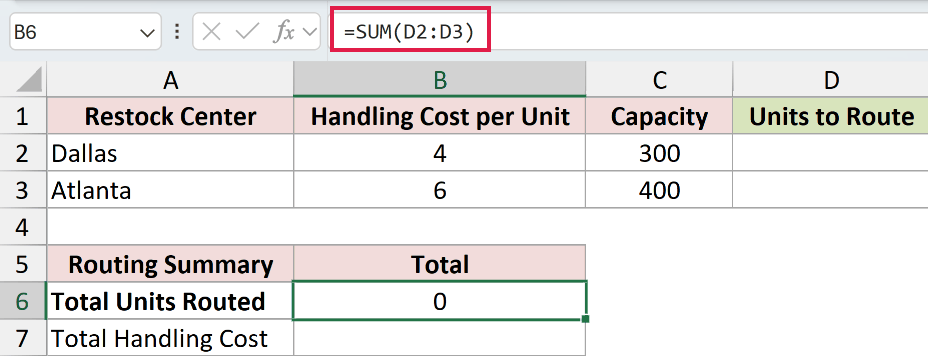
I need a cell that adds up how many units I’ve routed in total. In cell B6 I enter this:
=SUM(D2:D3)
Now the objective cell.
This is the total handling cost I want Solver to make as small as possible.
It multiplies each center’s cost per unit by the units routed there, then adds the two together.
In cell B7 I enter:
=SUMPRODUCT(B2:B3,D2:D3)
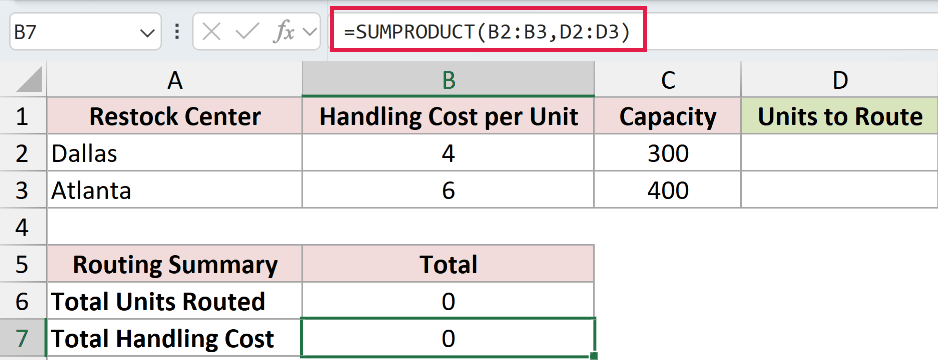
Both formulas read 0 right now because the Units to Route cells are still empty. That’s fine. Solver will change those cells, and both totals will update on their own.
Step 2: Load the Solver Add-in
Solver is available with supported desktop versions of Excel for Windows and Mac, but you need to load the add-in before using it.
You normally only have to do this once.
After that, Solver stays on the ribbon.
The steps below are for Windows. On a Mac, choose Tools > Excel Add-ins, check Solver Add-in, and click OK.
Here are the steps to load the Solver add-in:
- Click the File tab, then click Options at the bottom of the menu.

- In the Excel Options window, click Add-ins on the left. At the bottom, make sure the Manage box says Excel Add-ins, then click Go.
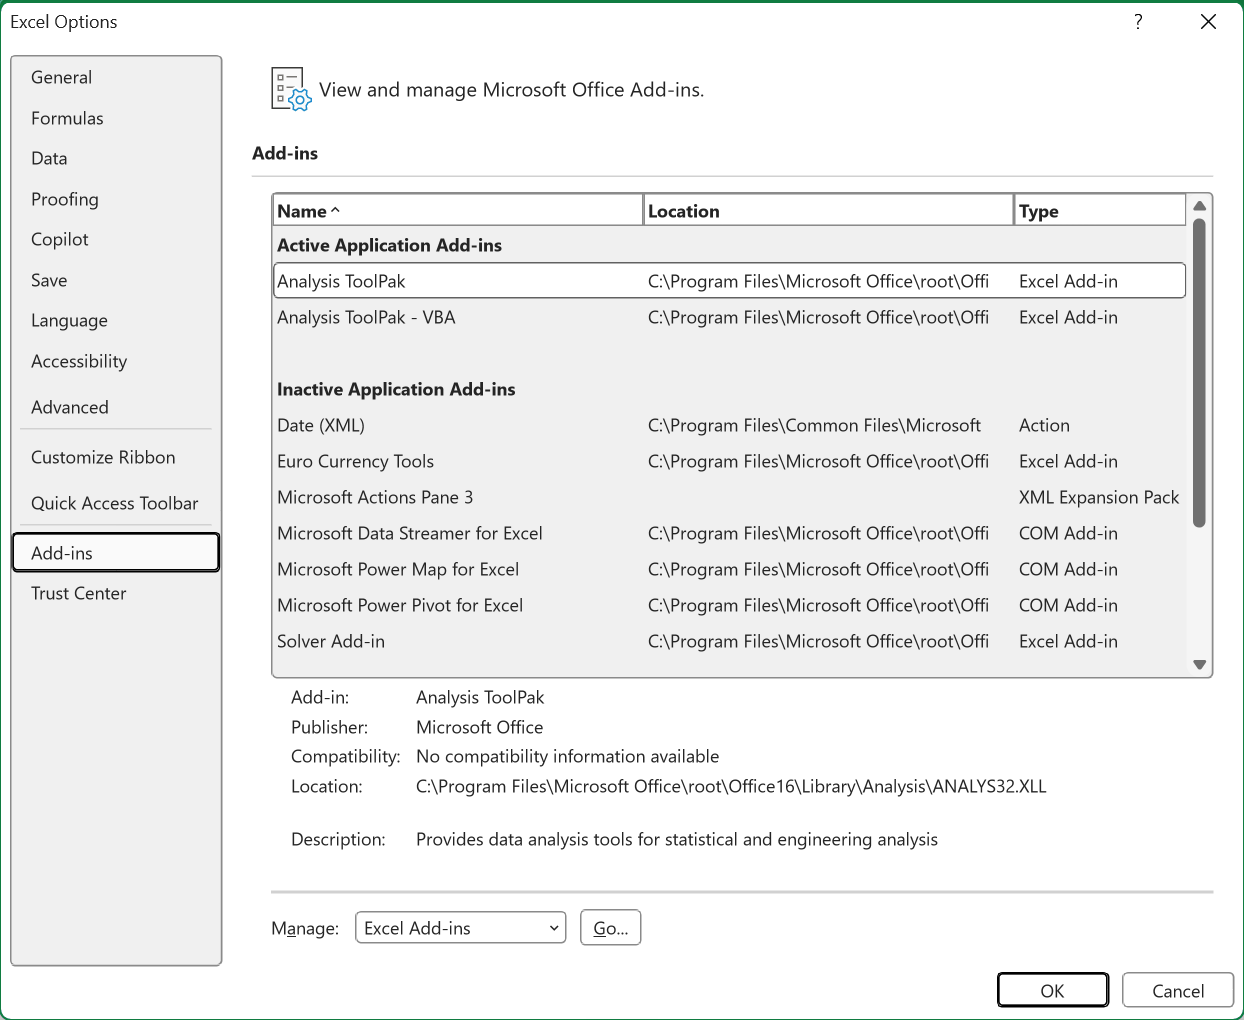
- In the Add-ins dialog box, check the Solver Add-in box and click OK.
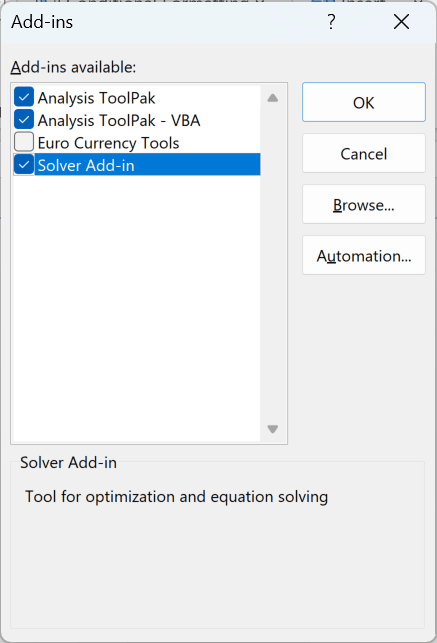
Note: Once enabled, Solver appears in the Analysis group on the Data tab. If you don’t see it there, close and reopen Excel.
Step 3: Define Constraints and Run Solver
With the model built and the add-in on, I can tell Solver what to optimize and what rules to respect. The rules are called constraints.
For this problem I have three: Dallas can’t take more than 300 units, Atlanta can’t take more than 400, and all 500 units have to be routed.
Here are the steps to set up and run Solver:
- On the Data tab, in the Analysis group, click Solver.
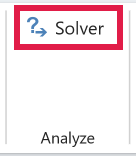
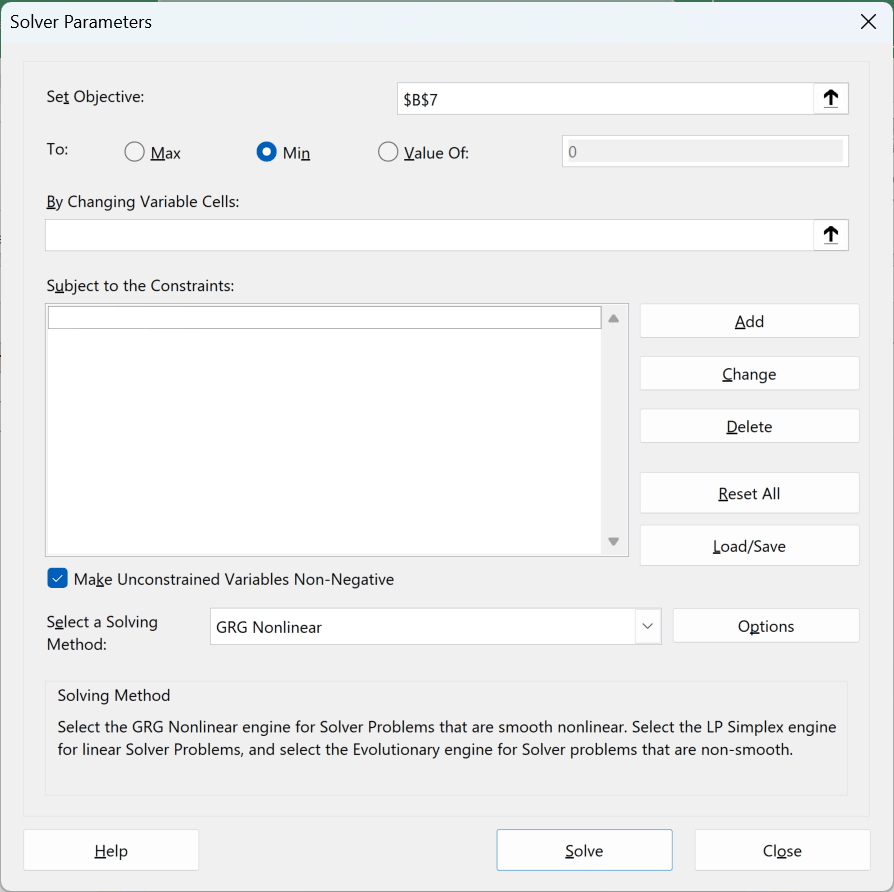
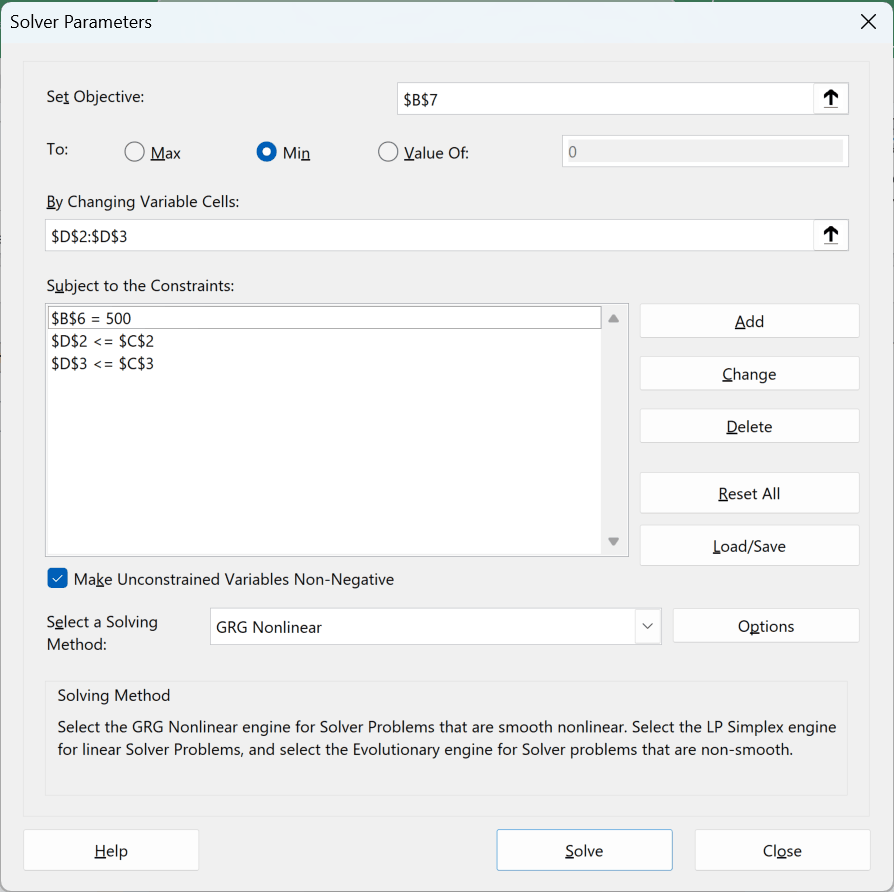
- In the Set Objective box, select cell B7 (the total handling cost). Below it, choose Min.
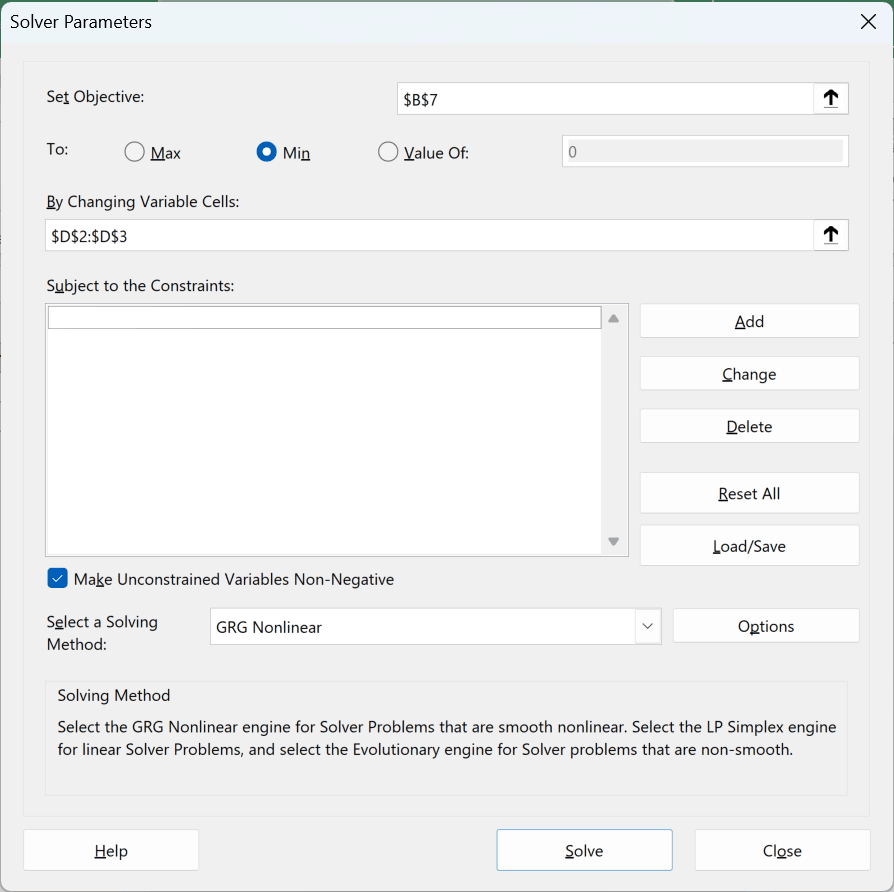
- Click inside the By Changing Variable Cells box and select the range D2:D3.
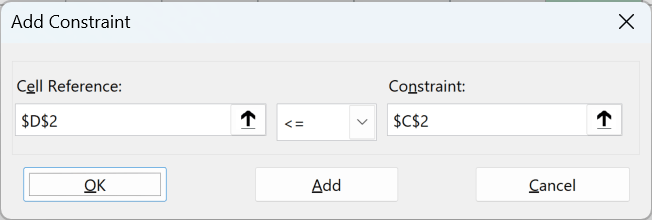
- Under Subject to the Constraints, click Add. In the Cell Reference box select D2, choose the <= operator, and in the Constraint box select C2. Click Add to enter the next one.
- Add the second constraint D3 <= C3 the same way. Then add a third for the total: set the reference to B6 (units allocated), choose the = operator, and type 500 in the Constraint box. Click OK to close the Add Constraint box.
- Make sure Make Unconstrained Variables Non-Negative is checked, so Solver can’t route a negative number of units. In the Select a Solving Method box, choose Simplex LP.
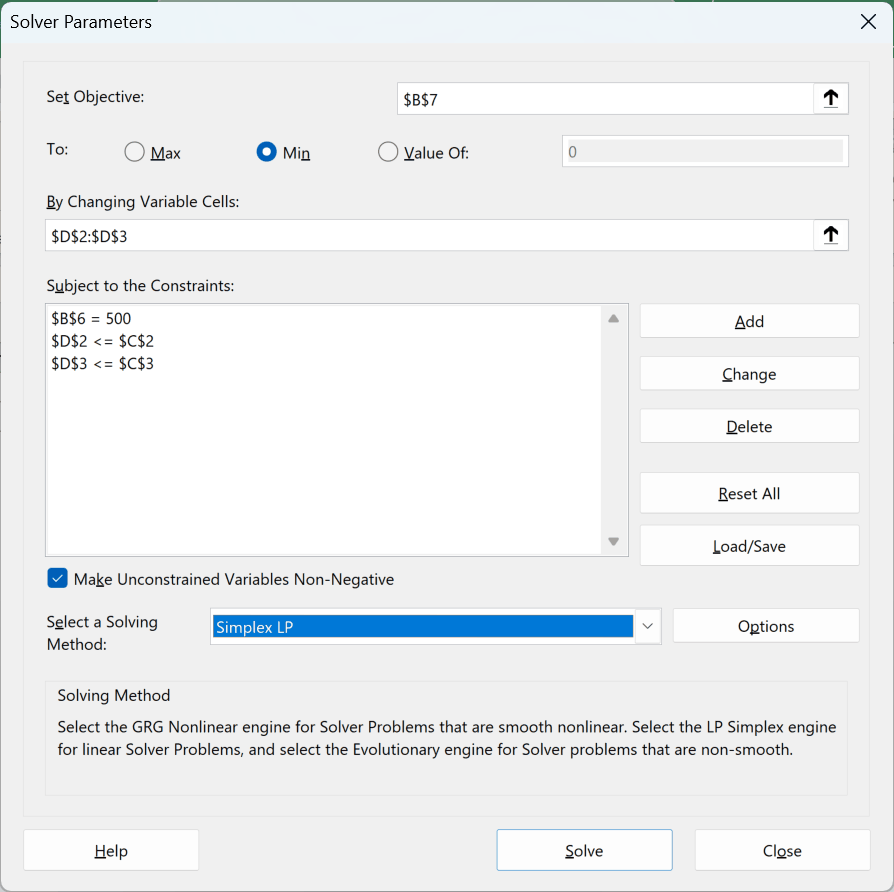
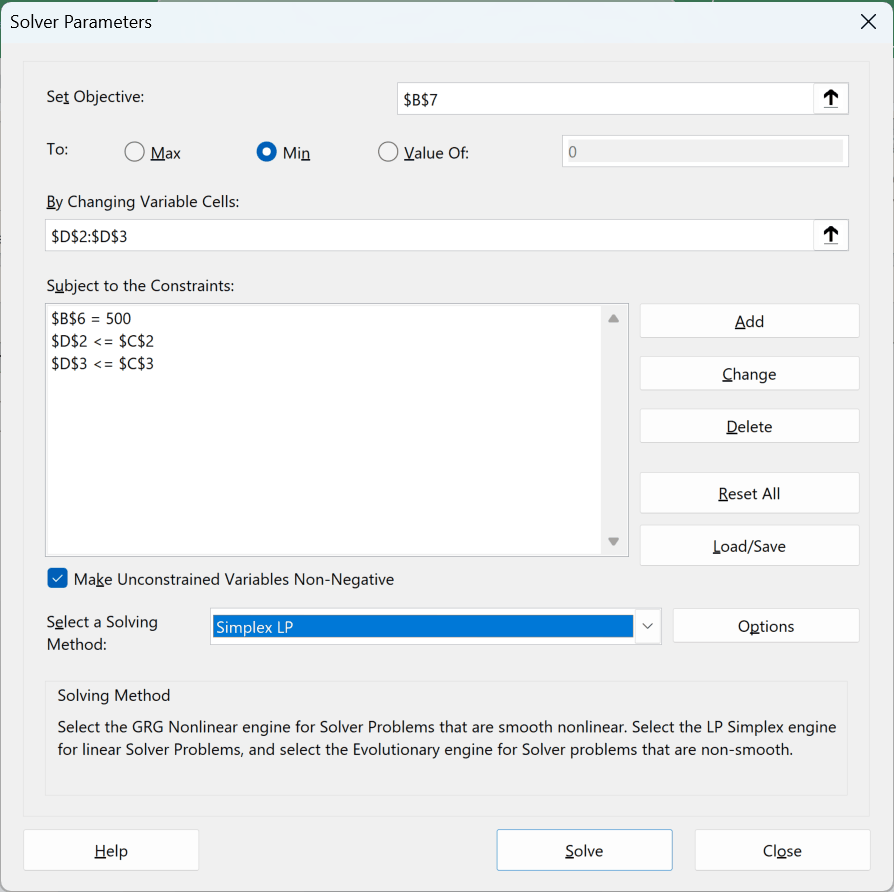
Note: Simplex LP is the right engine because this model is linear (costs are a straight per-unit rate). If your units must be whole numbers, add one more constraint with the “int” operator on D2:D3.
- Click Solve.
Step 4: Interpret the Solver Results
After you click Solve, the Solver Results dialog box appears. It tells you whether Solver found an answer that satisfies every constraint.
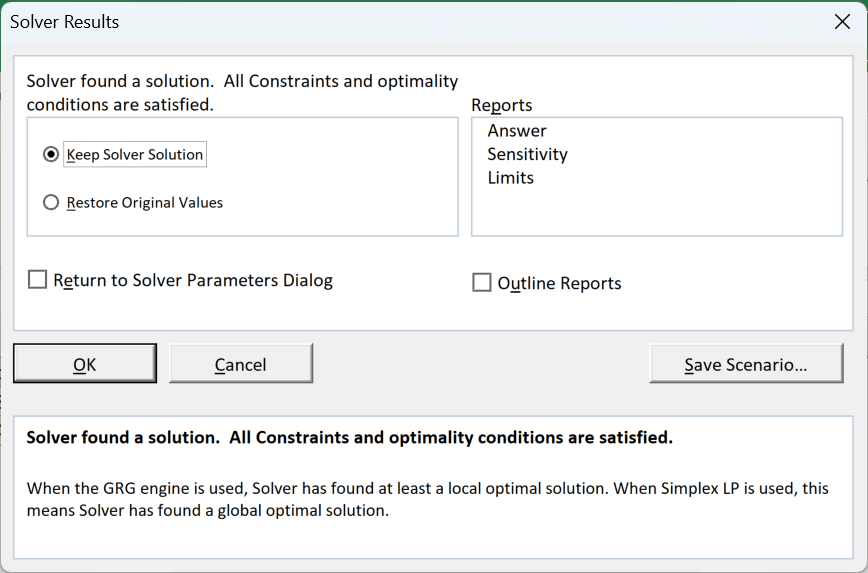
The message reads “Solver found a solution. All Constraints and optimality conditions are satisfied.” Leave Keep Solver Solution selected and click OK. That writes the answer back onto your sheet.
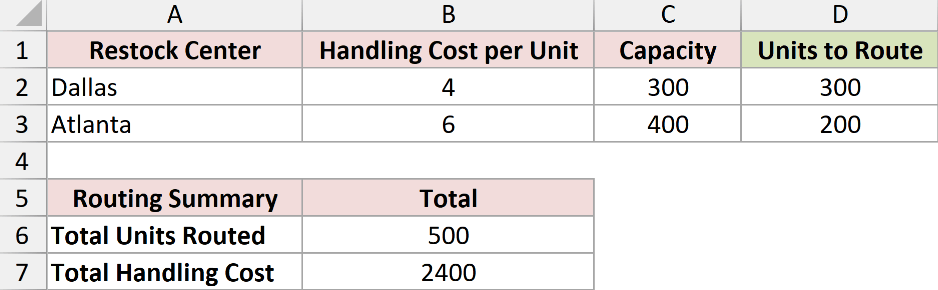
Solver routed 300 units to Dallas and 200 units to Atlanta. The minimum total handling cost in B7 is $2,400.
That’s the cheapest way to place all 500 units: fill the low-cost Dallas center to its 300-unit limit first, then send the remaining 200 to Atlanta.
If you’d rather go back to your starting numbers, choose Restore Original Values in the Solver Results dialog instead of keeping the solution.
You can also select available reports to create each one on a new worksheet.
The reports offered depend on the solving method and result.
Sensitivity and Limits reports are not available when the model has integer constraints, and reports may be limited or unavailable if Solver stops early or does not find a solution.
Additional Notes About Using Solver in Excel
- Solver runs in supported desktop versions of Excel for Windows and Mac. It isn’t available in Excel for the web or the mobile apps, so open the file in the desktop app first.
- Pick the solving method to match your model. Simplex LP is for linear problems, GRG Nonlinear for smooth nonlinear ones, and Evolutionary for non-smooth models. A mismatched method may fail, converge poorly, or return a local or otherwise suboptimal solution, depending on the model.
- Solver changes your worksheet in place when you keep the solution. Save a copy of the file first if you want the original numbers back later.
- For nonlinear problems, the starting values in your variable cells matter. A poor start can leave Solver stuck at a worse answer, so seed them with a reasonable guess.
Frequently Asked Questions
Do I need a paid version of Excel to use Solver?
You do not need to buy Solver separately, but you do need a supported license for desktop Excel.
Microsoft lists supported desktop versions for Windows and Mac.
Solver isn’t available in Excel for the web or the mobile apps.
What’s the difference between Solver and Goal Seek?
Goal Seek changes one cell to make a formula hit a single target value.
Solver changes several cells at once, can minimize or maximize, and respects the constraints you set.
Reach for Solver when the problem has more than one variable or any limits.
Why does Solver say it can’t find a feasible solution?
It means Solver did not find variable values that satisfy all the constraints.
Conflicting constraints can cause this, but so can model errors, an unsuitable solving method, poor starting values, or numerical issues.
Check the formulas, constraint directions, bounds, solving method, and starting values before deciding the model is truly infeasible.
Conclusion
I covered the four-part Solver workflow: build the model, load the add-in, set the objective and constraints, and interpret the result.
I hope you found this article helpful!
Other Excel articles you may also like:
