
If you want to catch typos before a spreadsheet goes out to your team or a client, Excel has a spell checker built right in. It just sits quieter than the one in Word, so a lot of people never realize it’s there.
The catch is that Excel won’t underline mistakes as you type, so a misspelled word can hide in a cell for weeks. The good news is that running a check takes a couple of seconds once you know where to look.
In this tutorial I’ll show you five easy ways to spell check in Excel, from the ribbon button and a one-key shortcut to checking several sheets at once and automating it with VBA.
Method #1: Using the Review Tab
The most direct way to spell check in Excel is the Spelling button on the Review tab. It scans the cells you’ve selected, stops on each word it doesn’t recognize, and offers suggestions you can accept or skip.
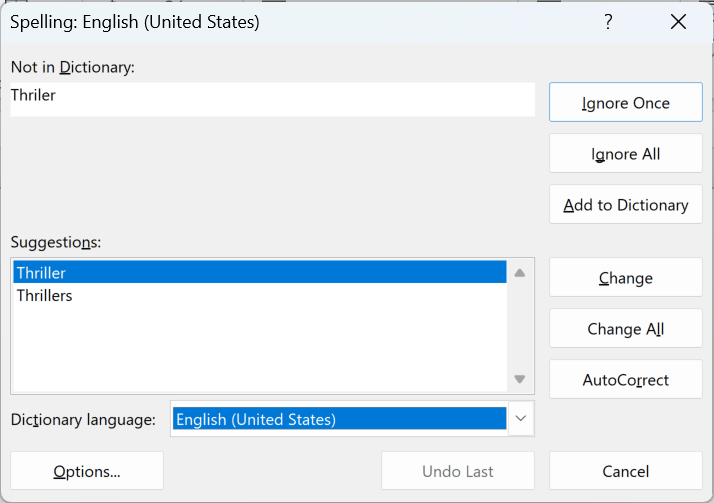
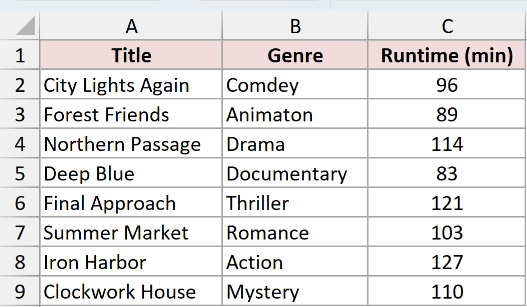
Below I have a movie watchlist on a sheet called To Watch. It lists each Title, its Genre, and the Runtime in minutes. A few of the genres have typos in them (like “Thriler” and “Actoin”) that I want to clean up.

Here are the steps to run spell check from the Review tab:
- Select the range you want to check. To check the whole sheet, click any single cell instead of selecting a range.

- On the Review tab, in the Proofing group, click Spelling.
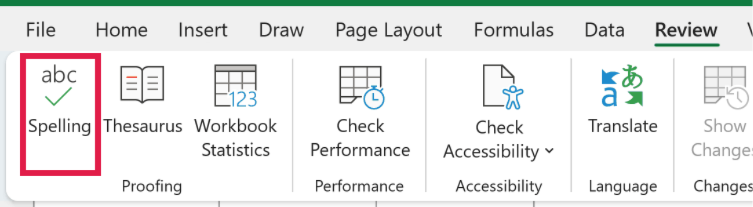
- The Spelling dialog box opens on the first word it doesn’t recognize. Pick a suggestion and click Change, or click Ignore Once to skip it.
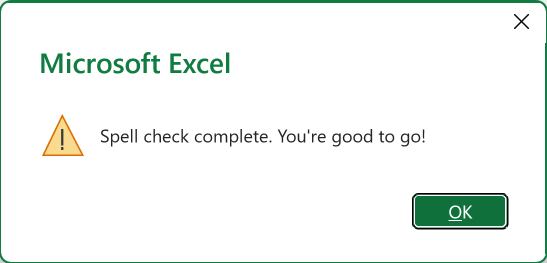
- Excel moves through each flagged word until it’s done, then shows a message that the spell check is complete. Click OK.
Once you click Change, Excel drops the corrected word straight into the cell. So “Thriler” becomes “Thriller” and “Actoin” becomes “Action” without you retyping anything.
Note: When you start the check from a single cell, Excel scans from that cell to the end of the sheet, then asks if you want to continue from the top. Click Yes so nothing gets missed.
Method #2: Using the F7 Shortcut
If you’d rather not hunt for the ribbon button every time, there’s a keyboard shortcut that opens the exact same tool. Pressing F7 launches the Spelling dialog straight away, which is the fastest way to start a check.
I’m using the same To Watch watchlist here, with the typos still sitting in the Genre column.

Here are the steps to run spell check with the shortcut:
- Click a cell in the sheet (or select the range you want to check).
- Press F7 on your keyboard.
The Spelling dialog opens right away, and from here it works exactly like Method #1. Choose a suggestion and click Change, or skip the word with Ignore Once.
This is the method I reach for most, since one key does the whole job. On some laptops F7 is tied to a media control, so you may need to hold the Fn key along with it.
Note: F7 also runs spell check in Excel for Mac. On some Mac keyboards, you may need to press Fn + F7 so the key works as a function key.
Method #3: Running Spell Check Across Multiple Sheets
By default, spell check only looks at the active sheet. If your workbook has several sheets, checking them one at a time gets tedious fast. You can group the sheets first and then check them all in a single pass.
In this workbook I have two sheets, To Watch and Watched. Both hold the same kind of movie list, and both have typos I want to catch (the Watched sheet has “Comdey” and “Animaton” in its Genre column).
Here are the steps to spell check multiple sheets together:
- Click the first sheet tab you want to include.
- Hold Ctrl and click each of the other sheet tabs. To grab every sheet in the workbook instead, right-click any tab and choose Select All Sheets. You’ll know the grouping worked when Group shows up next to the file name in the title bar.
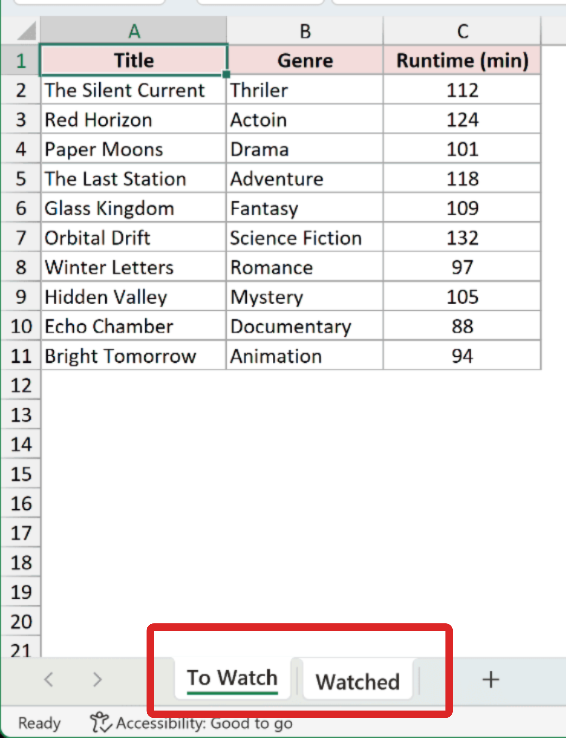
- Press F7 (or click Review > Spelling). Excel now runs through every grouped sheet in one continuous check.
When the check finishes, right-click any tab and choose Ungroup Sheets. That’s important, because anything you type while the sheets are grouped gets entered on all of them at once.
Method #4: Adding Spell Check to the Quick Access Toolbar
If you run spell checks often, you can pin the command to the Quick Access Toolbar (the small strip of icons at the very top of the window). After that, spell check is always one click away, no matter which ribbon tab you’re on.
Here’s the To Watch watchlist again, the same data I’ve been cleaning up.

Here are the steps to add spell check to the Quick Access Toolbar:
- Click the small drop-down arrow at the end of the Quick Access Toolbar, then choose More Commands.
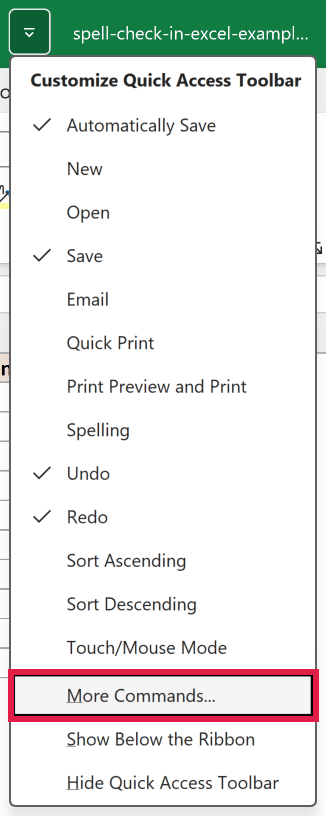
- In the Excel Options window that opens, find Spelling in the command list, select it, and click Add.
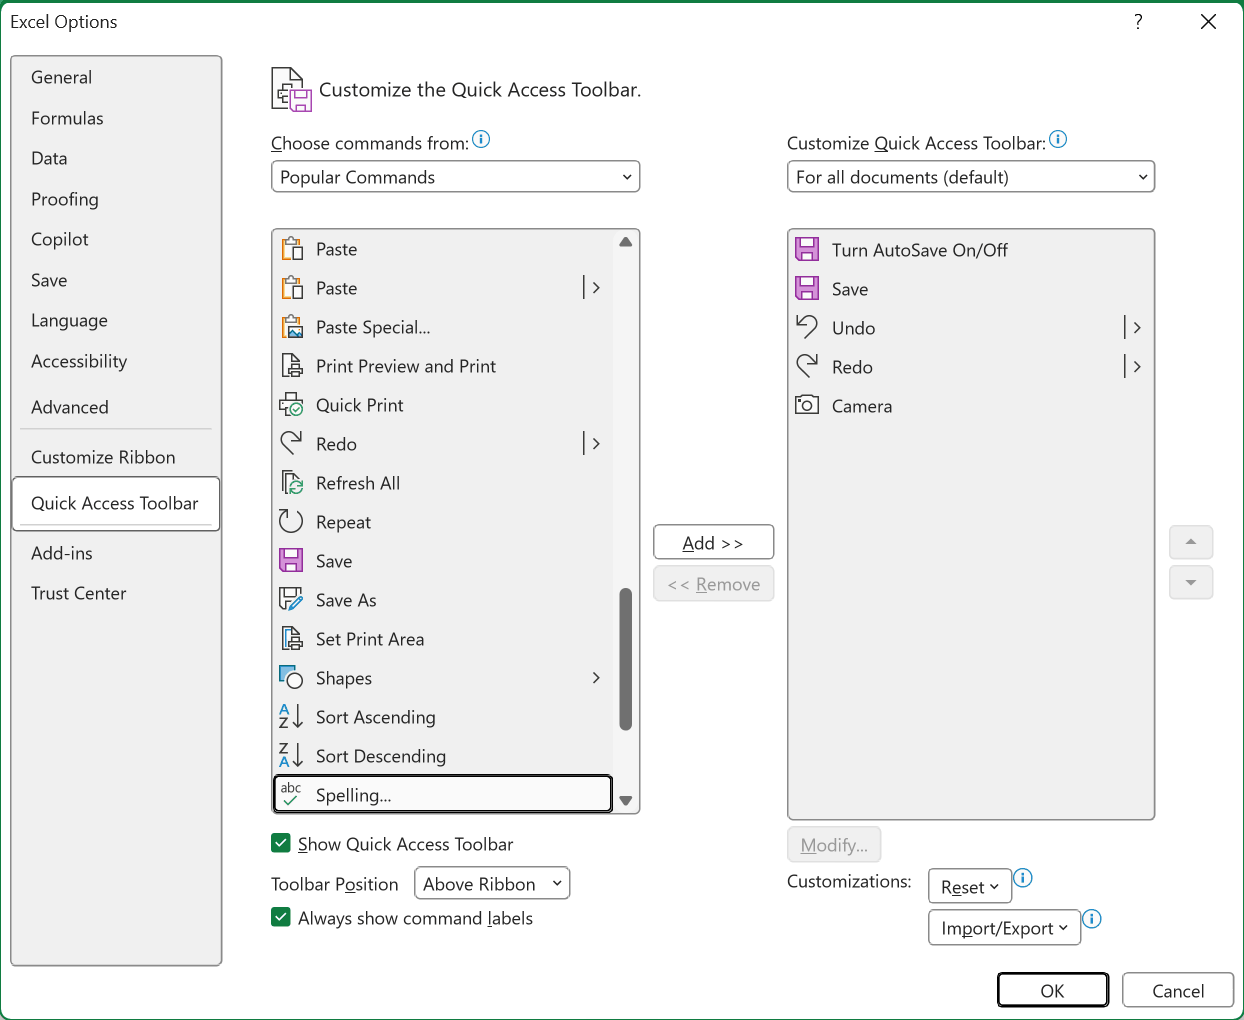
- Click OK. The Spelling icon now sits on the Quick Access Toolbar, ready whenever you need it.

Now a single click on that icon starts a check on the active sheet, the same as pressing F7. It’s a nice option if you prefer the mouse over shortcuts. There’s a quicker way to get it there, too: right-click the Spelling button on the Review tab and choose Add to Quick Access Toolbar, which skips the Excel Options window altogether.
Method #5: Using VBA
If spell checking is part of a larger routine you run on a workbook, you can trigger it with VBA.
The CheckSpelling method opens the same dialog through code, so you can fold it into a macro that also formats, saves, or cleans up your data.
I’m running this on the To Watch watchlist, with the typos still in the Genre column.

Here is the VBA code:
Sub RunSpellCheck()
    ActiveSheet.CheckSpelling
End SubHere are the steps to run this code:
- Press Alt + F11 to open the VBA editor.
- Go to Insert > Module, then paste the code into the module window.
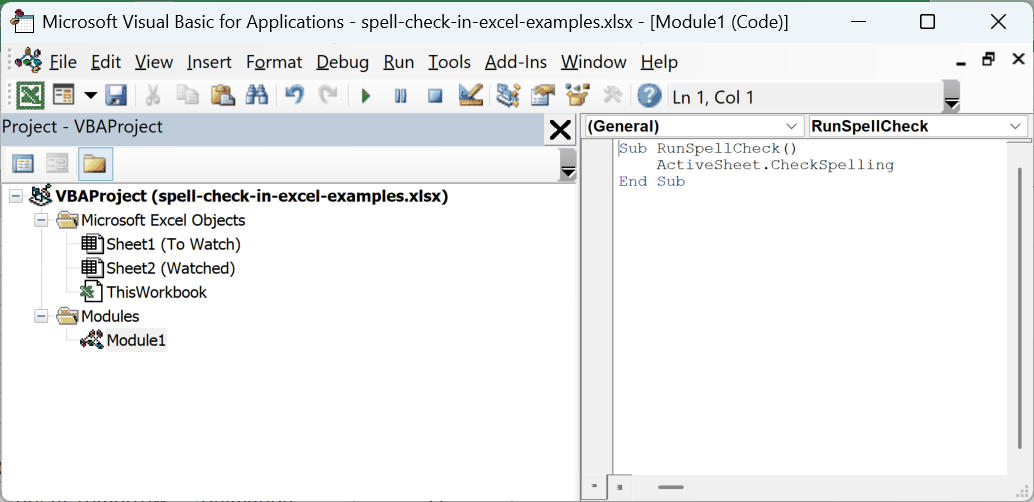
- Click back on your worksheet, then press Alt + F8, select RunSpellCheck, and click Run.
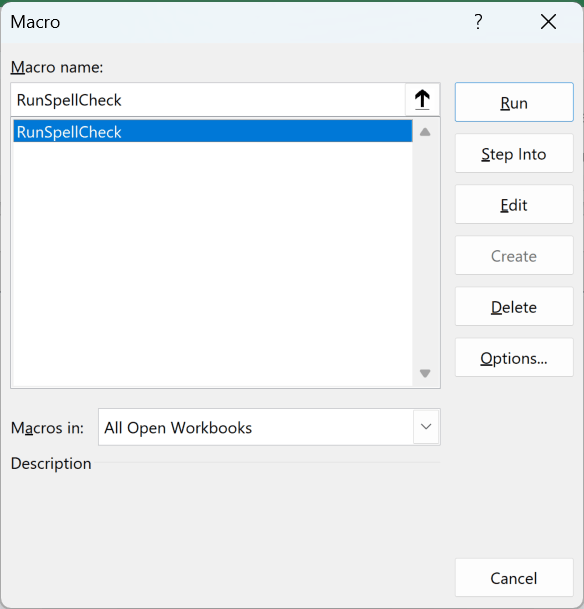
The macro calls CheckSpelling on the active sheet, so Excel opens its usual Spelling dialog and you correct words the same way you would by hand. To keep the macro, save the workbook as a macro-enabled file (.xlsm).
Note: You can point the check at a specific sheet instead of the active one by naming it, like Worksheets(“Watched”).CheckSpelling. That’s handy inside a loop that runs over several sheets.
Additional Notes About Spell Check in Excel
- The Change All button fixes every copy of the same typo in one go, which saves time when a misspelling repeats down a column.
- Proper nouns and brand names often get flagged even when they’re spelled right. Click Add to Dictionary so Excel stops stopping on them in future checks.
- Excel checks spelling, not grammar, so it won’t catch a wrong-but-real word like “form” in place of “from”. A read-through by eye still helps.
- Starting spell check from one selected cell checks the whole worksheet, including comments, page headers, footers, and graphics. Selecting multiple cells limits the check to that range.
Frequently Asked Questions
Why does spell check skip some cells in my worksheet?
Excel skips cells that contain formulas. It may also ignore words containing numbers and internet or file addresses when those options are selected under File > Options > Proofing.
How do I add a custom word so Excel stops flagging it?
When the Spelling dialog stops on the word, click Add to Dictionary. Excel saves it to your custom dictionary, and it won’t be flagged again in any workbook on that computer.
Does Excel spell check work on formulas or only on typed text?
It works on typed text only. Excel checks the actual characters in a cell, so a formula like =A2&” Recieved” is ignored, even though the result shows a misspelled word on screen. If you do need to check the words inside a formula, select them in the formula bar first and then run the check.
Why is the Spelling button greyed out?
The sheet is protected. Excel turns off spell check on a protected worksheet, so head to Review > Unprotect Sheet, run your check, then protect the sheet again when you’re done.
Conclusion
Spell check in Excel is quick once you know it’s there, and you have a few ways to reach it. For everyday use I’d just press F7, since one key opens the checker on any sheet.
When you’re cleaning up a whole workbook, group the sheets first so a single pass covers them all. And if it’s part of a repeatable routine, the short VBA macro drops it into your larger workflow.
Other Excel articles you may also like:
