When working with Excel, you may encounter situations where unwanted leading spaces appear in your data.
Leading spaces refer to spaces that are added at the beginning of text strings or numbers in cells.
These spaces can make it difficult to analyze and manipulate your data, as they may affect sorting, filtering, and calculations.
In this tutorial, we will cover five techniques to remove leading spaces in Excel.
Issues with Leading Spaces in Excel
Leading spaces in Excel can cause unwanted effects such as the following:
- Aesthetics: Leading spaces in cells can make a worksheet look untidy and unprofessional.
- Sorting: If you have leading spaces in cells, they can affect the results of sorting functions. Excel treats spaces as characters, so cells with leading spaces may not sort correctly.
- Formulas: If you have formulas referencing cells with leading spaces, they may not work as intended. For example, a formula that counts a range of cells may not include cells with leading spaces, resulting in an incorrect calculation.
Types of Spaces in Excel
There are two main types of spaces you may encounter in Excel:
- Regular spaces: These are the typical spaces you create using the spacebar on your keyboard. They are denoted by a single blank character.
- Non-breaking spaces: These spaces are special characters that prevent text from wrapping to the next line. They are created when you press the keyboard combination Ctrl+Shift+Space or when copying and pasting data from other sources, such as the web.
Non-Breaking Spaces vs. Regular Spaces
Understanding the difference between non-breaking spaces and regular spaces is essential for proper formatting in Excel.
As mentioned earlier, regular spaces are created with a single press of the spacebar, whereas non-breaking spaces require a specific keyboard combination or may be introduced when copying data from external sources.
Non-breaking spaces can cause issues with functions, formulas, and data analysis because they are treated as distinct characters, unlike regular spaces.
Therefore, it is crucial to identify and remove any leading non-breaking spaces to ensure accurate formatting and data manipulation within Excel.
Also read: How to Remove Leading Zeros in Excel?
Method #1: Using the TRIM Function
We can use the TRIM function to remove leading spaces in Excel. The TRIM function deletes all spaces from a text string leaving only the single spaces between words.
Let’s consider the following dataset with the names of ten lakes in the USA. Notice that all the names have leading spaces.
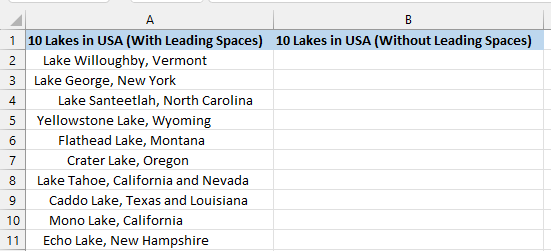
We want to use the TRIM function to remove the leading spaces from the dataset.
We use the following steps:
- Select cell B2 and enter the below formula:
=TRIM(A2)
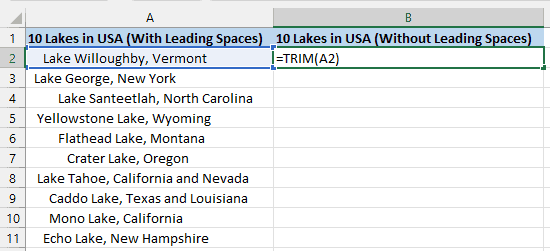
- Drag or double-click the fill handle feature to copy the formula down the column.
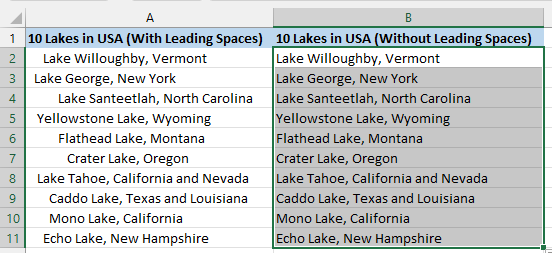
The leading spaces are removed from the dataset.
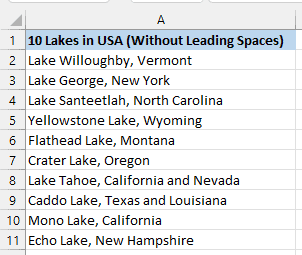
- Copy the data without spaces in cell range B2:B11, paste it back in as values, and then delete the original data in column A.
We remain with the dataset without the leading spaces.
Note: The TRIM function is designed to remove all leading and trailing common spaces from a text string but cannot remove non-breaking spaces. You must use the method in the following section to remove non-breaking spaces from a text string.
Also, note that since the TRIM function removes leading, trailing, and double spaces from a text string, you cannot use it if you want to remove leading spaces only.
Also read: How to Remove Space before Text in Excel
Method #2: Using TRIM, SUBSTITUTE, and CHAR Functions (Removing Non-breaking Leading Spaces)
If you pull data from a website into Excel, it may come in with non-breaking leading spaces.
Notice that the ASCII code for a non-breaking space is 160, and the ASCII code for a regular space is 32.
Unlike regular spaces, non-breaking spaces are treated as a single unit and are not broken when text is wrapped at the end of a line.
The non-breaking spaces are helpful when dealing with items such as numbers, dates, or names that should not be separated by line breaks but are troublesome in Excel operations such as sorting.
The TRIM function alone cannot remove leading non-breaking spaces.
Let’s consider the following dataset with non-breaking leading spaces.
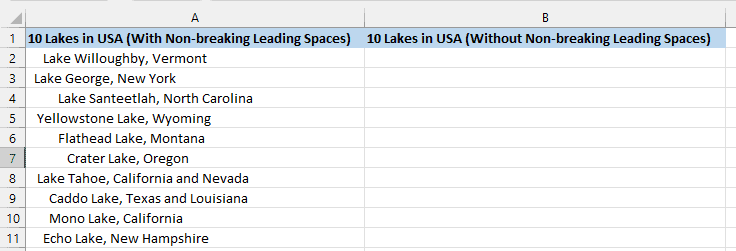
Let’s try to use the TRIM function to remove the leading spaces, as we did in Method #1:
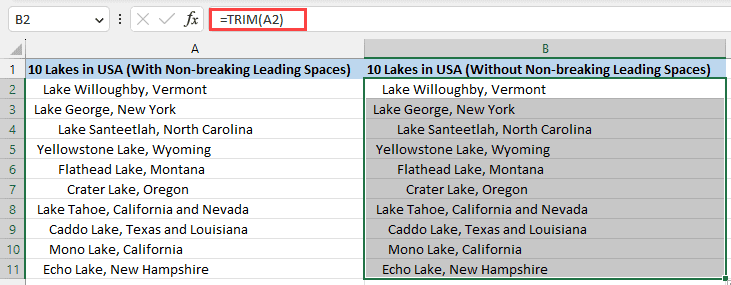
The TRIM function has not removed the non-breaking leading spaces from the dataset.
To remove the non-breaking leading spaces from the dataset, we can use the SUBSTITUTE function inside the TRIM function to replace the non-breaking spaces with regular spaces.
We use the steps below:
- Select cell B2 in the example dataset and enter the formula below:
=TRIM(SUBSTITUTE(A2,CHAR(160)," "))
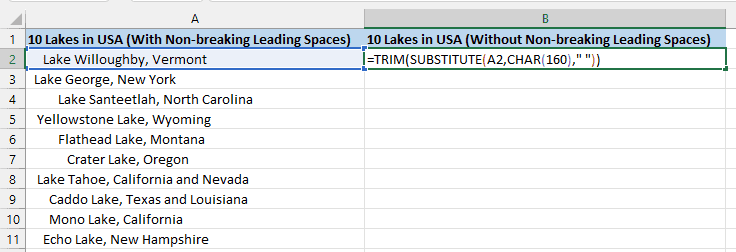
- Double-click or drag the fill handle in cell B2 to copy the formula down the column.
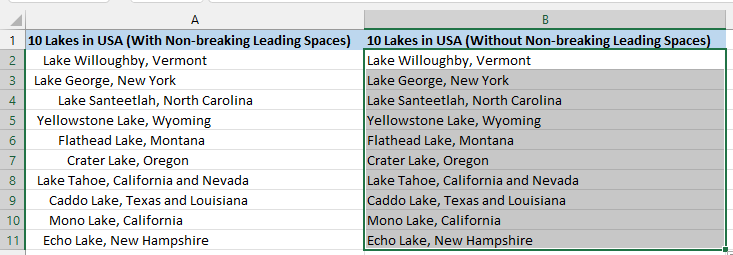
- Copy the data in column B and paste it back as values.
- Delete the original data by clicking the letter header of column A to select the column, right-click the selection, and choose Delete on the shortcut menu.
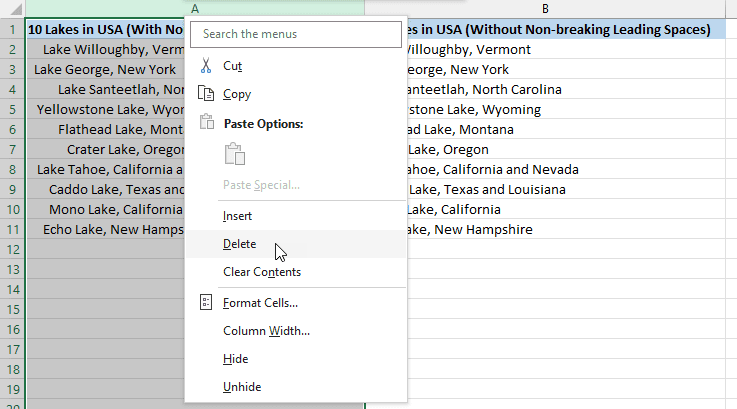
We remain with clean data without leading non-breaking spaces:

Also read: How to Remove a Specific Character from a String in Excel
Method #3: Use Flash Fill to Remove Leading Spaces in Excel
We can use Flash Fill to remove leading spaces in Excel. The Flash Fill feature allows us to fill in values in a column based on a pattern or example.
Suppose we have the following dataset showing the names of ten lakes in the USA. Notice that the names have leading spaces.

We want to use Flash Fill to remove the leading spaces from the dataset.
We proceed as follows:
- Select cell B2 and type in the name of the first lake on the list, “Lake Willoughby, Vermont,” without leading spaces.
- Select cell B3 and type in the name of the second lake on the list, “Lake George, New York,” without leading spaces.
- Select cell B4 and begin to type in the name of the third lake on the list. Notice that as you start to type, the Flash Fill feature gives suggestions for the following data entries in grey.
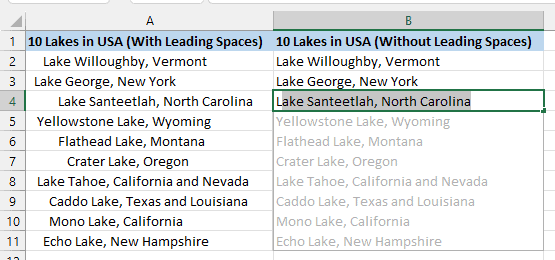
Press Enter to accept the suggestions if they are correct.
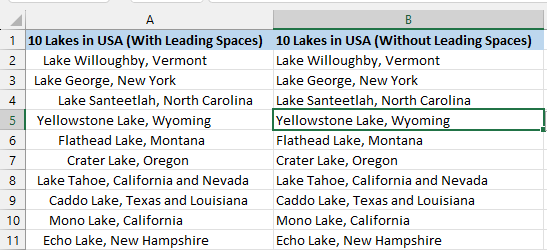
If Flash Fill does not suggest the following entries or the suggestions are incorrect, proceed with the steps below.
- Complete typing in the third name on the list and select the next cell C5.
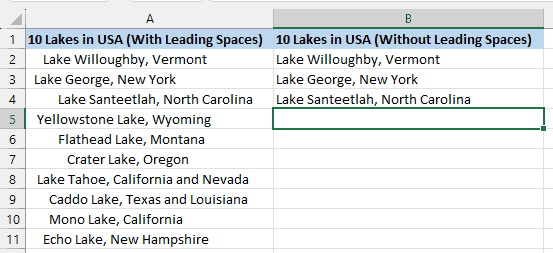
- On the Data tab, click the Flash Fill button on the Data Tools group. Alternatively, you can press the shortcut Ctrl + E.
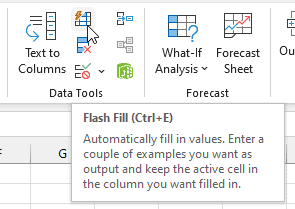
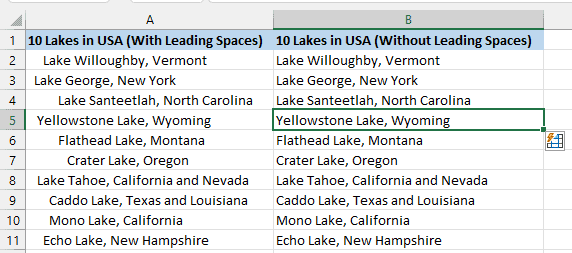
The rest of the data are automatically filled in.
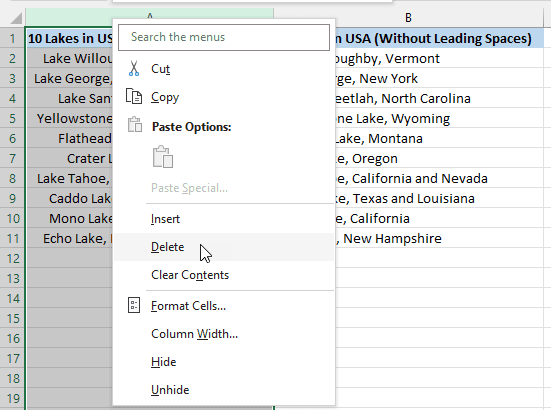
- Delete column A, which has the original data, by clicking its letter column header, right-clicking the selection, and choosing Delete on the shortcut menu.
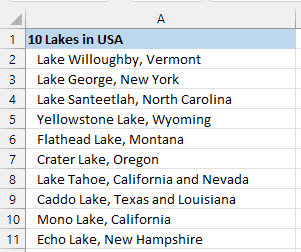
You remain with the clean data without leading spaces:

Note: Flash Fill may give incorrect results if your data is complex or there are multiple possible patterns. We recommend that you carefully review the results before accepting them.
Sometimes, you may need to edit the results to correct errors or inconsistencies manually.
Also read: Remove the Last 4 Characters in Excel
Method #4: Using Find and Replace Feature
If the number of leading spaces in each dataset cell is the same, we can use the Find and Replace feature to remove them.
Suppose we have the following list of ten names of lakes in the USA. Each name has three leading spaces.
We want to use the Find and Replace dialog box to remove the three leading spaces in each cell.
We use the following steps:
- Select the cell range A2:A11 containing the data from which we want to remove the leading spaces.
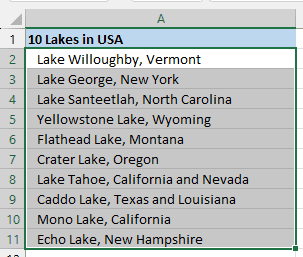
- Press the shortcut Ctrl + H to open the Find and Replace dialog box.
- Click in the Find what box and press the spacebar on the keyboard three times to enter three spaces. Leave the Replace with box blank and click the Replace All button at the bottom of the dialog box.

Excel replaces the leading spaces in the dataset with empty strings.
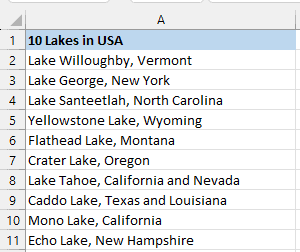
Excel displays a message box indicating the number of sets of the three leading spaces replaced with empty strings.
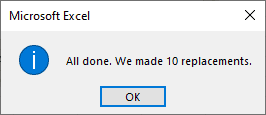
Note: This method will only work if there are a consistent number of leading spaces in text strings. Also, you cannot use this method to remove single leading spaces, as it can also remove other single spaces from the text strings.
Method #5: Using VBA to Remove Leading Spaces in Excel
We can create a sub-routine in Excel VBA and execute it to remove leading spaces in Excel.
For example, suppose we have the following dataset with leading spaces.
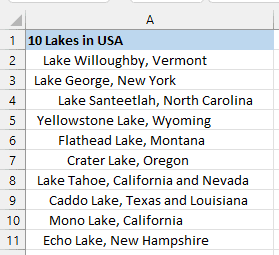
We want to remove the leading spaces using Excel VBA.
We use the below steps:
- Press Alt + F11 to open the Visual Basic Editor.
- Open the Insert menu and choose Module to insert a module.
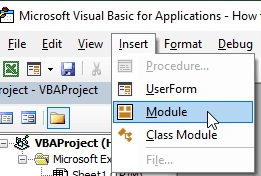
- Copy and paste the following sub-routine into the module.
Sub RemoveLeadingSpaces()
    ' Declare a variable named rng of type Range,
    ' which will be used to represent each cell in the selected range
    Dim rng As Range

    ' Start a loop that iterates over each cell (rng) in the currently selected range (Selection)

    For Each rng In Selection
        ' Remove leading spaces from the current cell's value
 using the LTrim function
        rng.Value = LTrim(rng.Value)

    ' End the loop and move to the next cell in the selection
    Next rng

End Sub- Save the workbook as an Excel Macro-Enabled Workbook (*.xlsm).
- Press Alt + F11 to switch to the current worksheet containing the dataset.
- Select the dataset.

- Press Alt + F8 to open the Macro dialog box.
- On the Macro dialog box, choose the RemoveLeadingSpaces macro and click Run.
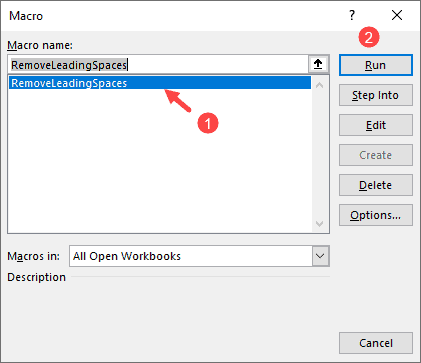
The sub-procedure loops through each cell in the current selection and uses the LTrim function to remove any leading spaces from the cell’s value.
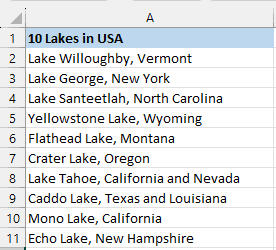
Note: The LTrim function in the code only removes common leading spaces and cannot remove non-breaking spaces; therefore, you cannot use this method to remove non-breaking spaces.
Leading spaces in Excel can be frustrating.
For example, they can lead to incorrect results of sorting functions. Therefore, we should remove the leading spaces to prevent such unwanted effects in data operations.
This tutorial showed five techniques for removing leading spaces in Excel. We hope you found the tutorial helpful.
Other Excel articles you may also like:

Thank you for the wonderful post. it helped me a lot especialy with Trim and Substitute formula
You can also use Data / Text to Columns. Fixed width, create a line break at the beginning, do not import the first column.