Deleting worksheets in Excel is a fairly easy task. All you need to do is just right-click on the sheet’s name at the bottom of the Excel window and hit ‘Delete’ from the popup menu.
But when working with worksheets day in and day out, you might be dealing with quite a large number of sheets on a regular basis.
Manually deleting the sheets can then become quite time-consuming, not to mention boring!
As such, you might feel the need to automate some of your tasks to save time.
That’s where VBA comes to your rescue. Using VBA, you can build code with a small number of lines to do the task. After that, just run the code whenever you feel the need. A lot of people get put off by the thought of having to code, but trust me, it’s just 2-3 lines of code max.
Write it once and reuse it over and over for the rest of your life! Tell me that doesn’t tempt you *raising eyebrow*.
So how do we do this?
Read on to find out.
Deleting a Specific Sheet using VBA
Let’s start with the simplest task – deleting just one specific sheet. The main syntax for deleting a sheet is just:
Worksheets("YourSheetName").Delete
Here are the steps you need to follow when you want to use VBA to delete a sheet named ‘MySheet’: Replace the word “YourSheetName” with the name of your worksheet, simple!
- From the Developer Menu Ribbon, select Visual Basic Note: If you can’t see the Developer ribbon, from the File menu, go to Options. Select Customize Ribbon and check the Developer option from the Main Tabs. Finally, Click OK.
- Once your VBA window opens, Click Insert->Module. Now you can start coding.
- Type the following 3 lines into the module window:
Sub deleteWorksheet()
Worksheets("MySheet").Delete
End Sub- That’s all, you’re done with the coding part. The first line marks the start of the module and gives it the name ‘deleteWorksheet’,
- The second line does the actual work of deleting the worksheet
- The last line marks the end of the module.
Close the VBA window.
Running the VBA Macro Code
Now, whenever you need to delete a sheet named ‘MySheet’:
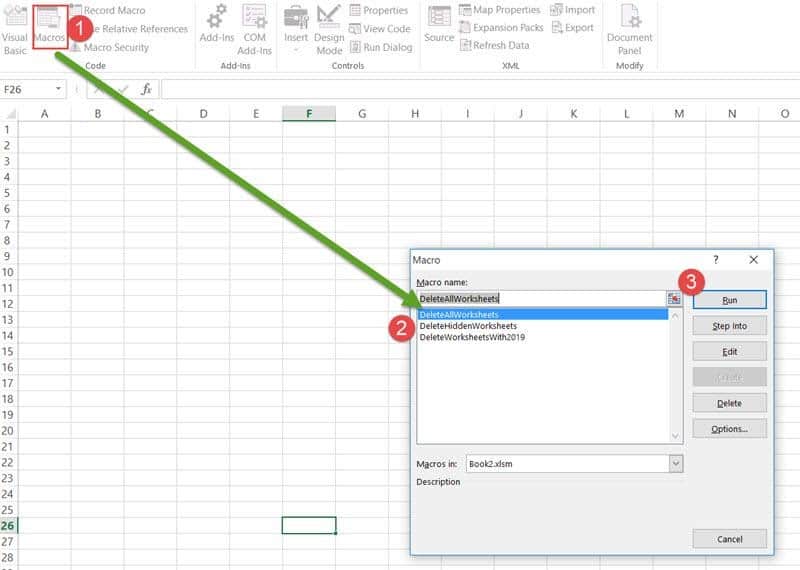
- Select the Macros button from the Developer Ribbon. This will open the Macro Window, where you will find the names of all the Macros that you have created so far.
- Select the Macro (or module) named ‘deleteWorksheet’ and click on the Run button. If a sheet named ‘MySheet’ exists, the Macro will delete it right after asking you if you’re sure you want to delete it.
Now, what if you just want to delete the active worksheet, irrespective of the name. This makes more sense in terms of reusability right? That’s easy too, just change the second line of code to:
ActiveSheet.DeleteNow one thing to note here is that each time you delete a sheet, Excel gives you a warning that you are about to delete a sheet and that you can’t undo this later.
So you have an option to either press Delete or Cancel. Oftentimes, we might not want this warning to show, and just get the job done. When you run the module now, you’ll find whichever sheet is active in your workbook, deleted.
To get rid of this warning message, you can add the following line to your code, right before you give the delete command:
Application.DisplayAlerts = False
This disables the DisplayAlerts command. But we also want to make sure that the command is disabled just this once, not forever. So after you’re done deleting, you can reset the command to True by saying:
Application.DisplayAlerts = TrueYour entire code will thus be:
Sub deleteWorksheet()
Application.DisplayAlerts = False
ActiveSheet.Delete
Application.DisplayAlerts = True
End SubNow, I understand it doesn’t make sense to write code for this when you can manually get it done faster. But bear with me. It gets better.Try this out. You’ll find your active sheet deleted, without the annoying warning.
Also read: VBA to Copy Sheet to New Workbook
Deleting All Sheets Except the Active Sheet
Now let’s do something that’s actually more useful with VBA. Say you want to delete not one, but ALL the sheets in your Workbook.
This is when your VBA script will save you both time and effort by just a click of a button (OK two buttons).
To delete all the sheets in your workbook, you need to cycle through every sheet, deleting them one after the other.
Now, this might sound like you have to write a lot of lines of code, but thanks to loops this can get done with just 5-6 lines, irrespective of the number of sheets that you need to delete!
The syntax for a VBA loop is simple. You start the loop with a For statement and end it with a Next statement. So the general syntax is:
For <<condition>>
<<one or more statements>>
Next
To delete all the worksheets in your Workbook, just type out the following lines of code into your module window:
Whatever you put in between the For and the Next statements, gets repeated over and over as long as the <<condition>> is true.
Sub DeleteAllWorksheets()
Dim ws As Worksheet
For Each ws In ThisWorkbook.Worksheets
ws.Delete
Next ws
End SubBy now you already know what the first (Sub command) and last (End Sub command) lines do. In the second line, we are declaring a variable named ws to be of type Worksheet. In other words, ws is going to be an instance of a worksheet.Lets’ go through this code line by line.
The third line starts the loop off by specifying that at each repetition of the loop, ws will refer to one of the worksheets in your Workbook.
In our case, the first time, ws will point to Sheet1. In the fourth line, we specify that the sheet ws is pointing to should be deleted.
The fifth line now tells VBA to repeat the loop, but this time, ws will point to the next worksheet in the Workbook.
So ws should now point to Sheet2. Once this sheet is deleted, ws will point to Sheet3, then Sheet4, then…you get the drift.
In this way, as long as there are sheets in ThisWorkbook, the statement ws.Delete will keep getting repeated.
Now there’s one more thing to add. Remember the annoying warning messages? Now we don’t want that to keep bothering us every time a sheet needs to get deleted, right?
So we again set Application.DisplayAlerts to False before we start the loop and set it back to True once we’re done deleting all the sheets.
Sub DeleteAllWorksheets()
Dim ws As Worksheet
Application.DisplayAlerts = False
For Each ws In ThisWorkbook.Worksheets
ws.Delete
Next ws
Application.DisplayAlerts = True
End SubWhile the above code does work, it will end up giving you an error as it will try and delete all the sheets in the workbook (which doesn’t make sense as if that’s what you want then better delete the entire workbook).
Since you can not delete all the sheets, it will end up giving you an error.
What would make more sense would be to delete all the sheets except, say, the current sheet or the ActiveSheet.
Sub DeleteAllWorksheets()
Dim ws As Worksheet
Application.DisplayAlerts = False
For Each ws In ThisWorkbook.Worksheets
If ws.Name <> ThisWorkbook.ActiveSheet.Name Then
ws.Delete
End If
Next ws
Application.DisplayAlerts = True
End SubAlways remember to end an If statement with an End If statement. Hence, we put it after the Delete statement.
The If statement makes sure that the next line gets executed only if the name of the worksheet ws is pointing to does not have the same name as the Active worksheet (The <> symbol in VBA means ‘not equal to’).
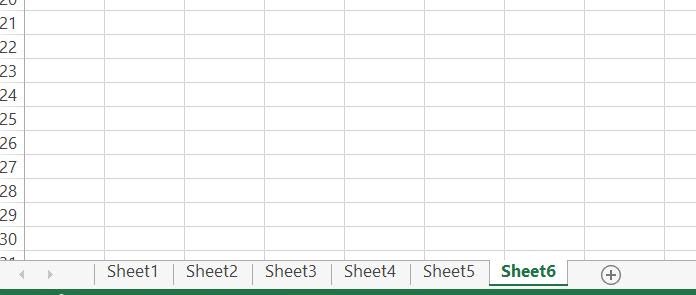
Our code is done. If you now run this module, you’ll find all the sheets, except the current sheet deleted.
Also read: Rename Sheets Using VBA in Excel
Deleting All Sheets with a Specific Word
Let’s get a little more creative now. What if you have a set of worksheets, like in the image below and want to delete all the sheets belonging to last year?
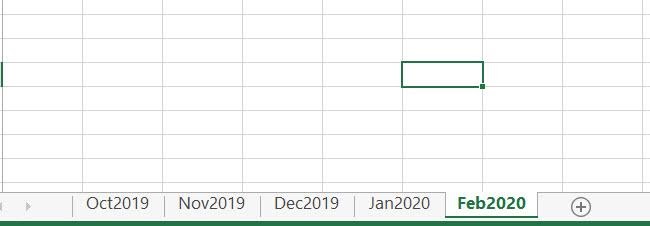
Say you want to retain the sheets of 2020 but delete all sheets that have the “2019”in the name. To do this, you only need to change your If statement in the earlier code.
So you can change the If statement in line 5 to:
If InStr(ws.Name, "2019") Then
This line makes sure that the next line (or set of lines) gets executed only if the name of the worksheet has the string “2019” in it.
Your entire code should look like this (You can copy this into a new module named “DeleteWorksheetsWith2019”:
Sub DeleteWorksheetsWith2019()
Dim ws As Worksheet
Application.DisplayAlerts = False
For Each ws In ThisWorkbook.Worksheets
If InStr(ws.Name, "2019") Then
ws.Delete
End If
Next ws
Application.DisplayAlerts = True
End SubThat’s it! When you run this code you will find all worksheets of 2019 deleted and only the sheets of 2020 will be retained.
Also read: How to Close Workbook Using VBA
Deleting All Hidden Sheets
Finally, let’s see how you can delete all the hidden sheets in your workbook. If you’ve ever tried manually deleting hidden sheets, you’ll find that it’s not possible to delete more than one of them in one go without first un-hiding them.
But with VBA, doing this is a piece of cake…or…code….like literally just a piece of it.
Once again, all you need to do is change your If statement. So you can change the If statement in line 5 to:
If ws.Visible <> True Then
And that’s all, this will make sure that the next line (or set of lines) gets executed only if the worksheet that ws is pointing to is not visible.
Your entire code should look like this (Once again, you can copy this into a new module named “DeleteHiddenWorksheets”:
Sub DeleteHiddenWorksheets()
Dim ws As Worksheet
Application.DisplayAlerts = False
For Each ws In ThisWorkbook.Worksheets
If ws.Visible <> True Then
ws.Delete
End If
Next ws
Application.DisplayAlerts = True
End SubNote that you can reverse this code to delete only the visible sheets rather than the hidden sheets by simply replacing the <> symbol with the ‘=’ symbol.
There you go, with just a click of a button you can delete ALL your hidden sheets without anyone noticing!
Sneaky!
Conclusion
So we saw four different ways to use VBA to delete sheets in your Excel Workbook. These codes can be saved and then reused whenever you find the need.
This is what makes VBA coding so much more efficient and helpful. You can also choose to link these modules to different buttons.
We hope you found this tutorial helpful. We love to get your feedback and suggestions in our comment section.
Other Excel tutorials you may find useful:
- How to Select Every Other Cell in Excel (Or Every Nth Cell)
- How to Delete Filtered Rows in Excel (with and without VBA)
- How to Group and Ungroup Worksheets in Excel
- How to Delete a Comment in Excel (or Delete ALL Comments)
- How to Unhide All Rows in Excel with VBA
- How to Copy Multiple Sheets to a New Workbook in Excel
- How to Filter as You Type in Excel (With and Without VBA)
- How to Delete Chart in Excel? (Manual & VBA)
- How to Delete a Pivot Table? 4 Different Ways!
- VBA Delete Files in Folder