
A named range in Excel gives a cell or group of cells a label you can use in formulas instead of a cell address.
That label stays connected to the cells. You can change their values without rewriting every formula that uses the name.
You can create one name quickly, choose which worksheet can use it, or turn several column headings into names at once.
In this article, I’ll show you three ways to create named ranges, use them in formulas, and edit or delete them later.
The screenshots below use Excel for Microsoft 365 on Windows. I recommend the Name Box when you just need to name one range.
| Choose This Method | When It Helps |
|---|---|
| Name Box | Give one range a name quickly. |
| Define Name dialog | Choose workbook or worksheet scope and check the reference. |
| Create from Selection | Create several names from existing row or column labels. |
Method #1: Using the Name Box
The Name Box sits to the left of the formula bar. It shows the active cell’s address and also lets you name a selection.
Below I have eight harbor tour bookings on the Tour Bookings sheet. I want to name the adult ticket counts in B2:B9.
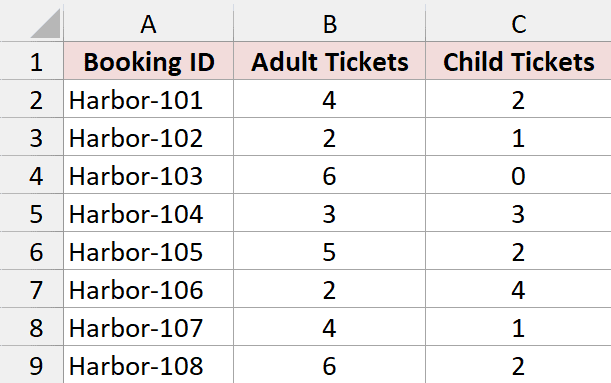
Here are the steps:
- Select B2:B9. Leave the Adult Tickets heading out of the selection.
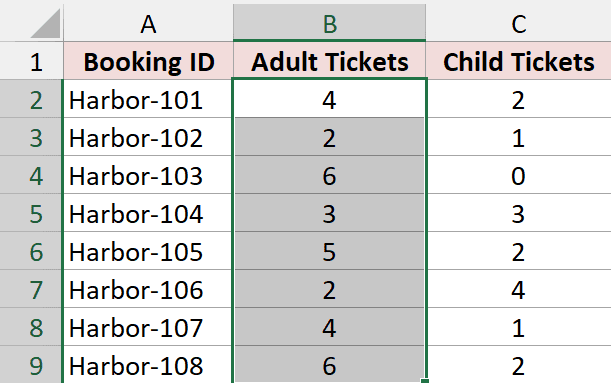
- Click inside the Name Box, replace its contents with Adult_Tickets, and press Enter to create the name.
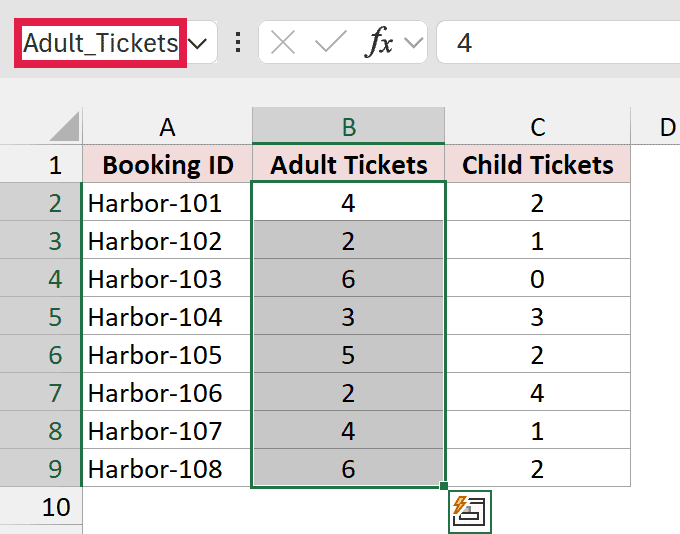
The underscore separates the words because Excel names cannot contain spaces. Pressing Enter matters; clicking away does not finish creating the name.
To use the name, type Adult Total in E1 and enter this formula in E2:
=SUM(Adult_Tickets)
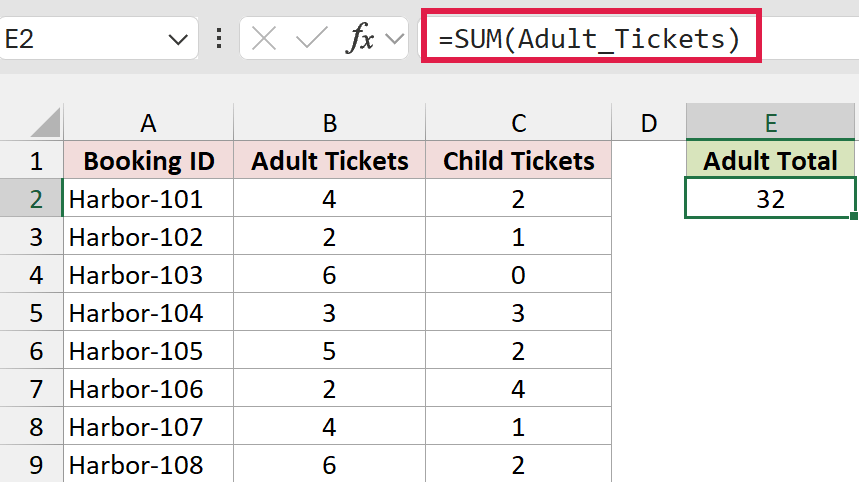
The result is 32. SUM adds the numbers in B2:B9 because that’s the range Adult_Tickets refers to.
This name is available throughout the workbook. I’ll show you how worksheet-specific names behave after the three creation methods.
Method #2: Using the Define Name Dialog
If you want to choose a name’s scope or check its cell reference before saving, use the Define Name dialog.
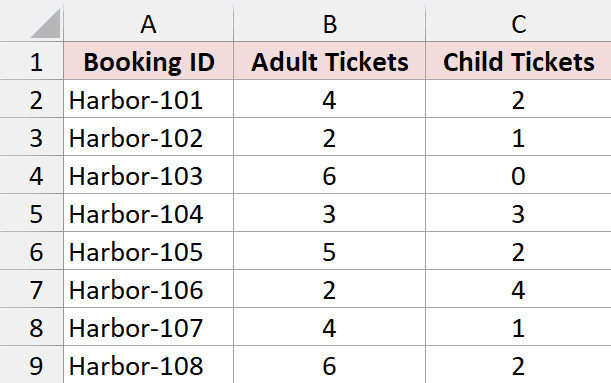
Below I have adult and child ticket counts for eight bookings on the Tour Bookings sheet. I’ll name the adult counts in B2:B9.
Use this method as an alternative to Method #1. You don’t need to create the same name twice.
Here are the steps:
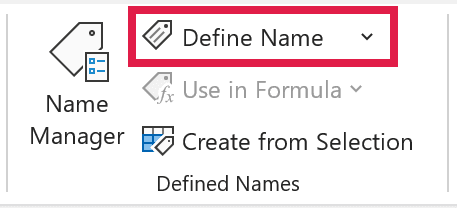
- Select B2:B9, then go to Formulas > Define Name in the Defined Names group.
- In the New Name dialog, enter Adult_Tickets in Name. Leave Scope set to Workbook, check that Refers to is
='Tour Bookings'!$B$2:$B$9, and click OK.
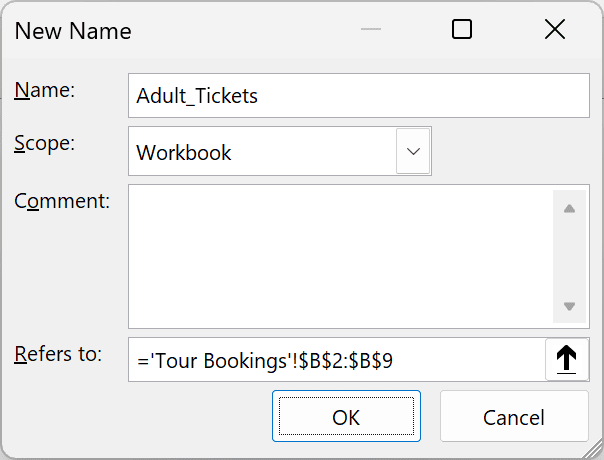
The dollar signs make the reference absolute. Copying a formula that uses Adult_Tickets won’t shift this name’s reference to another range.
The optional Comment box is useful when someone else needs to understand what the name represents.
You can also open the same New Name dialog through Formulas > Name Manager > New. That’s another entrance to this method.
Method #3: Using Create from Selection
When your data already has useful headings, Excel can turn those labels into several names in one operation.
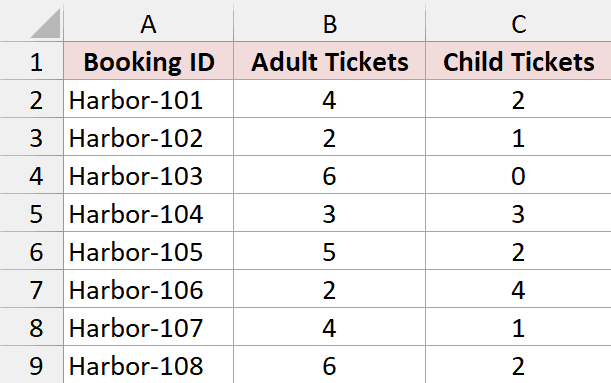
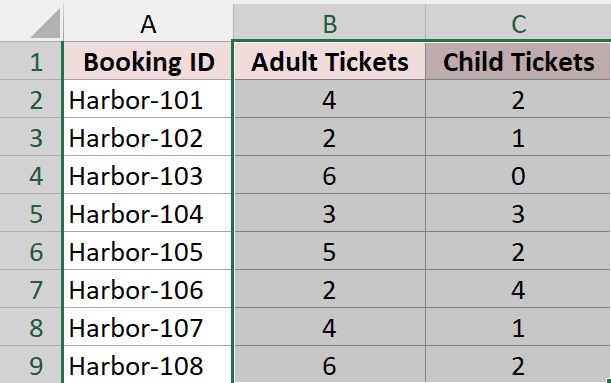
Below I have adult and child ticket counts on the Tour Bookings sheet. I’ll use the headings in B1:C1 to name both columns of numbers.
Here are the steps:
- Select B1:C9, including the Adult Tickets and Child Tickets headings.
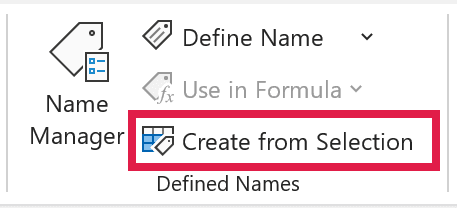
- Go to Formulas > Create from Selection in the Defined Names group.
- In the Create Names from Selection dialog, check Top row only, then click OK.
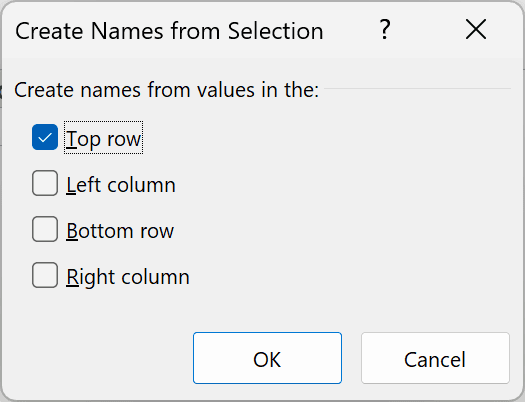
Excel creates Adult_Tickets for B2:B9 and Child_Tickets for C2:C9. The headings provide the names but are excluded from the named ranges.
It also replaces the spaces in these headings with underscores. For labels in the first column instead, choose Left column.
To total the child tickets, type Child Total in F1 and enter this formula in F2:
=SUM(Child_Tickets)
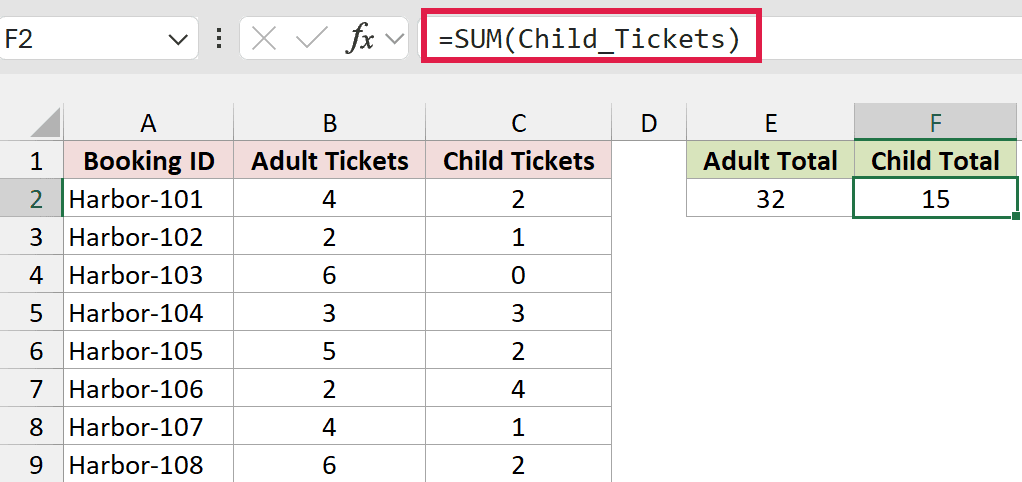
The result is 15. The screenshot also includes the adult total of 32, calculated with the formula shown in Method #1.
Note: Try these creation methods separately. If a name already exists, check its definition in Name Manager before creating it again. An existing name in the Name Box takes you to that range.
Choose Workbook or Worksheet Scope
The workbook-level Adult_Tickets name points to the public bookings. Suppose a separate Private Tours sheet needs the same label for its own ticket counts.
Below I have four private bookings, with adult ticket counts in B2:B5.
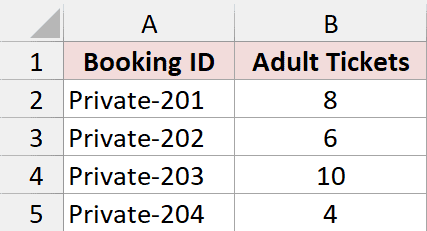
You can give this range the same name by limiting it to the Private Tours sheet. Here’s how:
- On Private Tours, select B2:B5 and go to Formulas > Define Name.
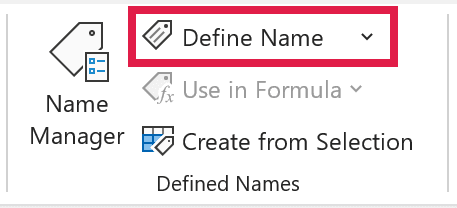
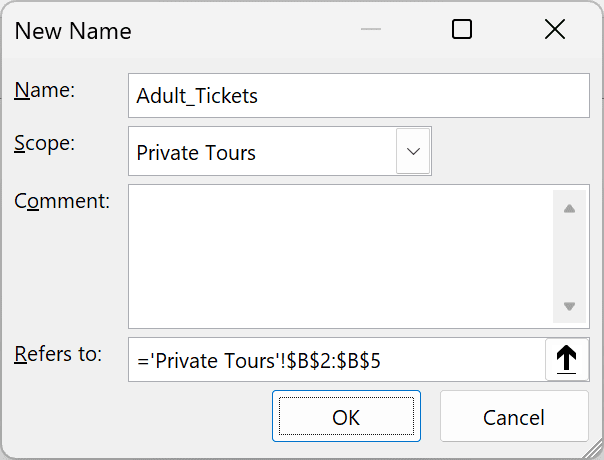
- Enter Adult_Tickets, choose Private Tours in Scope, and check that Refers to is
='Private Tours'!$B$2:$B$5. Click OK.
On Private Tours, enter Private Adult Total in D1 and this formula in D2:
=SUM(Adult_Tickets)
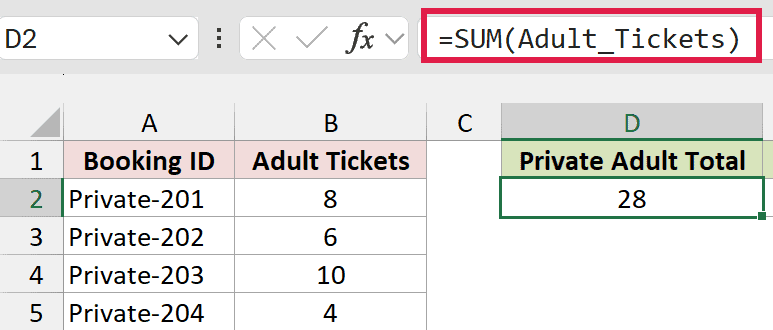
It returns 28 from the private bookings. On this sheet, the local Adult_Tickets name takes priority over the workbook-level name.
Child_Tickets has no competing local name here, so the workbook-level name still works. Enter Public Child Total in E1 and this formula in E2:
=SUM(Child_Tickets)
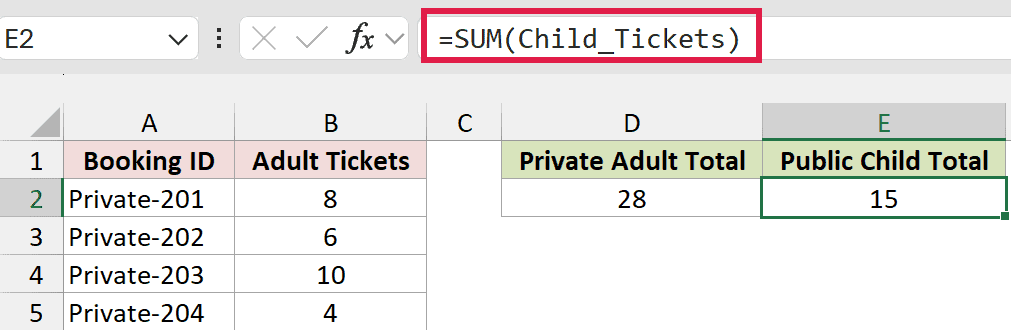
The result is 15, from the child counts on Tour Bookings.
To use the private name from another sheet, include its sheet name. On Tour Bookings, enter Private Adult Total in G1 and this formula in G2:
=SUM('Private Tours'!Adult_Tickets)
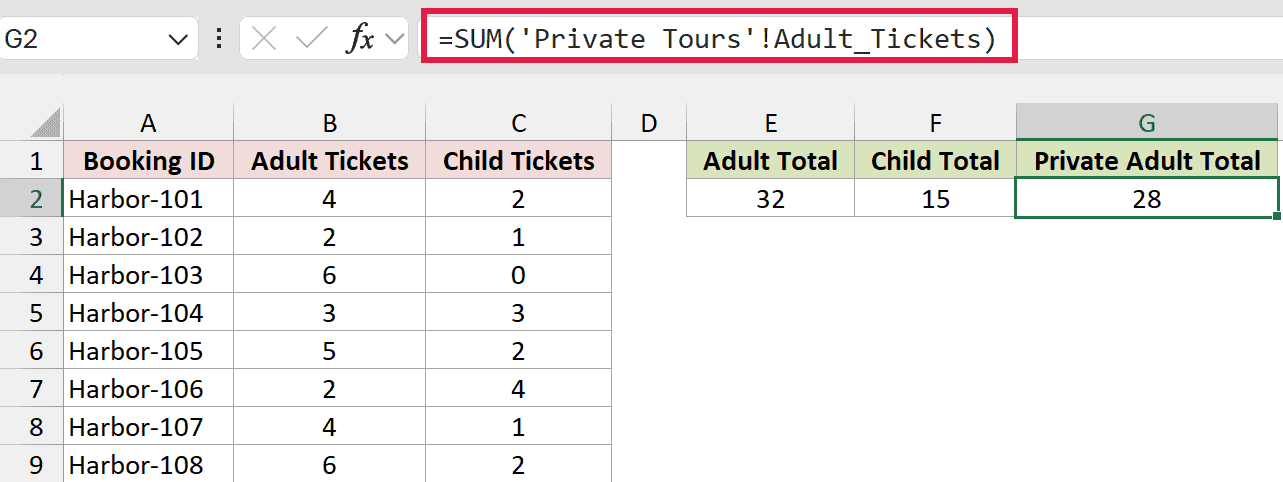
This returns 28. The single quotes are needed because the sheet name contains a space, just as when you reference a cell on another sheet.
Choose scope when you create the name. Excel’s Edit Name dialog doesn’t let you change an existing name’s scope.
Edit a Named Range in Excel
Use Name Manager to rename a range or change the cells it refers to. Typing a different label in the Name Box does not rename the original name.
For this example, I’ll rename the workbook-level Adult_Tickets name. Here are the steps:
- Go to Formulas > Name Manager. Select the Adult_Tickets entry whose Scope is Workbook, then click Edit.
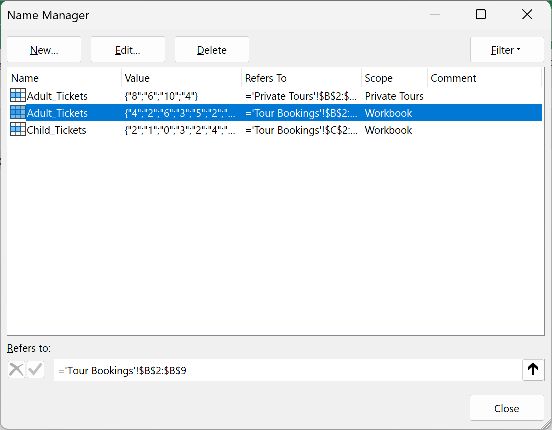
- Change Name to Public_Adults, keep the reference unchanged, and click OK.
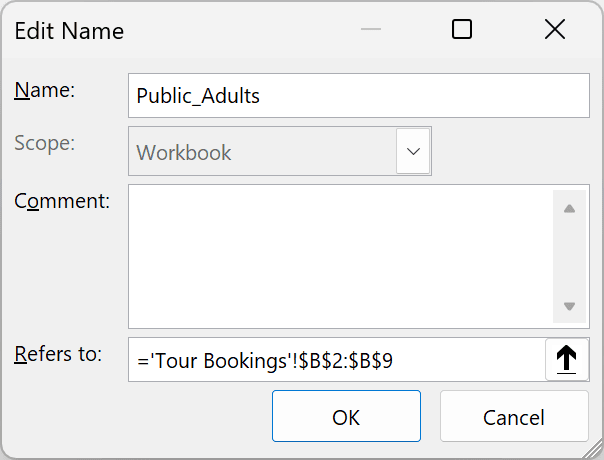
Excel updates direct formula references to the renamed name. The adult total on Tour Bookings still returns 32, and the separate Private Tours name is unaffected.
You can also resize the range in the Edit Name dialog. For example, changing Refers to from ='Tour Bookings'!$B$2:$B$9 to ='Tour Bookings'!$B$2:$B$8 excludes the last booking.
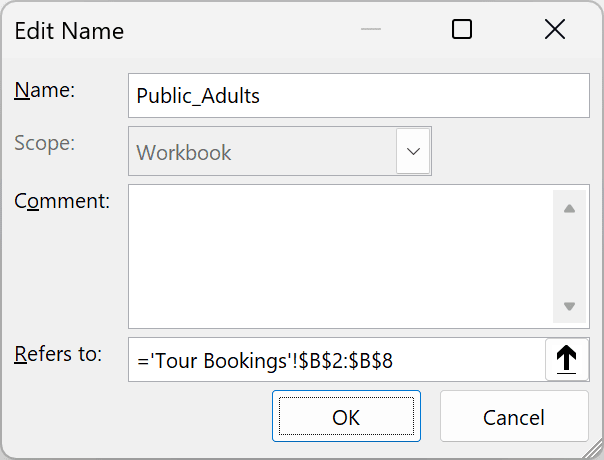
That change reduces the adult total to 26. Restore B2:B9 to include all eight bookings again.
Changing the reference affects every formula that uses that name. Check the intended rows before saving, especially when totals suddenly change.
Delete a Named Range in Excel
Deleting a name leaves the worksheet data in place, but formulas that depend on the deleted name can return #NAME?.
Before you delete a defined name, update any formulas that still need it. Then follow these steps:
- Go to Formulas > Name Manager and select the name you want to remove. Check its Scope and Refers To columns so you pick the right entry.
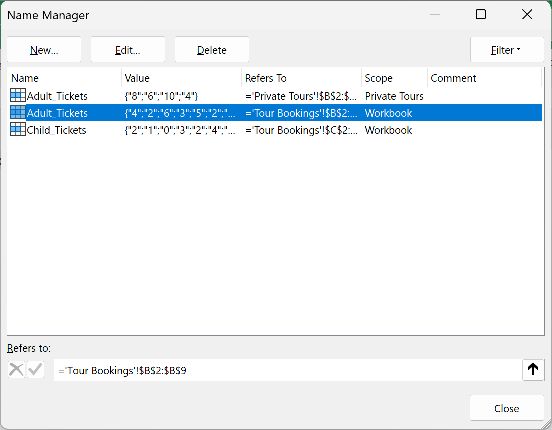
- Click Delete, then confirm the deletion in the message that appears.
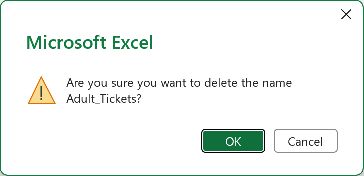
In the original example, deleting the workbook-level Adult_Tickets name breaks the adult total on Tour Bookings. The locally scoped name on Private Tours remains available.
Additional Notes About Named Ranges in Excel
Keep these points in mind when setting up your own names:
- Use readable names. Start with a letter or underscore, then use letters, numbers, underscores, or periods. Avoid cell addresses such as A1 and the reserved single-letter names R and C.
- Capitalization doesn’t create a different name. Adult_Tickets and ADULT_TICKETS are the same name within the same scope.
- A name can refer to one cell. This is useful for a tax rate, target, or other input used by several formulas.
- The download is a completed example. Its names and formulas are already filled in. Practice the creation methods in a separate copy with the names removed, and keep the original for comparison.
Frequently Asked Questions
Here are a few questions that come up after creating your first named range.
Does a Named Range Expand When I Add Rows?
A fixed reference such as B2:B9 doesn’t automatically include data typed into B10. Inserting rows inside the referenced range can adjust its boundaries.
For a list that keeps growing, use a dynamic named range or an Excel Table so you don’t have to keep changing the reference manually.
Can a Named Range Include Cells That Aren’t Next to Each Other?
Yes. On Windows, hold Ctrl while selecting the separate areas, then give the selection a name. Whether you can use that name depends on the feature or function.
Does Creating a Name Update My Existing Formulas?
No. Creating a name doesn’t automatically replace the cell addresses in formulas you’ve already written. You can edit those formulas to use the new name.
This differs from renaming an existing name, which updates formulas that already refer to it directly.
Can a Named Range Contain Text?
Yes. A named range can contain text, numbers, dates, or a mixture. The formula using it determines how those values are handled.
For example, SUM ignores text stored in the referenced cells and adds their numeric values.
Conclusion
I use the Name Box for a quick name and Create from Selection when the headings already describe the data.
Use Define Name when scope matters, then manage later changes through Name Manager.
Other Excel articles you may also like:
