Sometimes when you print or print preview an Excel file that you have received from maybe a colleague, you notice that it has a watermark.
You may not want the watermark on your printout. How can you remove it? This tutorial shows you 2 techniques for removing a watermark in Excel.
Note: A watermark can be either a text watermark or an image watermark. In this tutorial, I will show you how to remove both
Method #1: How to Remove a Text Watermark
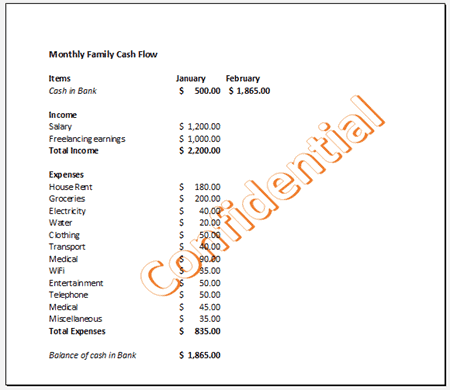
Suppose we have a text watermark in our Excel file as shown below:

We use the following steps to remove the watermark:
- Change the view of the workbook to Page Layout view using any of the followings ways:
- Click the Page Layout button on the status bar.

- Click the Insert tab and select Page Layout in the Workbook Views group.

- Place the mouse pointer in the header section of the page. Three adjacent text boxes appear.

Note: A text watermark can also be added to the footer section. If you do not find the text watermark in the header section try looking in the footer section.
- Click each of the boxes until you find the one that contains the text watermark.

- Press the Delete key to delete the text and click anywhere on the page outside the box.
The text watermark is removed.

Also read: How to Create Barcodes in Excel
Method #2: How to Remove an Image Watermark
Suppose we have an image watermark in our Excel file as shown below:

We use the following steps to remove the watermark:
- Change the view of the workbook to Page Layout view using any of the following ways:
- Click the Page Layout button on the status bar.

- Click the Insert tab and select Page Layout in the Workbook Views group.

- Place the mouse pointer in the header section of the page. Three adjacent text boxes appear.

- Click each of the text boxes until you find the one that contains the code &[Picture].

Note: An image watermark can also be added to the footer section. If you do not find the image watermark in the header section try looking in the footer section.
- Select the code and press Delete to remove it. Click anywhere on the page outside the header section and see that the image watermark is gone.

Also read: How to Remove Gridlines in Excel
How to Add a Watermark in Excel?
Suppose after removing the watermark from the Excel file your colleague calls you and tells you that the watermark should not be removed.
What can you do to restore the watermark?
We show you 2 techniques for adding a watermark to an Excel file.
Excel does not have a built-in watermark feature the way for example Word has. We can work around this limitation by using the header and footer tools.
How to Add a Text Watermark in Excel
Suppose we want to add the following text watermark to our Excel file:

We can use the following steps to add the watermark to our Excel file:
- Change the view of the workbook to Page Layout view using any of the following ways:
- Click the Page Layout button on the status bar.

- Click the Insert tab and select Page Layout in the Workbook Views group.

- Click any of the three text boxes in the header section depending on where you want to position the watermark on the page. In this case, we have opted for the middle text box because we want the watermark displayed in the middle of the page.
- Type the word DRAFT in the text box.

- Select the word DRAFT, click the Home tab, open the Font Size drop-down list, and select 72.

Note: If you want a font size that is larger than 72, you can type it in the drop-down.
The word DRAFT is enlarged.

- Open the Font Color drop-down on the Home tab, and select a light color from the Theme Colors, Standard Colors, or More Colors.

The light color is applied to the text:

- Click at the beginning of the word DRAFT and press the enter key several times to push the word down into the middle of the page.

- Click anywhere on the page outside of the text box and see the watermark displayed on the page.

Note: You can add the text watermark in the footer section of the page if you find it appropriate for your Excel file.
How to Add an Image Watermark in Excel?
Suppose we want to add the following image watermark to our Excel file:

We can use the following steps to add the watermark to our Excel file:
- Change the view of the workbook to Page Layout view using any of the following methods:
- Click the Page Layout button on the status bar.

- Click the Insert tab and select Page Layout in the Workbook Views group.

- Click any of the three text boxes in the header section depending on where you want to position the watermark on the page. In this case, we have opted for the middle text box because we want the watermark displayed in the middle of the page.
- Click the Header & Footer tab, and select Picture in the Header & Footer Elements group.

- Select an option from the Insert Pictures dialog box that appears. In this case, we choose From a file because we want to insert a picture stored on our local hard drive.

- Navigate to the folder that contains the picture we want to insert. Choose the picture and click the Insert button.

The code &[Picture] appears in the middle text box:
![code &[Picture] appears](https://spreadsheetplanet.com/wp-content/uploads/2022/11/image-463.png)
- Click anywhere on the page outside of the text box and see the image watermark displayed on the worksheet.

Note: If you want to push the image further down the page, place the cursor at the beginning of the code &[Picture] in the header and press the Enter key as many times as needed.
To add formatting to the image, click in the text box containing the &[Picture] code and select Format Picture in the Header & Footer Elements group.

The Format Picture dialog box appears. We can then use the options on the Size tab and Picture tab to format the picture.

Note: You can add the image watermark in the footer section of the page if it is appropriate for your Excel file.
In this tutorial, we looked at two techniques to remove watermarks from Excel files.
We also looked at two techniques for adding watermarks to Excel files. We hope you found the information useful.
Other Excel articles you may also like:
- How to Remove Table Formatting in Excel?
- How to Remove Conditional Formatting in Excel?
- How to Remove Drop-down List in Excel?
- How to Delete/Remove Checkbox in Excel?
- Add Alt Text to an Object in Excel (Images / Charts / Shapes)
- How to Insert an Image in a Cell in Excel
- How to Remove Header and Footer in Excel