
Slicers are the easiest way to filter a report. But every new one looks the same, with small text on pale blue buttons that rarely match your workbook.
You can change the look, just not from the Home tab. A slicer’s colors, font, and font size all live in its slicer style.
Excel also won’t let you edit its built-in styles. To change anything beyond picking a different preset, you make a copy of a style and edit the copy.
In this article, I’ll show you how to build your own slicer style, change the slicer font size, make a slicer horizontal, and reuse your style in another workbook.
Change Slicer Color With a Built-In Style
The quickest way to change a slicer’s color is to pick one of Excel’s built-in styles. There are 14 of them, split into a Light group and a Dark group.
Below I have a PivotTable showing wholesale revenue by coffee bean for a small roastery. Next to it is a Bean slicer in the default blue style.
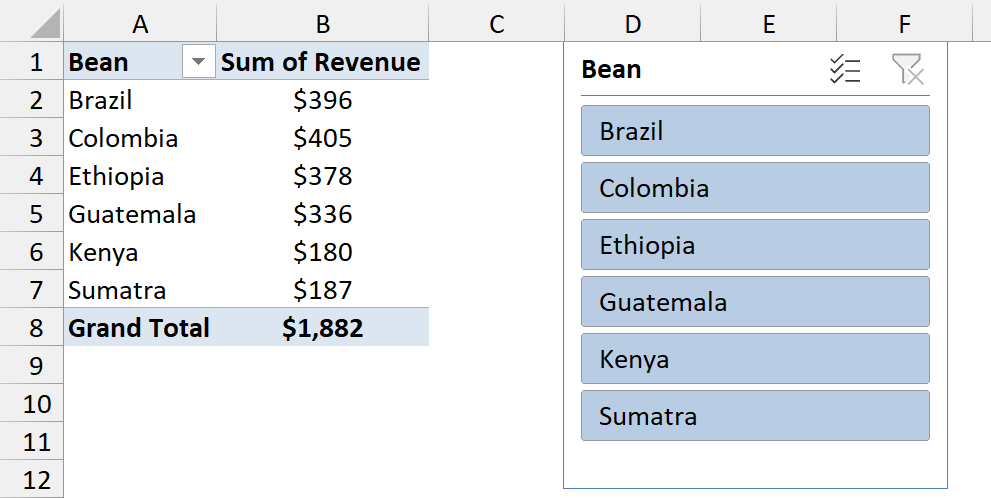
Here are the steps to change the slicer color with a built-in style:
- Click the slicer’s header (the title at the top) to select it. The Slicer tab appears in the ribbon.
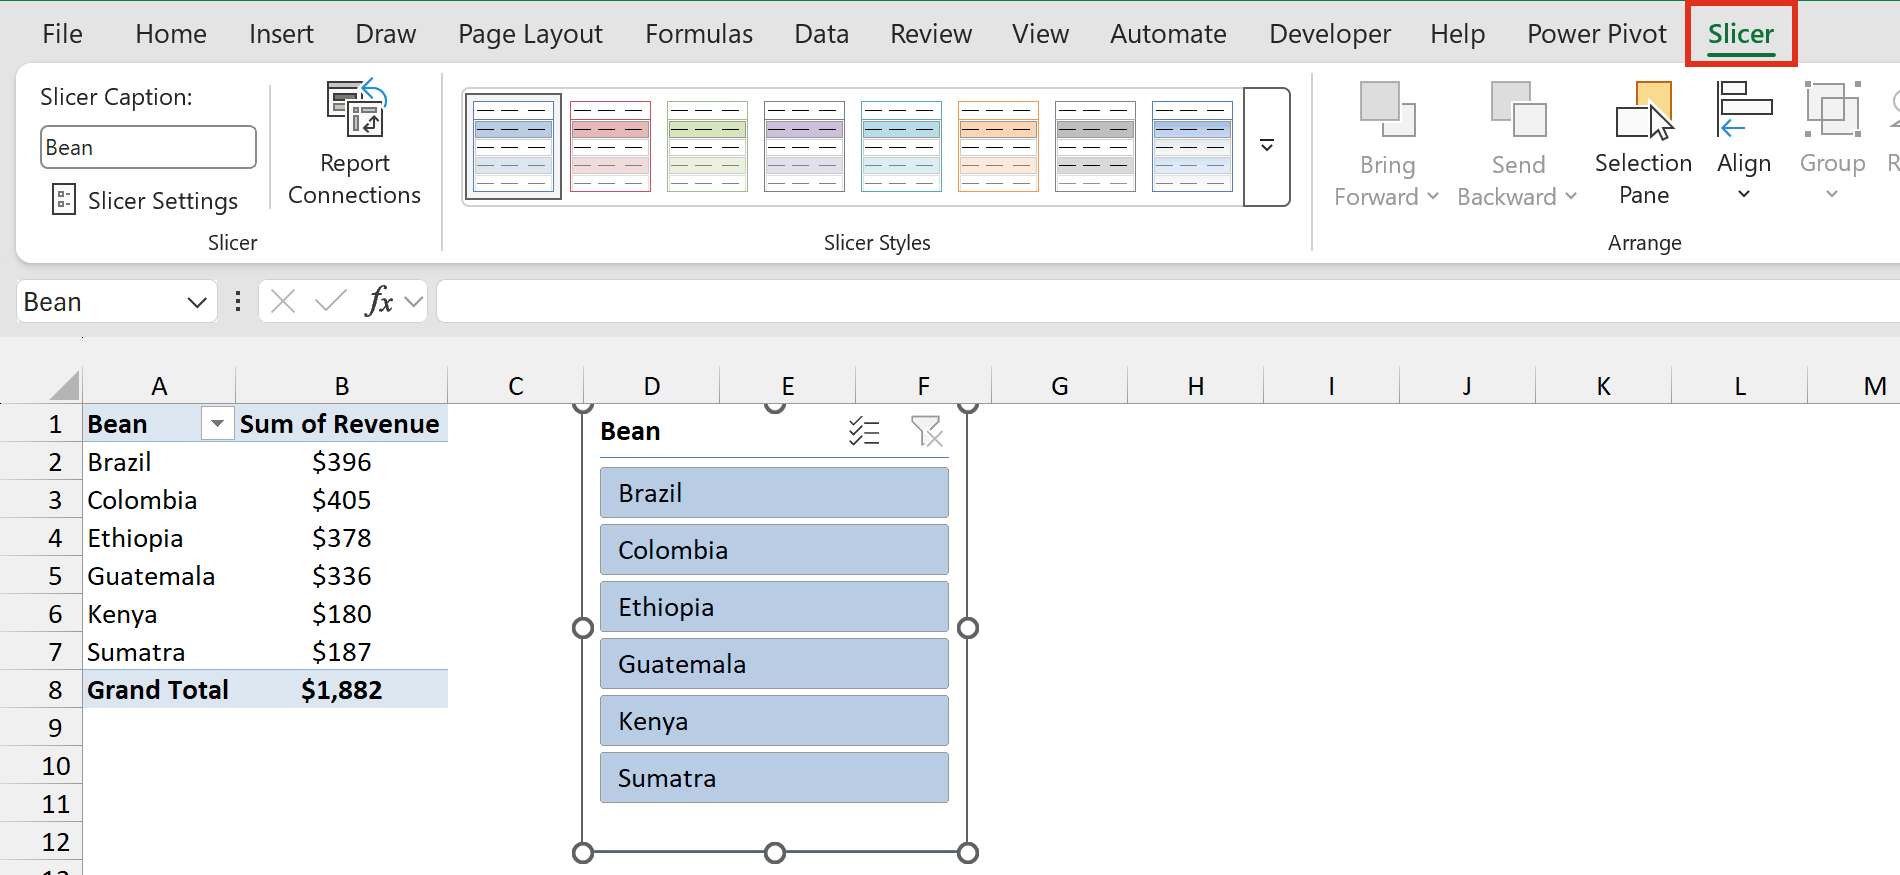
- On the Slicer tab, open the Slicer Styles gallery and click the style you want.
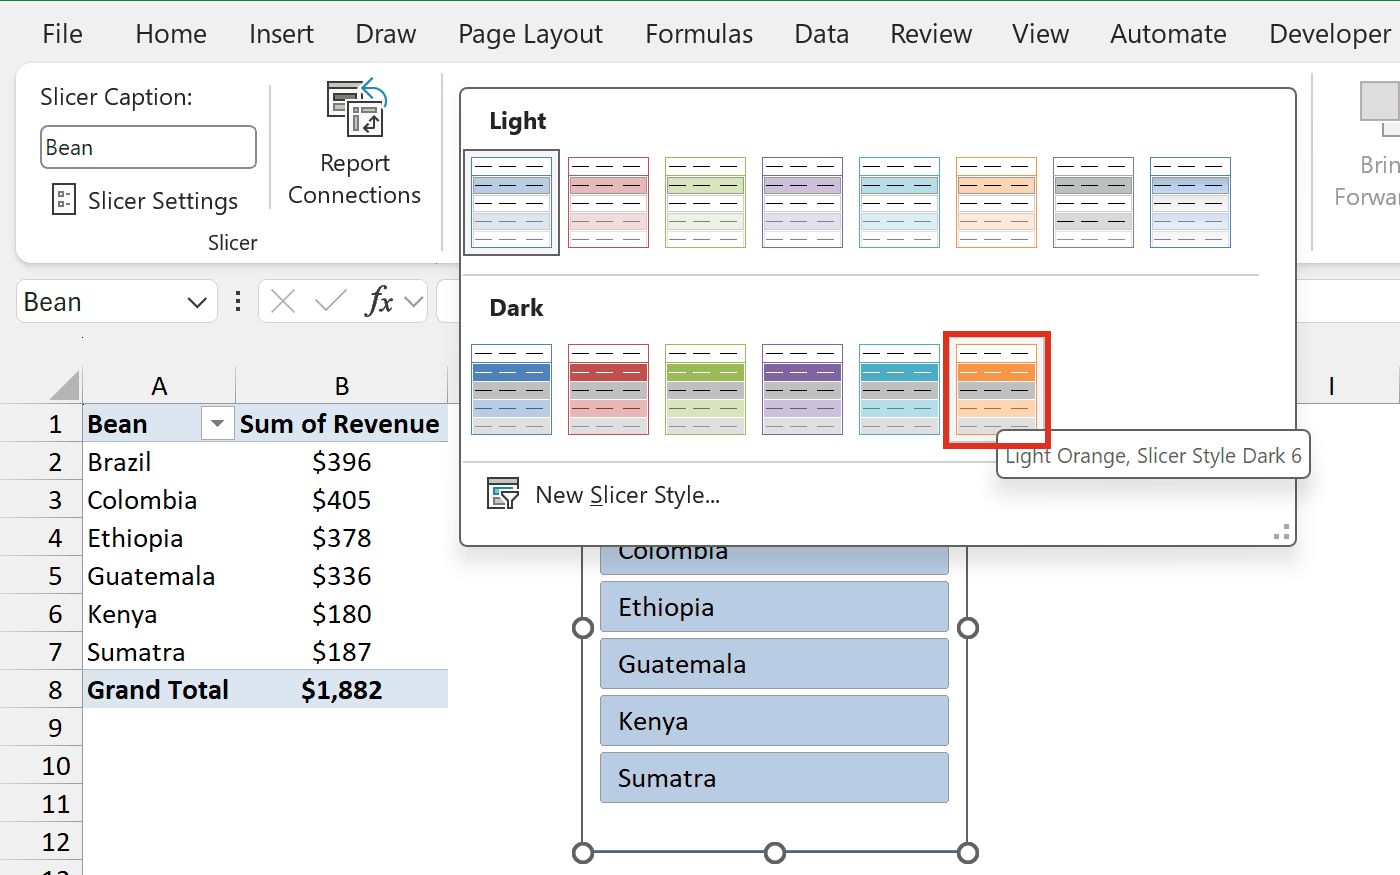
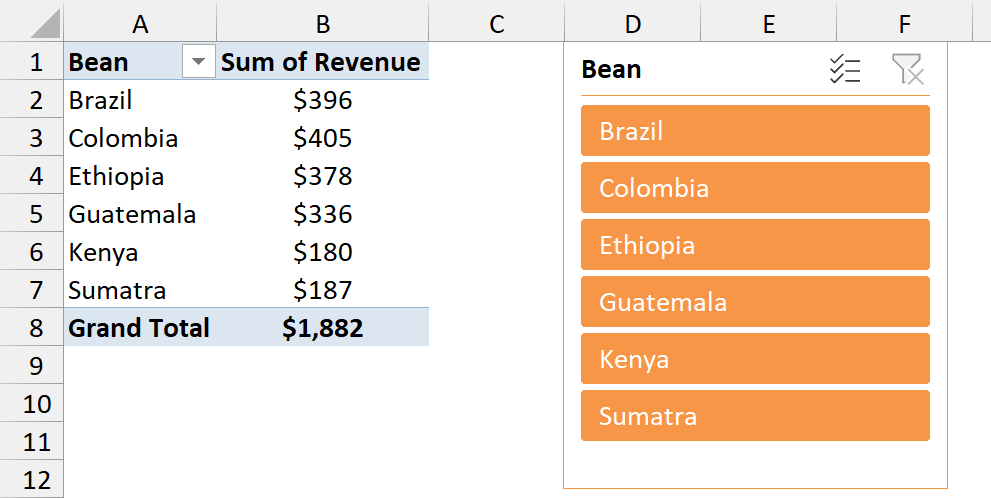
I picked an orange style from the Dark group, and the whole slicer changes to match.
Clicking a button in the slicer filters the PivotTable, so always select the slicer by its header.
If you click a button by mistake, click the Clear Filter button in the slicer’s header to show all items again.
Create a Custom Slicer Style (Button and Background Color)
When no built-in style fits, you can make your own and pick the exact colors for the buttons, the background, and the header.
Excel won’t let you modify a built-in style. So you start by duplicating the one closest to what you want, then change the copy.
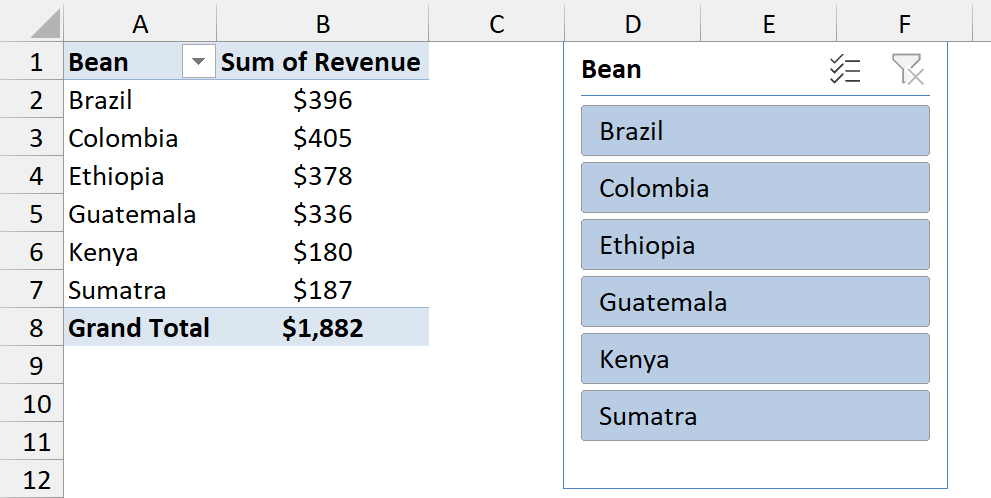
Below I have the same coffee revenue PivotTable, with a Bean slicer in the default blue style. I want it in coffee browns instead.
Here are the steps to create a custom slicer style:
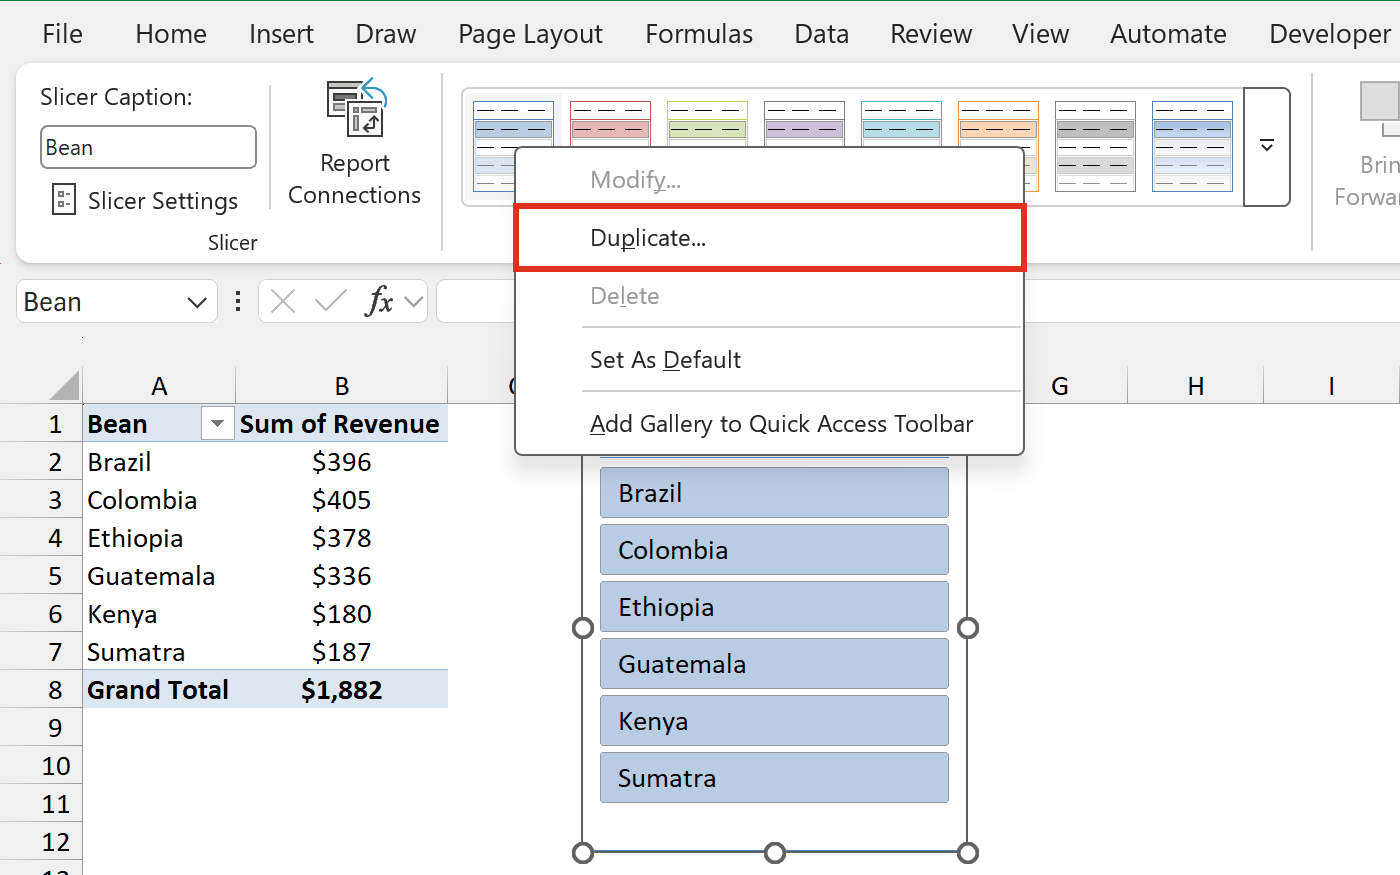
- Select the slicer, go to the Slicer tab, right-click the current style in the Slicer Styles gallery, and choose Duplicate.
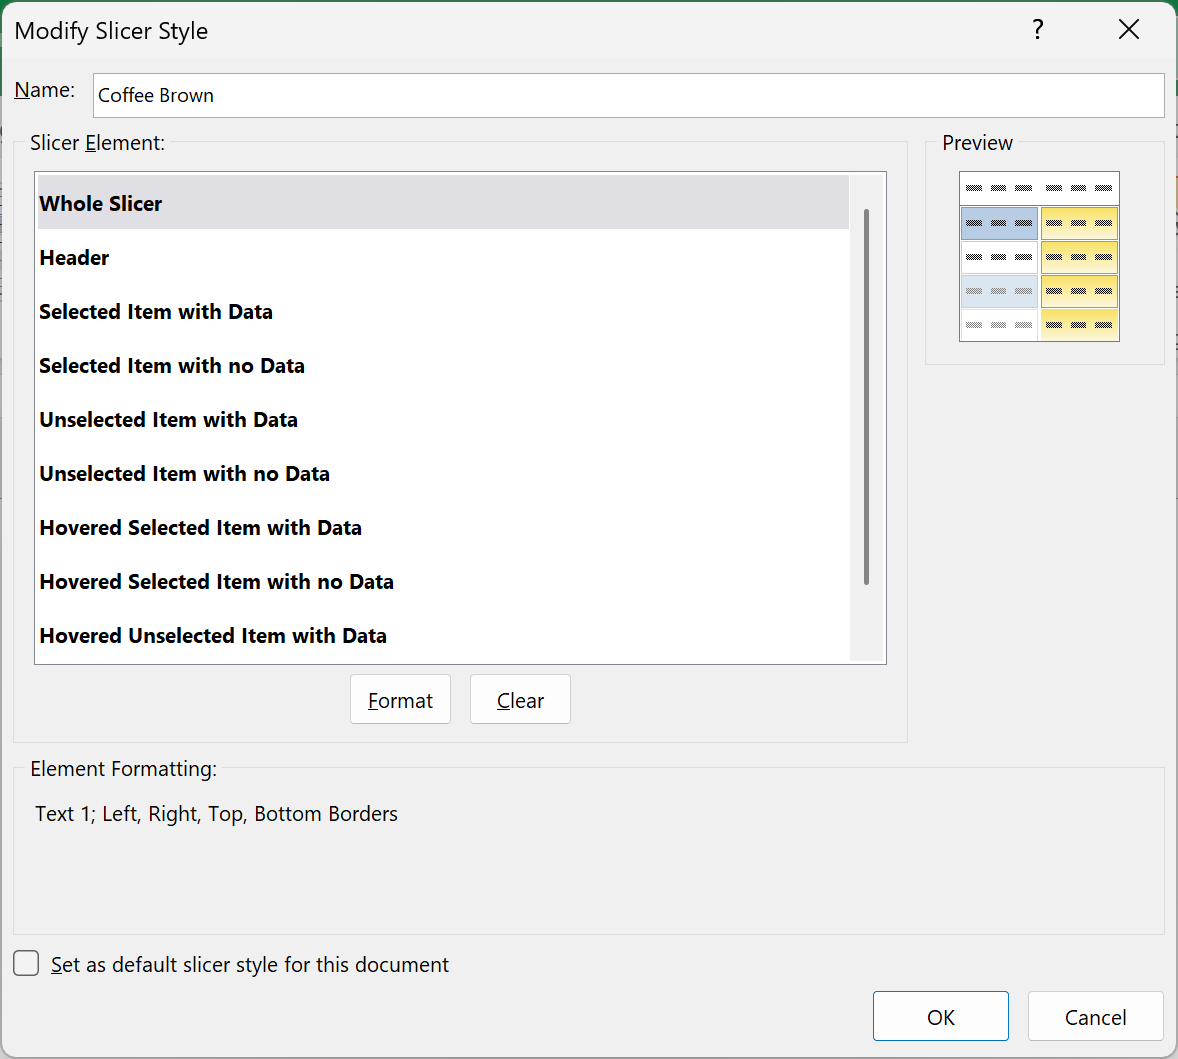
- In the Modify Slicer Style dialog box, type a name for the style in the Name box. I called mine Coffee Brown.
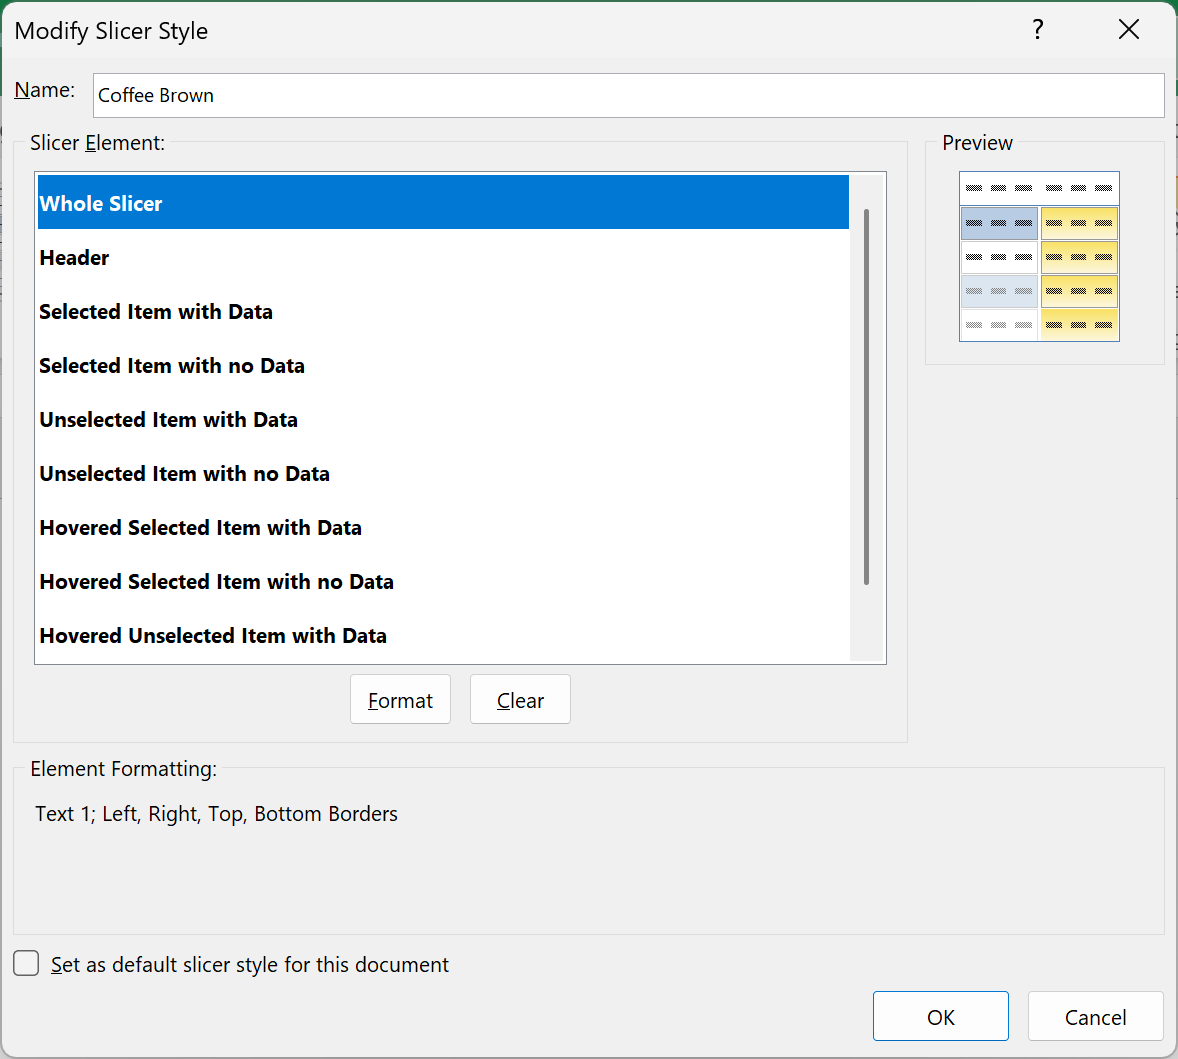
- In the Slicer Element list, select Whole Slicer and click Format.
- In the Format Slicer Element dialog box, go to the Fill tab, pick a background color (I used a light cream), and click OK.
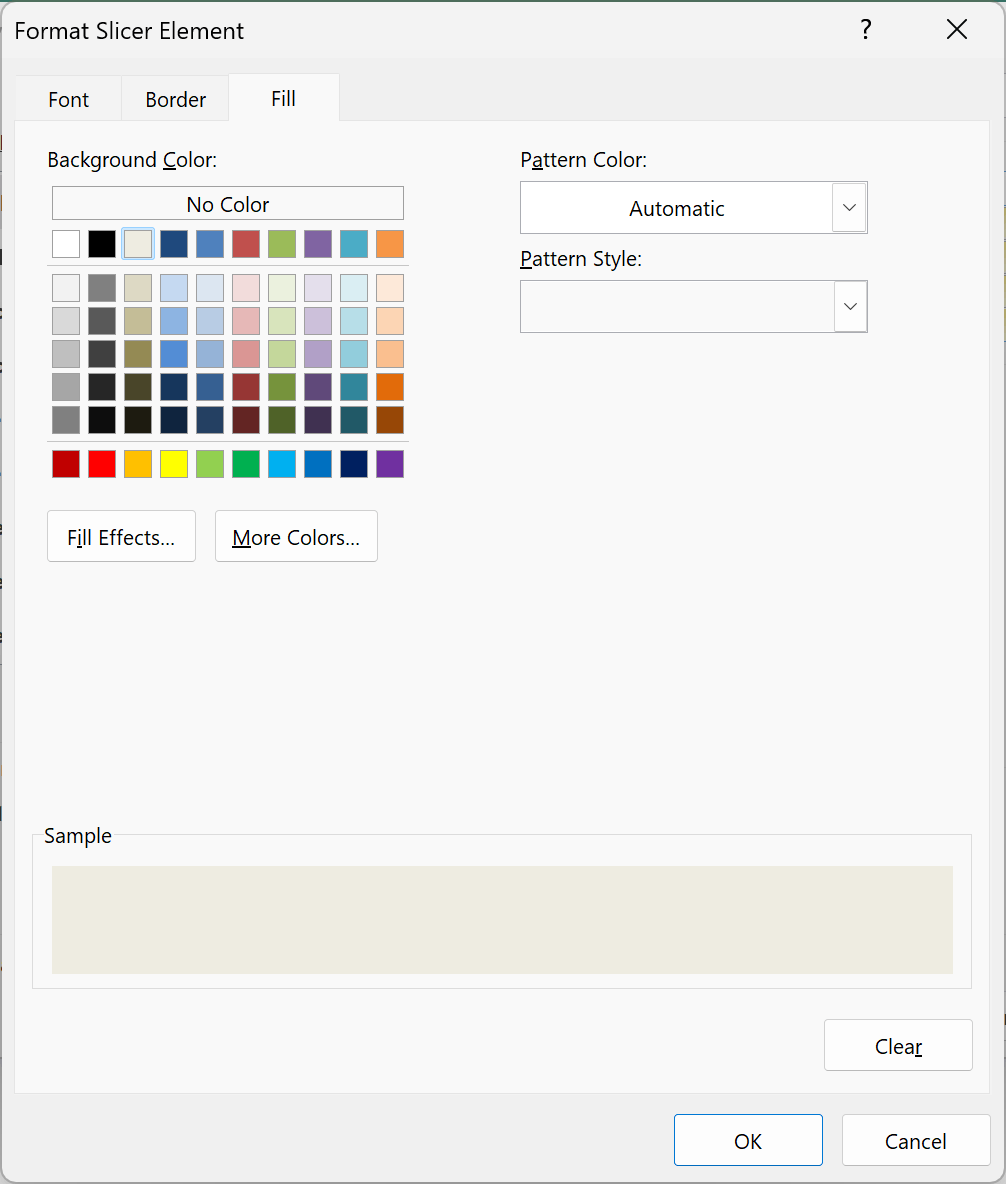
- Repeat step 4 for each element you want to change, then click OK. The table below shows what each element controls and what I set.
| Slicer Element | What it changes | What I set |
|---|---|---|
| Whole Slicer | The background and outer border of the slicer | Cream fill, brown border |
| Header | The slicer title and the line under it | Bold brown text, brown line |
| Selected Item with Data | Buttons that are currently selected | Dark brown fill, white text |
| Unselected Item with Data | Buttons that aren’t selected | Light tan fill, dark brown text |
| Selected Item with no Data | Selected buttons with no matching data | Light gray fill, gray text |
| Unselected Item with no Data | Unselected buttons with no matching data | Light gray fill, gray text |
| Hovered Selected Item with Data | A selected button under your mouse pointer | Darker brown fill, white text |
| Hovered Unselected Item with Data | An unselected button under your mouse pointer | Medium tan fill, dark brown text |
| Hovered Selected Item with no Data | A selected no-data button under your pointer | Left as it was |
| Hovered Unselected Item with no Data | An unselected no-data button under your pointer | Left as it was |
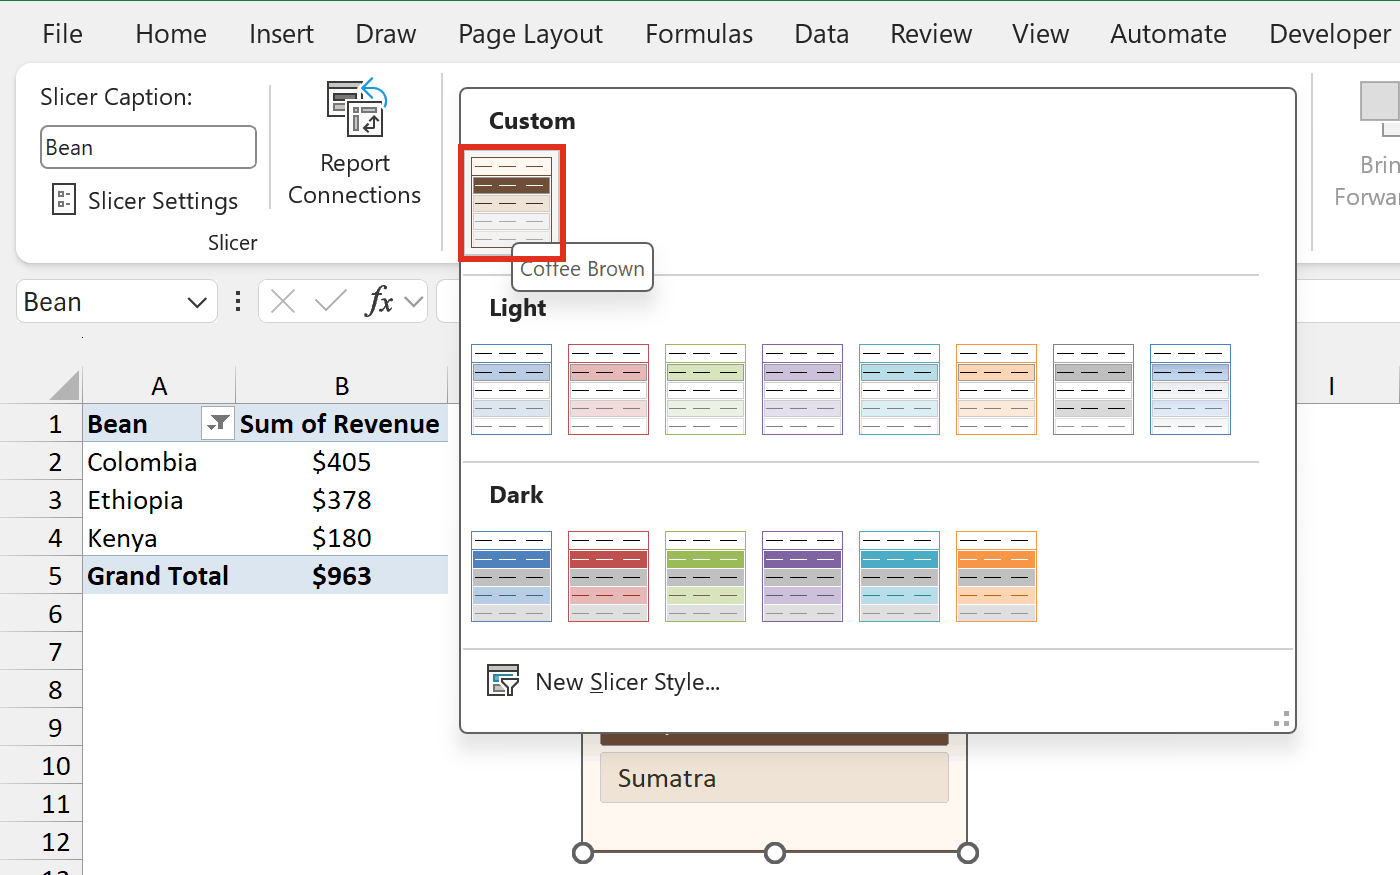
- Your new style now appears under Custom at the top of the Slicer Styles gallery. Click it to apply it to the slicer.
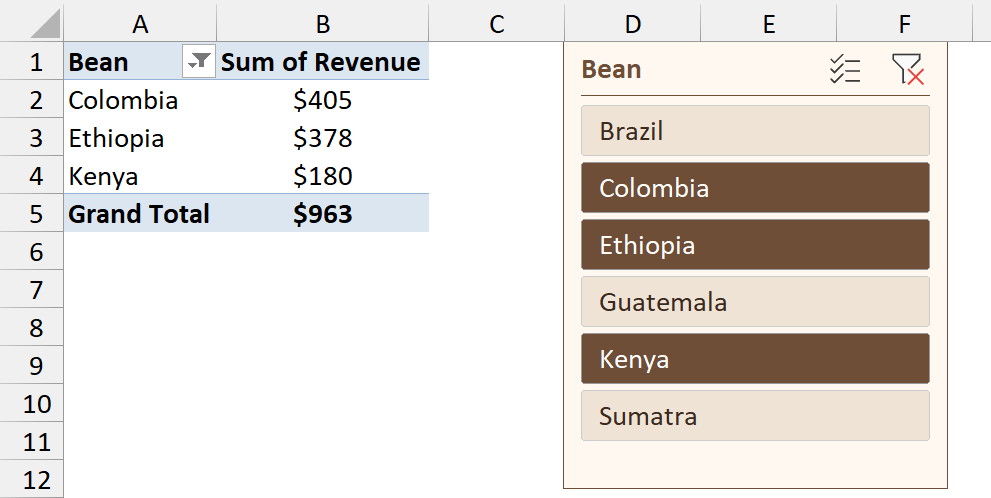
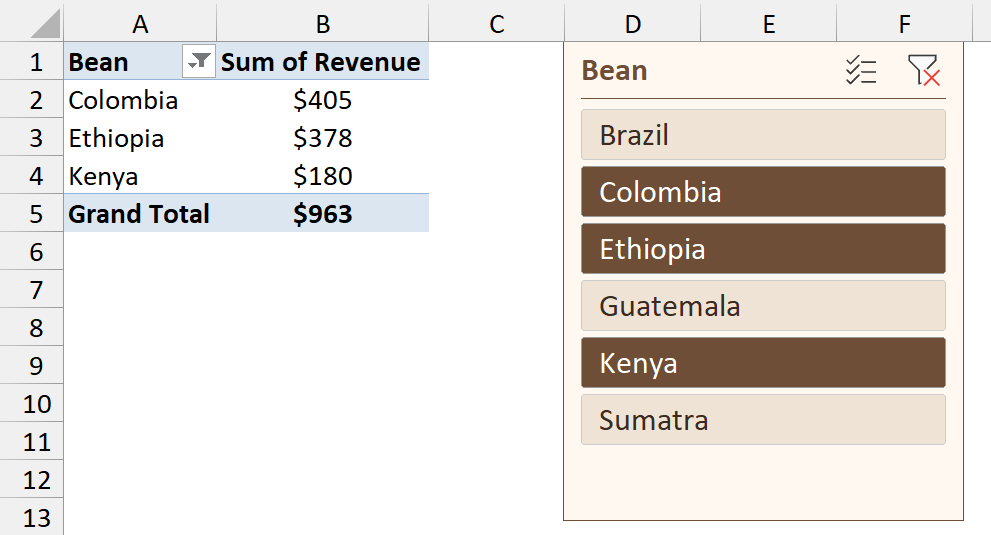
Here’s the slicer with the Coffee Brown style. I’ve selected Colombia, Ethiopia, and Kenya, so you can see the dark selected buttons next to the light unselected ones.
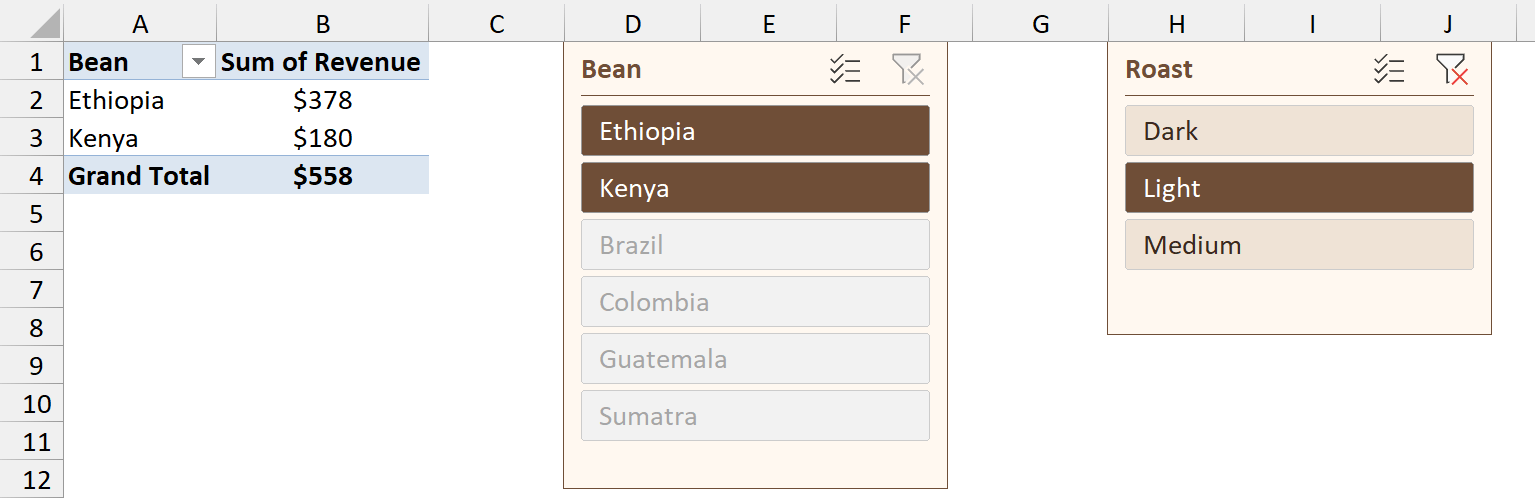
The two “no Data” elements show up when another slicer filters the same PivotTable. Here I’ve added a Roast slicer and picked Light.
Only Ethiopia and Kenya are light roasts. So the other four beans have no data, and they turn gray.
The four Hovered elements only show while your mouse pointer is over a button. A slightly darker shade makes it clear which button you’re about to click.
Note: You can also click New Slicer Style at the bottom of the gallery. That style starts with no formatting at all, so you’d have to set every element yourself. Duplicating a built-in style is usually faster.
Change Slicer Font Size and Font
When you select a slicer, the font controls on the Home tab are greyed out. The slicer’s font, font size, and text color all come from its style.
That means you can only change them in a custom style, using the same Format button as the colors.
Below I have the Bean slicer with the Coffee Brown style from the previous section. The text is the default size, and I want it bigger and easier to read.
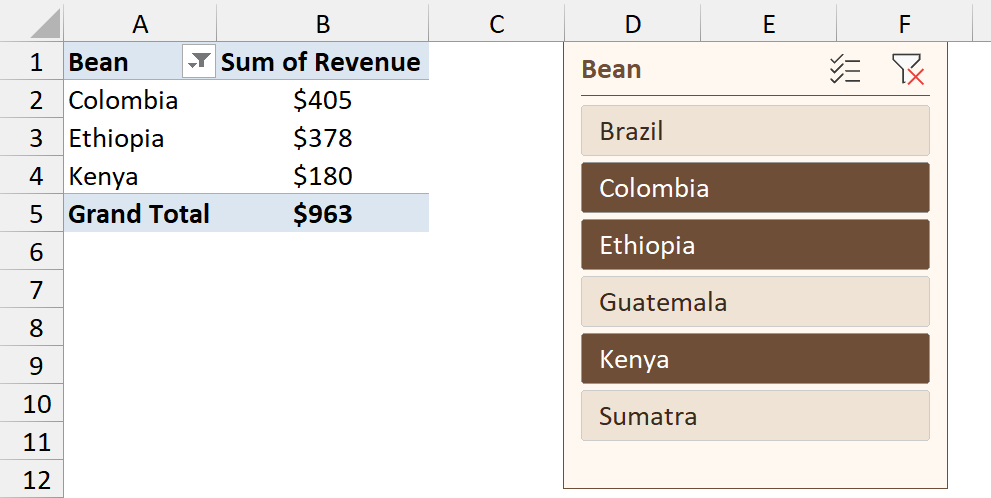
Here are the steps to change the slicer font size:
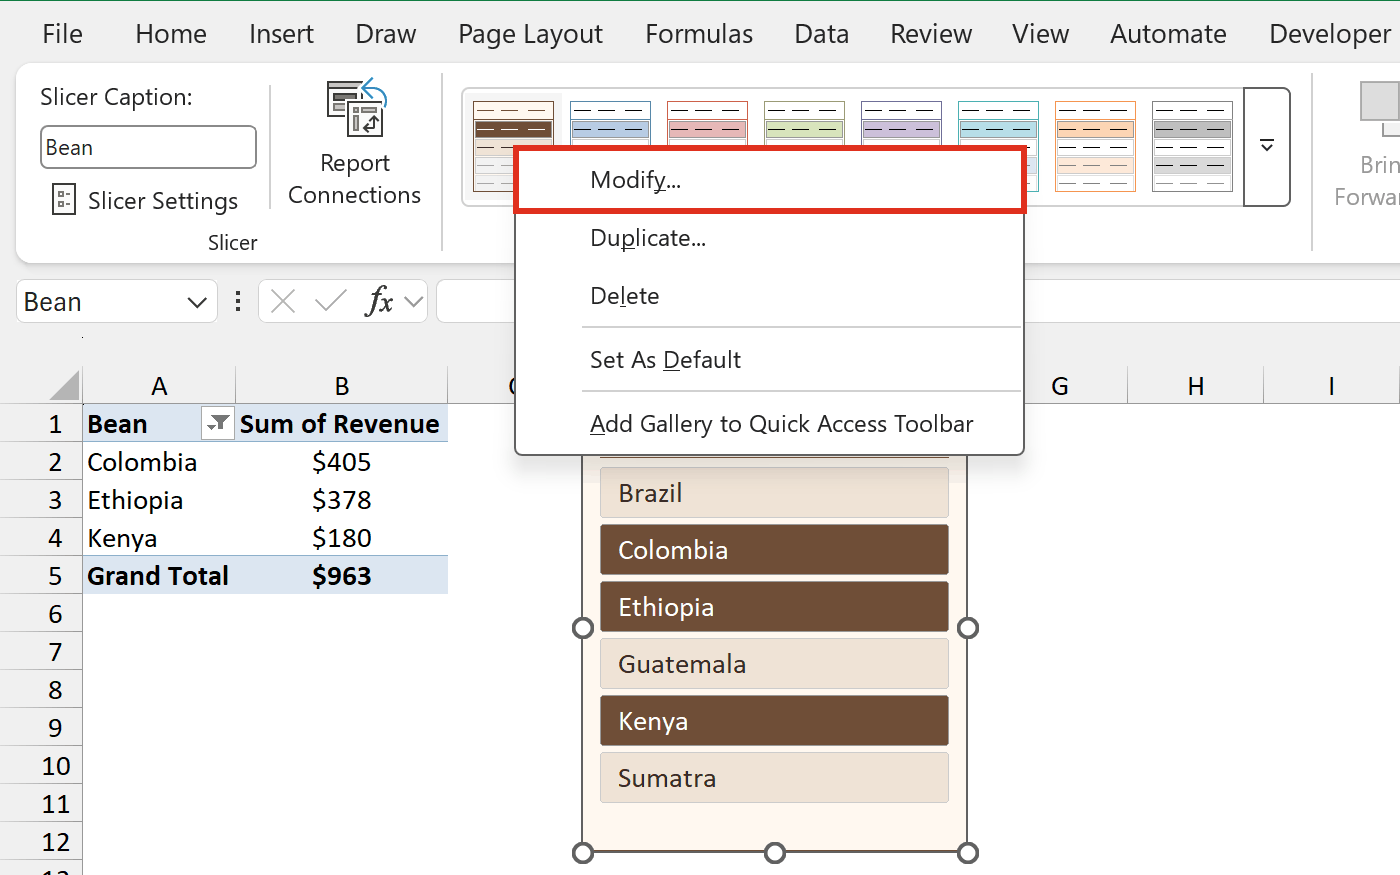
- Select the slicer, go to the Slicer tab, right-click your custom style in the gallery, and choose Modify.
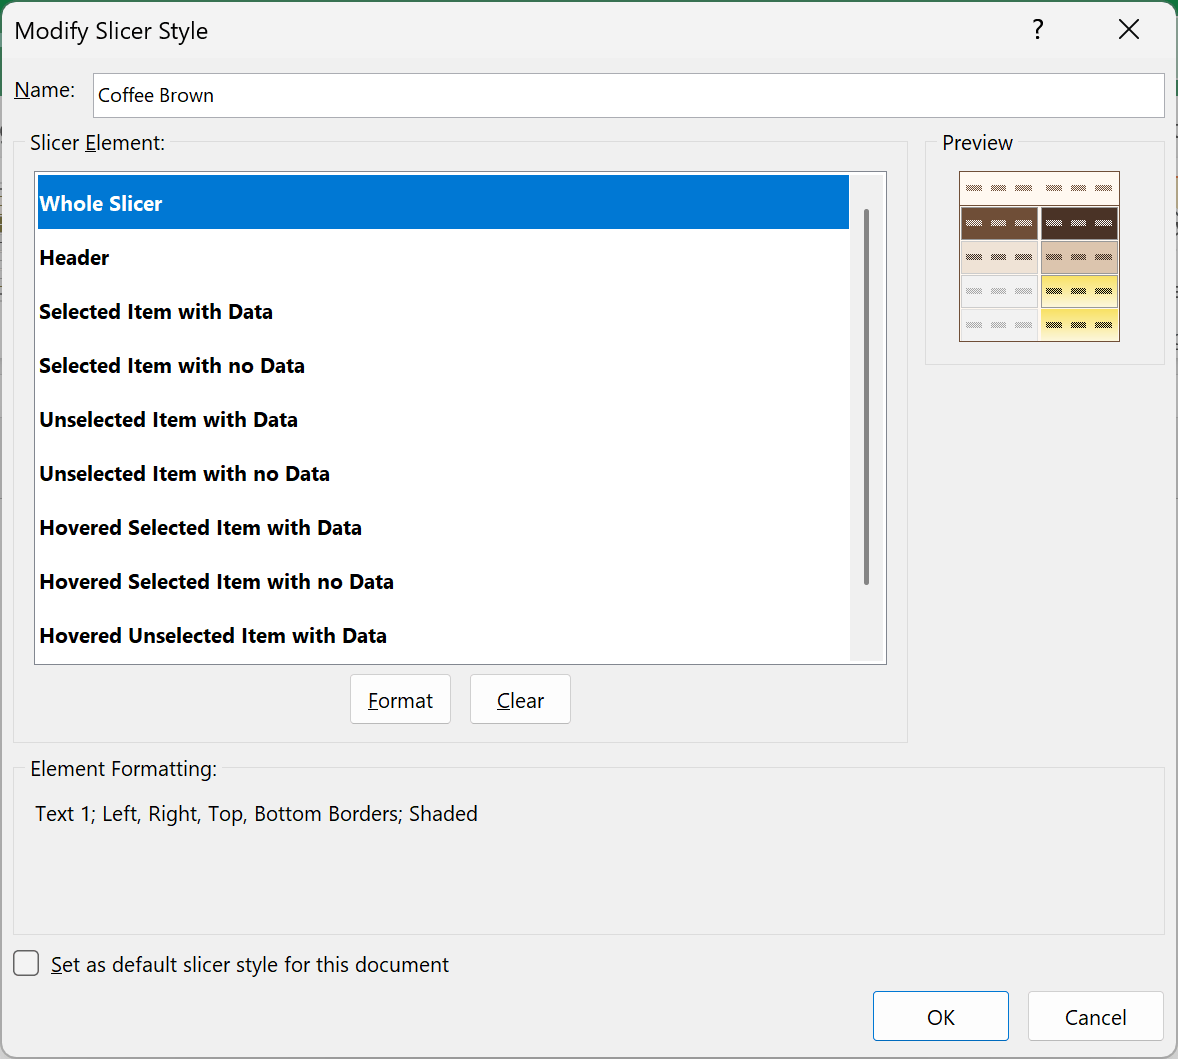
- Select Whole Slicer in the Slicer Element list and click Format.
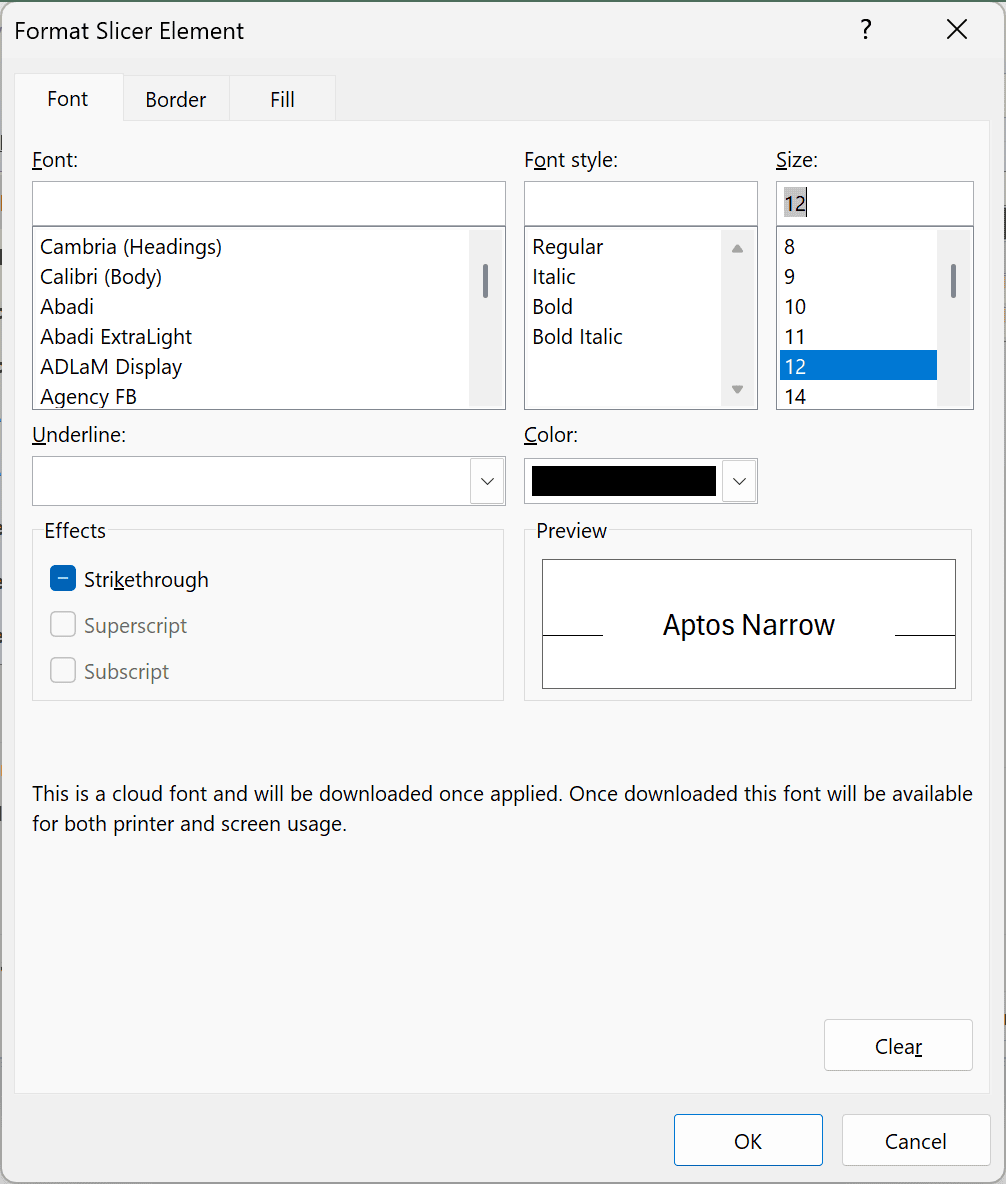
- On the Font tab, pick the font and size you want (I chose 12), then click OK in both dialog boxes.
The header and every button now use the bigger text.
The Whole Slicer font applies to the header and the buttons. To give the header its own size, format the Header element too.
If the bigger text looks cramped, raise the button Height on the Slicer tab. I cover that in the next section.
Note: To change the text color, format the button elements (like Selected Item with Data), not Whole Slicer. Each button element has its own font color, and it overrides the color set on Whole Slicer.
Change Slicer Button Size and Make a Slicer Horizontal
A new slicer stacks its buttons in one column. For a field with only a few items, a single row of buttons takes less space above or below a report.
Below I have a Roast slicer with the Coffee Brown style. Its three buttons, Dark, Light, and Medium, sit one below the other.
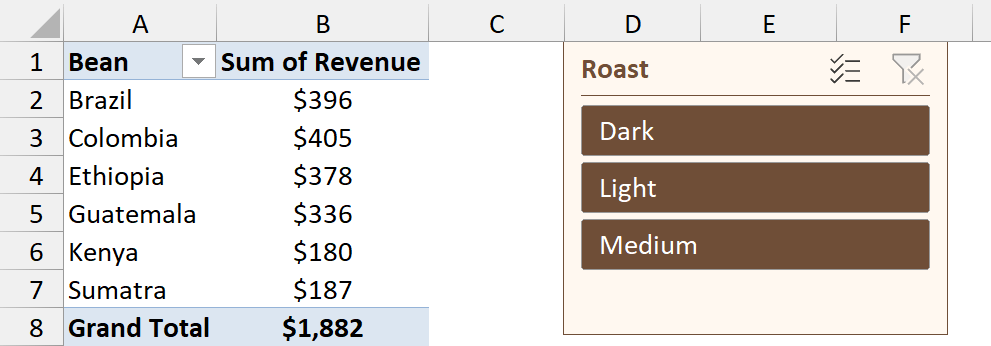
Here are the steps to make the slicer horizontal:
- Select the slicer, go to the Slicer tab, and in the Buttons group, set Columns to 3.
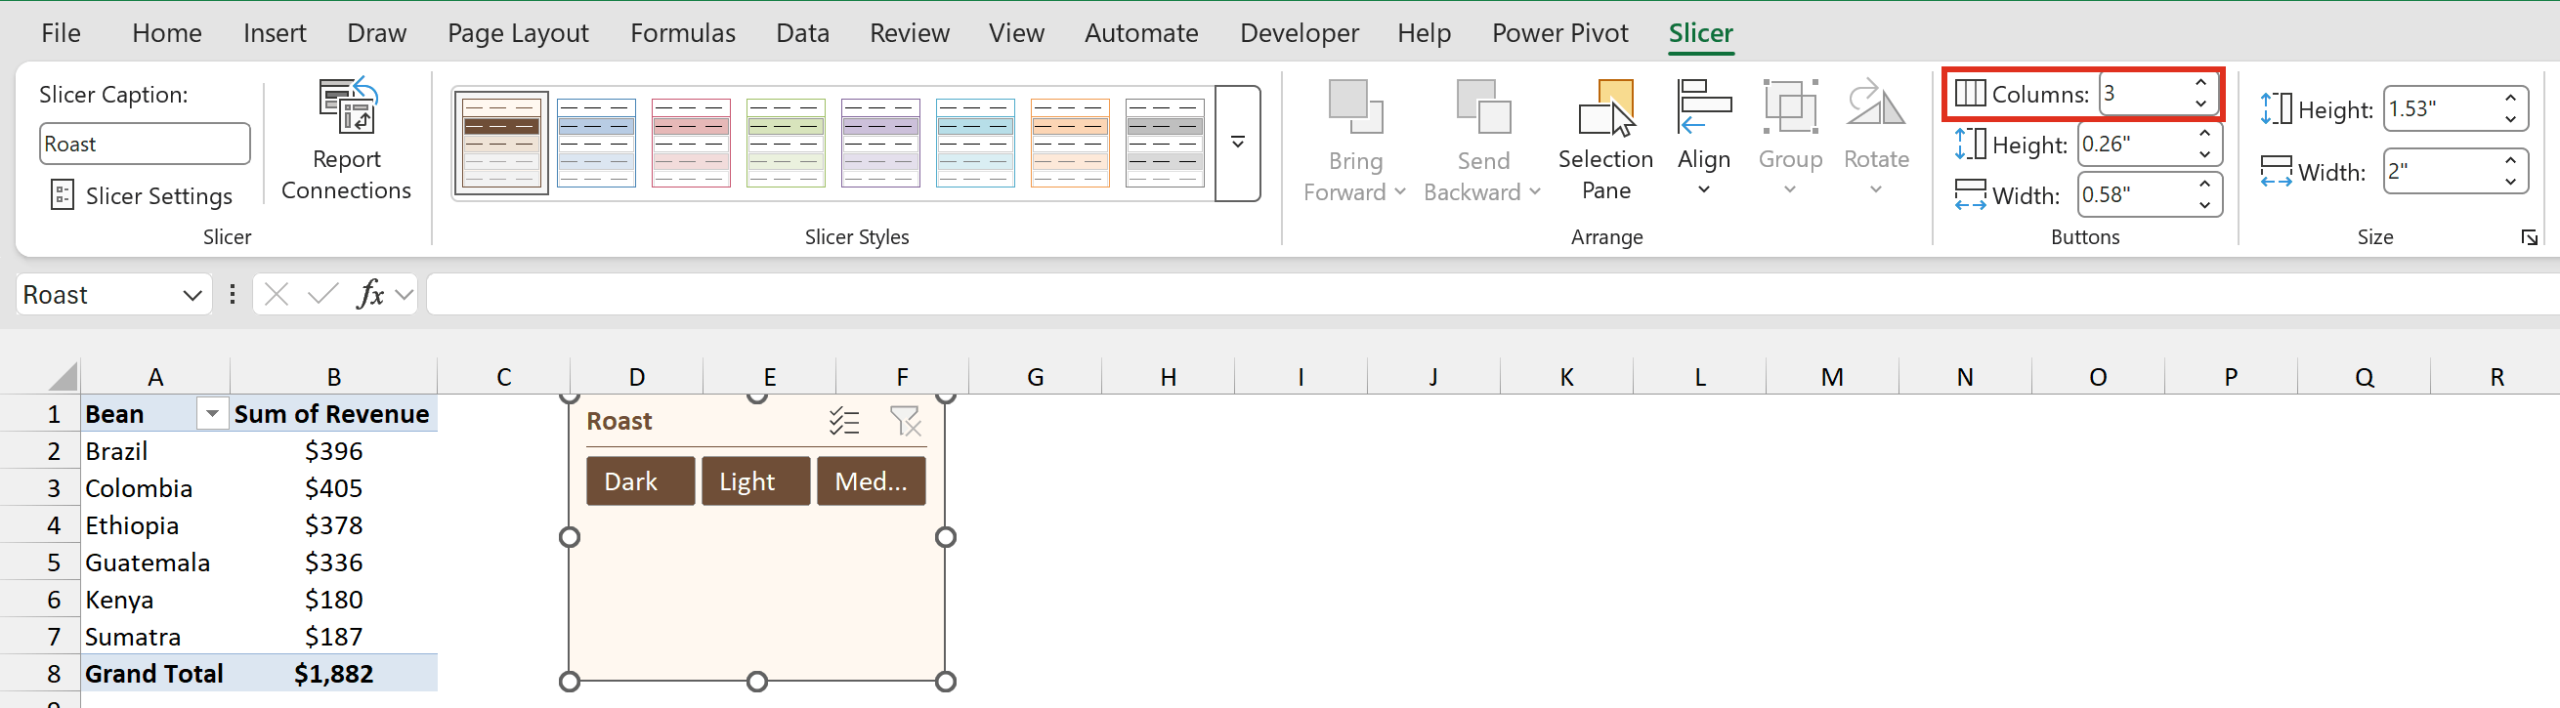
- In the Size group, make the slicer wider and shorter so the three buttons fit in one row. You can also drag the slicer’s edges.
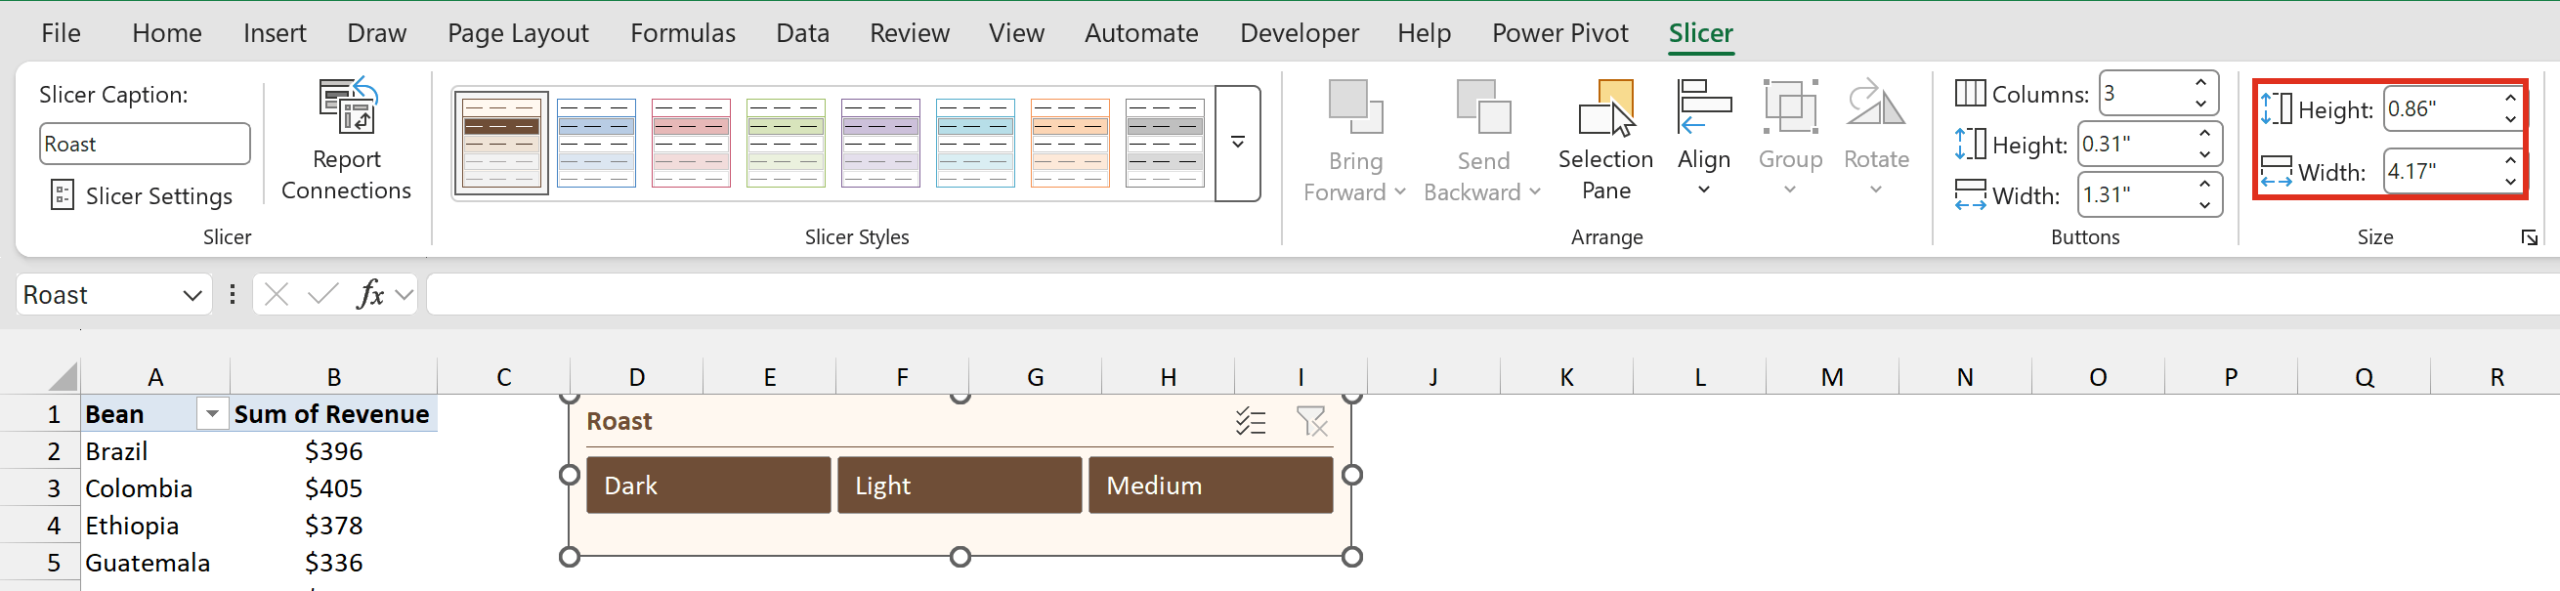
The slicer is now a single row of buttons.
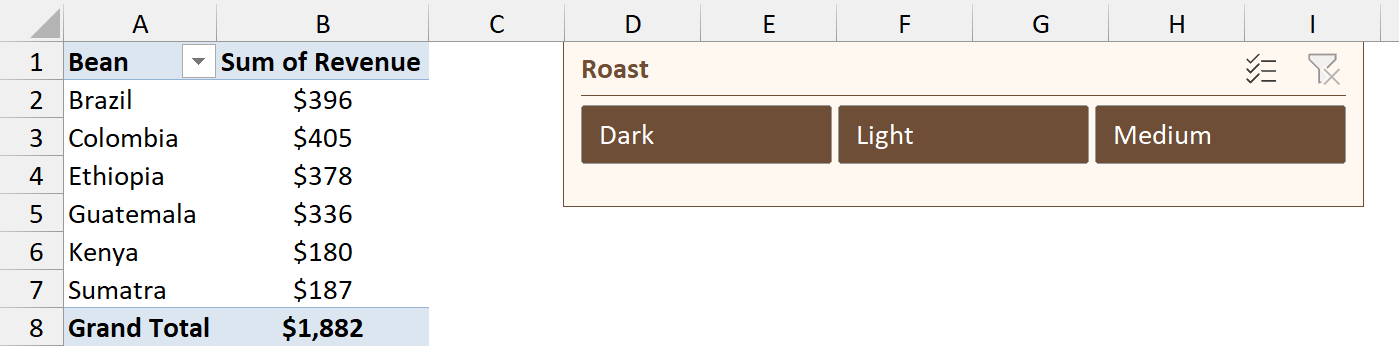
The <strong>Height</strong> and <strong>Width</strong> boxes in the <strong>Buttons</strong> group change the size of each button. The ones in the <strong>Size</strong> group change the whole slicer box.
If a button’s text gets cut off, the slicer is too narrow for the number of columns. Make the slicer wider or use fewer columns.
Remove Slicer Borders to Make It Compact
Every built-in style draws a border around the slicer and around each button. Without those borders, the slicer looks flatter and takes up less room.
Below I have the horizontal Roast slicer from the previous section, with a border around the slicer and each of its buttons.
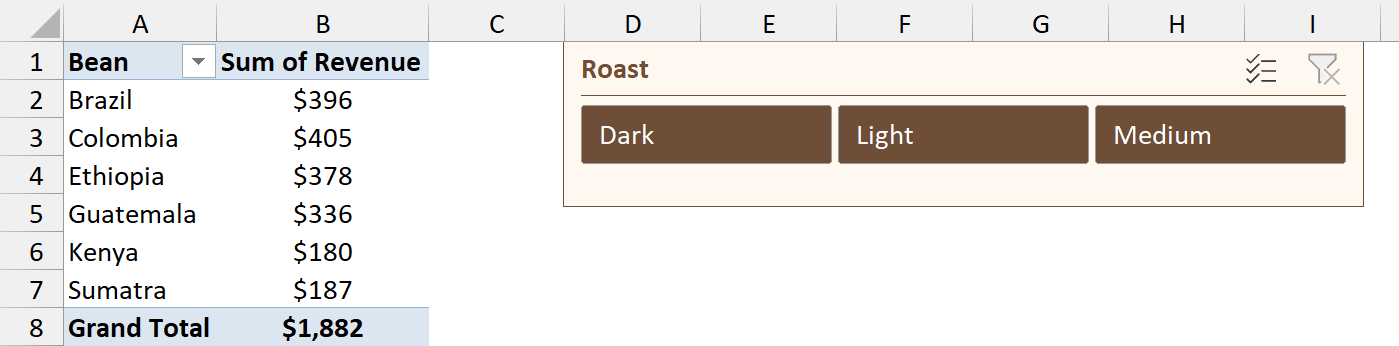
Here are the steps to remove the slicer borders:
- Select the slicer, go to the Slicer tab, right-click your custom style, and choose Duplicate. Give the copy a name (I used Coffee Compact) so you keep the original too.
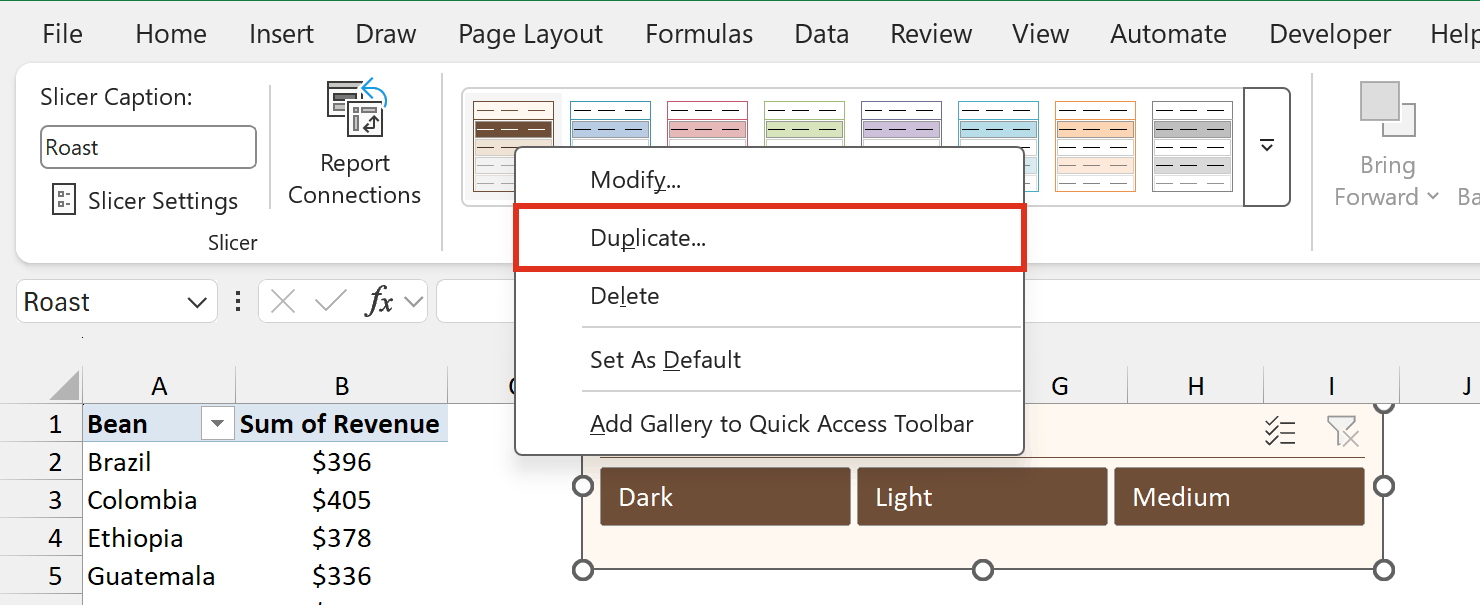
- Select Whole Slicer, click Format, go to the Border tab, click None, and click OK.
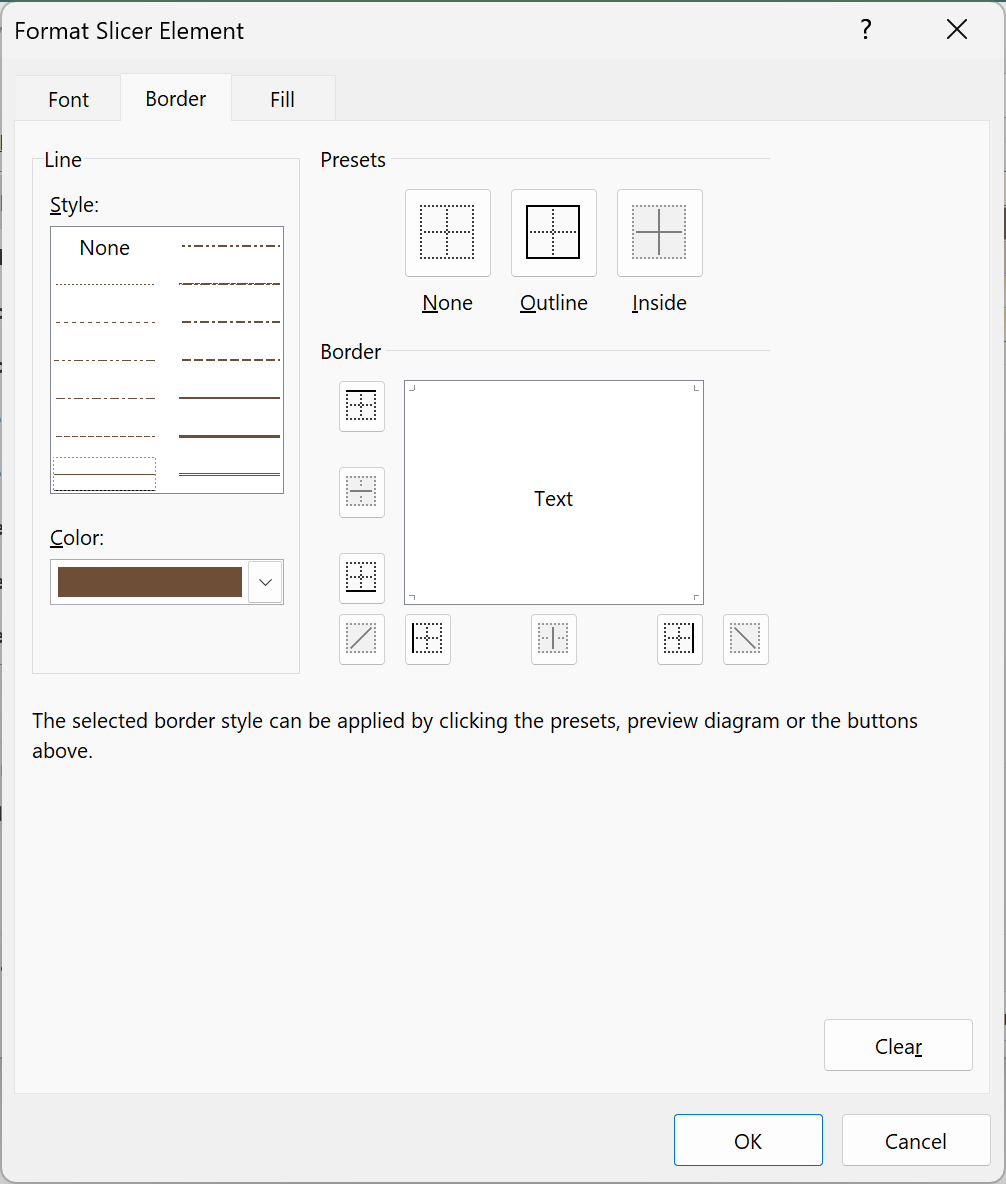
- Do the same for the Header element (this removes the line under the title) and for each of the eight button elements. Then click OK and apply the new style.
Here is the compact version. The outer border and the line under the title are gone.
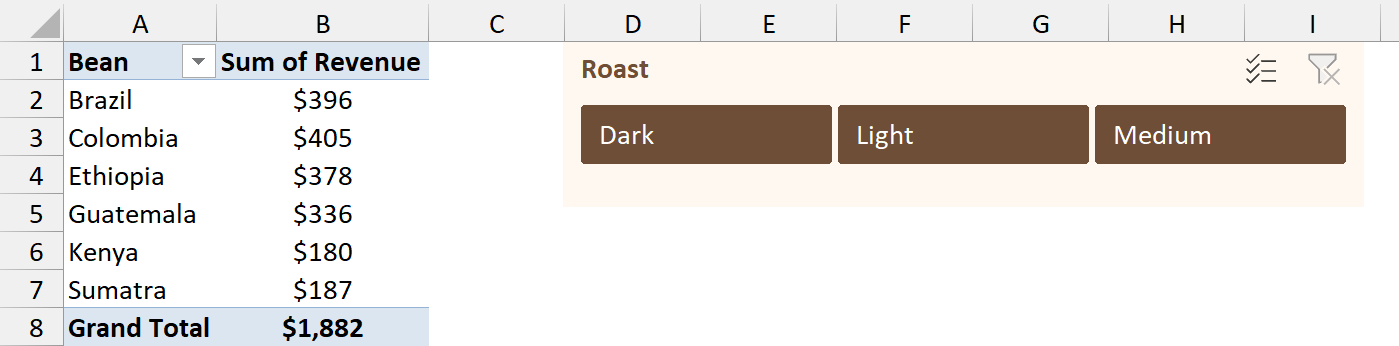
Clear the borders on all eight button elements. If you skip the hovered ones, the border comes back while your mouse is over a button.
To make the slicer even smaller, you can also hide its header. Right-click the slicer, choose <strong>Slicer Settings</strong>, and uncheck <strong>Display header</strong>.
Set a Default Slicer Style
If you use the same custom style everywhere, make it the default. Every new slicer you add to the workbook then starts with that style instead of the blue one.
Here are the steps to set a default slicer style:
- Select any slicer, go to the Slicer tab, right-click the style in the Slicer Styles gallery, and choose Set As Default.
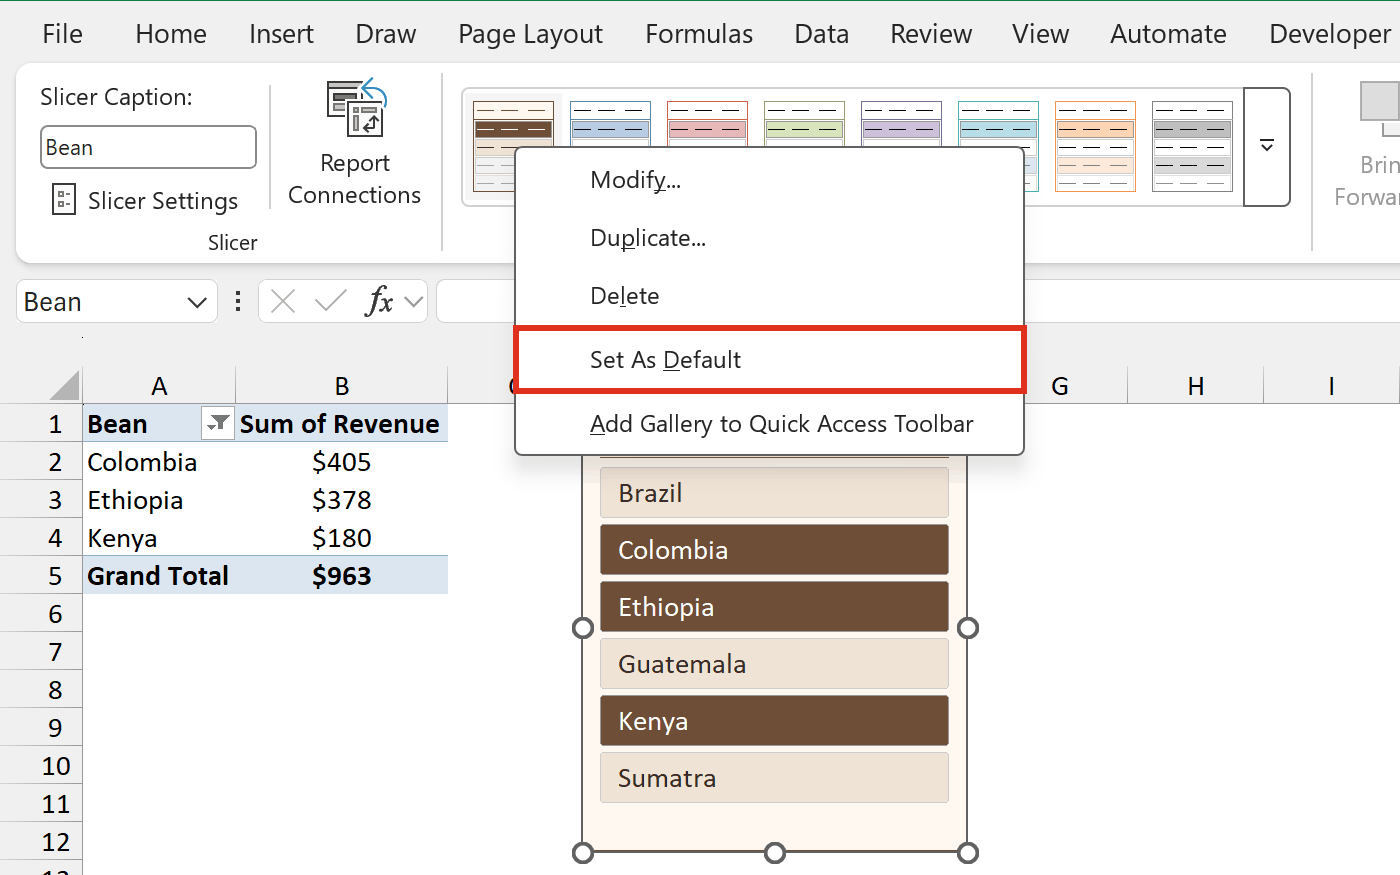
From now on, new slicers in this workbook use the Coffee Brown style. Slicers you already have keep their current style.
The default only applies to the workbook you set it in. Other workbooks still use the blue style.
Copy a Custom Slicer Style to Another Workbook
A custom slicer style is saved inside the workbook you made it in. It doesn’t show up in your other files.
There’s no import button, but there is a simple workaround. When you paste a slicer into another workbook, its style comes with it.
Below I have the coffee revenue workbook with the Bean slicer using the Coffee Brown style. I want the same style in a second workbook.
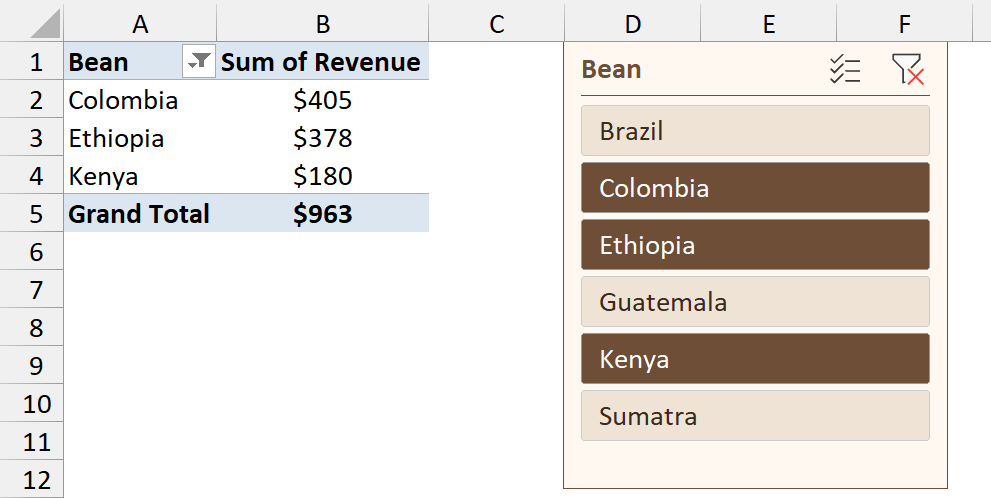
Here are the steps to copy a slicer style to another workbook:
- Open both workbooks. In the one with the style, select a PivotTable slicer that uses it and press Ctrl + C.
- Go to the other workbook, click any cell, and press Ctrl + V.
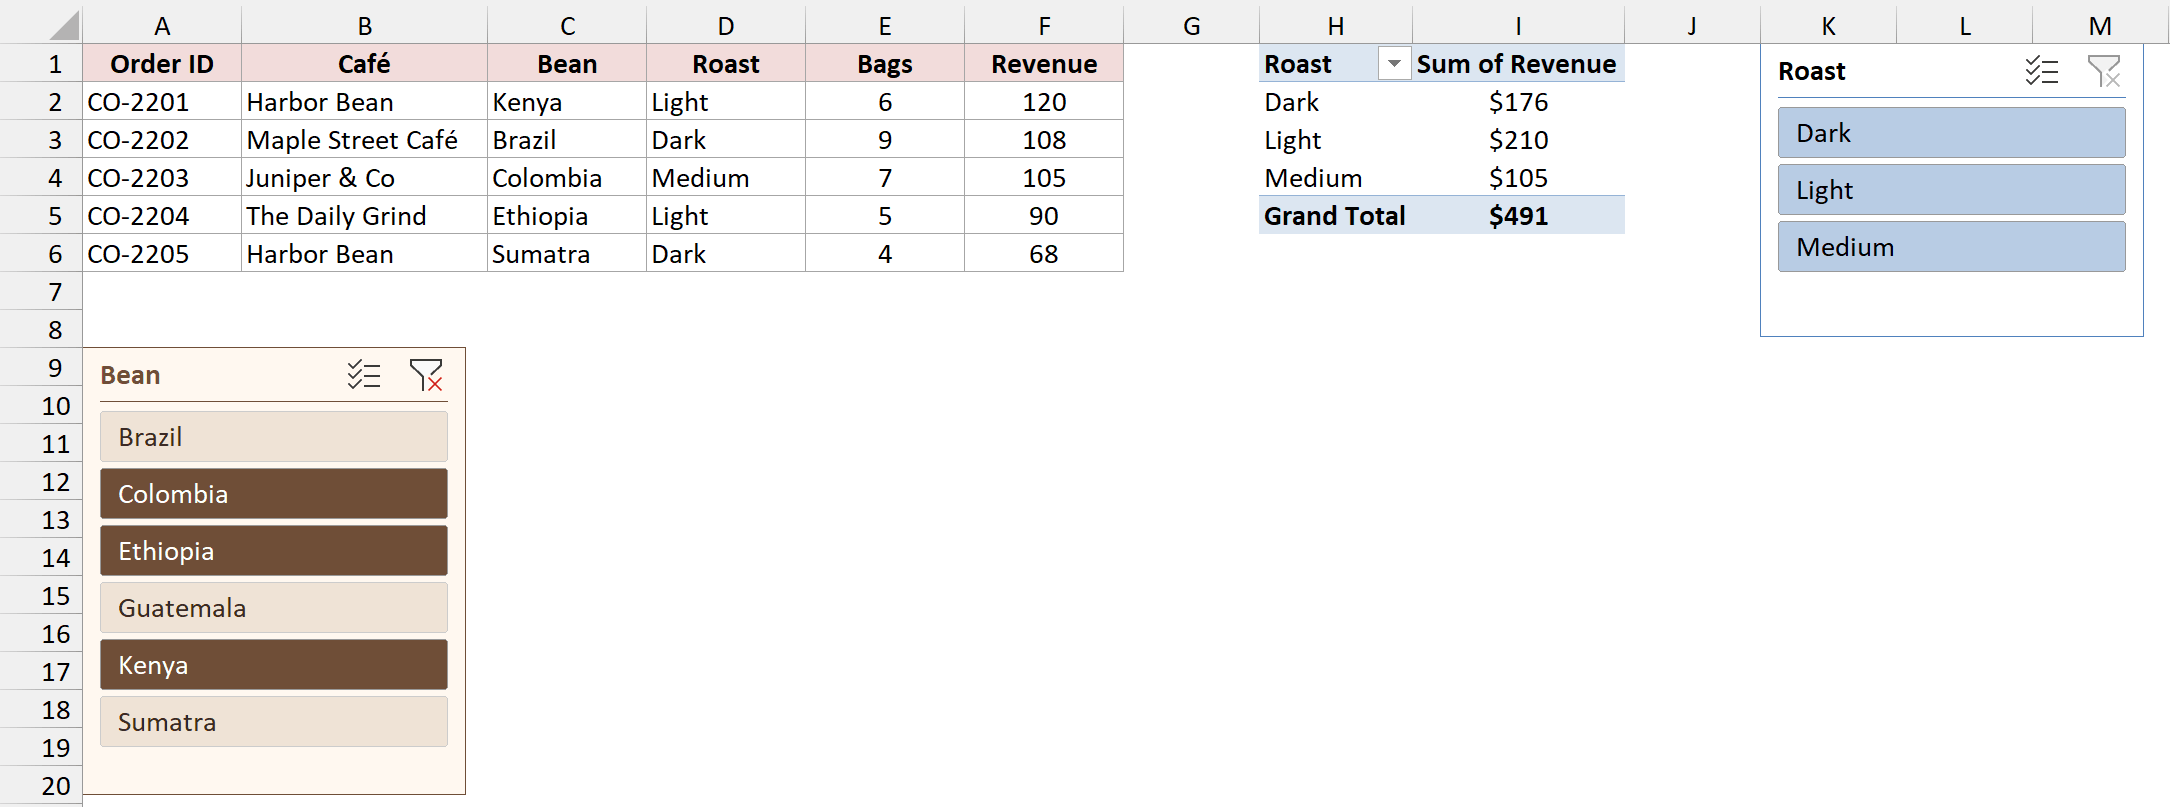
- Select the pasted slicer and press Delete.
The slicer is gone, but Coffee Brown stays in the other workbook’s gallery under Custom. Any slicer you add there can now use it.
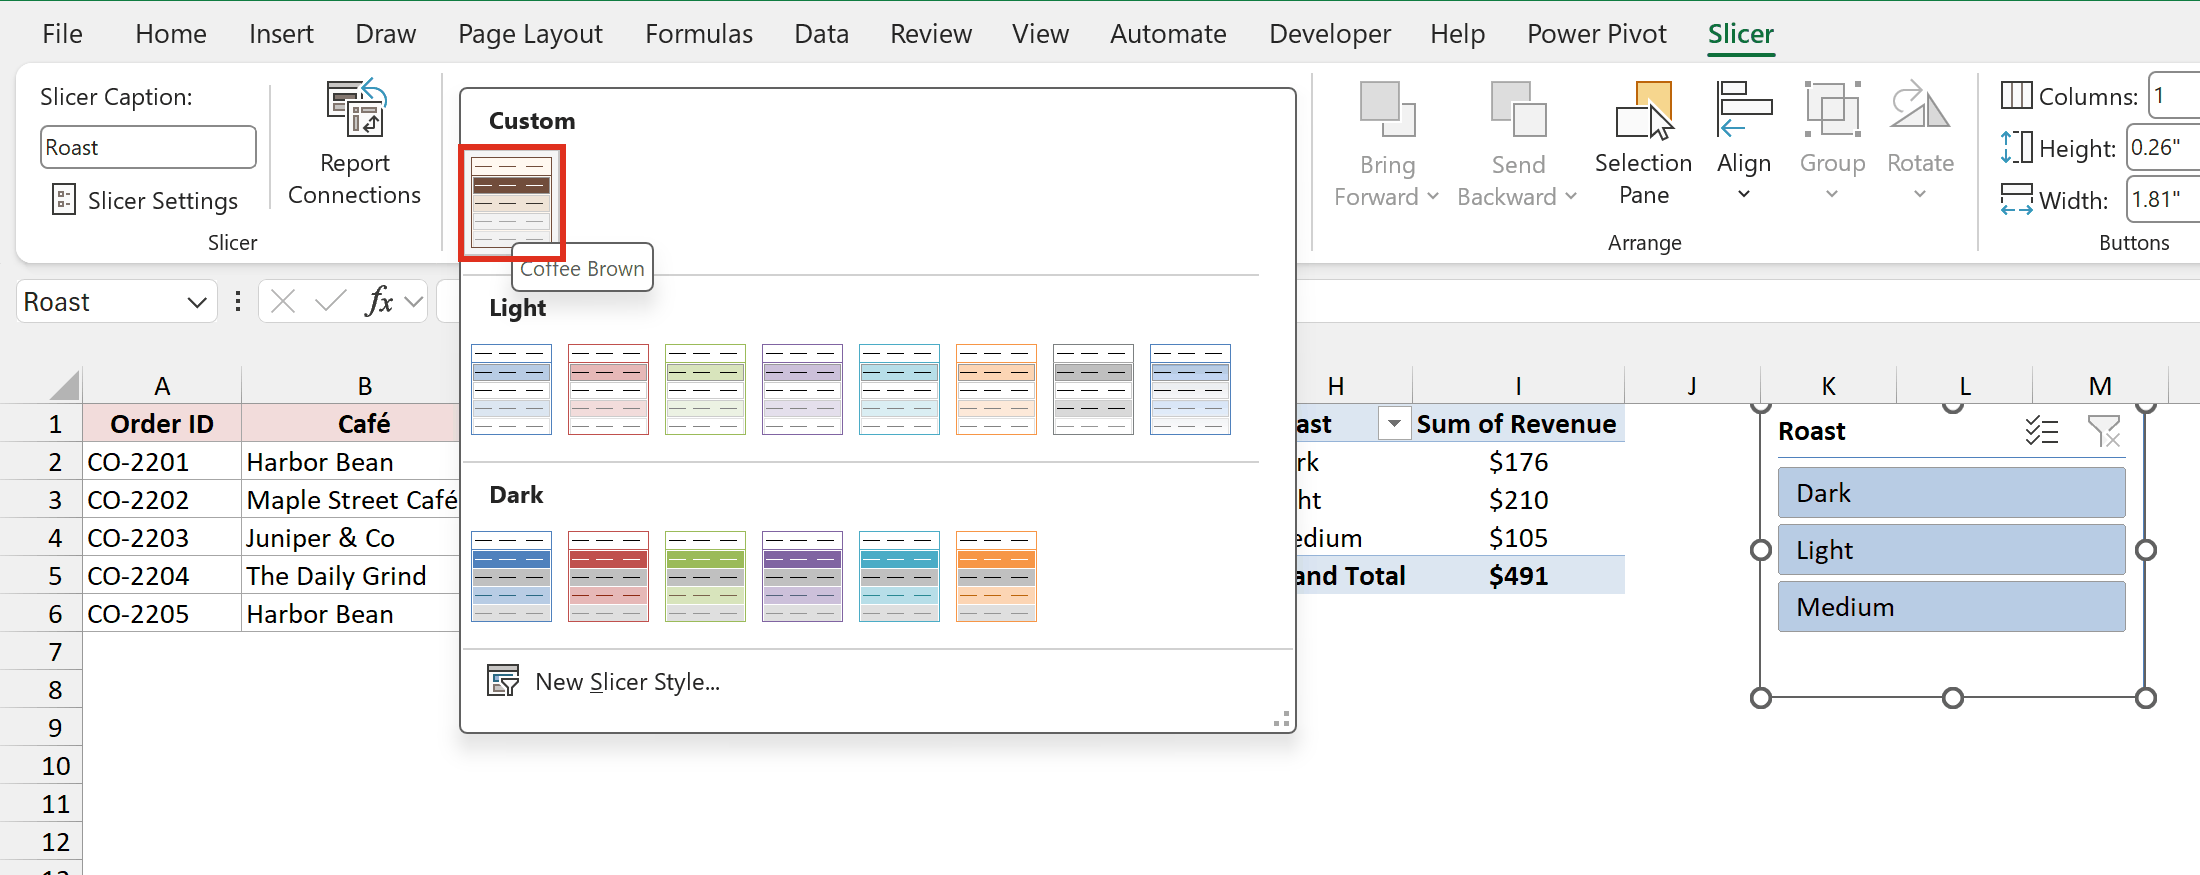
Note: This only works with a PivotTable slicer. If you copy a Table slicer on its own, Excel says Table slicers can’t be copied from one workbook to another. Copy the whole sheet instead (right-click the sheet tab, choose Move or Copy, pick the other workbook, and check Create a copy).
Additional Notes About Changing Slicer Styles in Excel
- Editing a custom style updates every slicer that uses it. You don’t need to reapply the style after changing it.
- Slicer styles are separate from PivotTable styles. Changing one doesn’t change the other, so match them by hand if you want a consistent look.
- Timelines have their own styles. When you select a Timeline, its tab has a Timeline Styles gallery. It works the same way: duplicate a built-in style, then modify the copy.
- Older versions of Excel don’t have a Slicer tab. In Excel 2016 and earlier, the same options sit under Slicer Tools on the ribbon when you select a slicer.
Frequently Asked Questions
Here are some common questions about changing how slicers look in Excel.
Why can’t I modify a slicer style in Excel?
You’re probably trying to modify a built-in style, and Excel locks those. Right-click the style, choose Duplicate, and edit the copy instead.
Why is the font size option greyed out for my slicer?
The Home tab font controls are greyed out when a slicer is selected. Create a custom slicer style and set the font size on its Whole Slicer element.
Can I change the color of just one slicer button?
No. A slicer style colors buttons by their state (selected, unselected, no data, hovered), so every button in the same state looks the same.
Why doesn’t my custom slicer style show up in a new workbook?
Custom slicer styles are saved in the workbook where you made them. Paste a slicer that uses the style into the new workbook, as shown above, to bring it across.
Conclusion
A built-in style is the fastest fix when you only need a new color. For your own colors, a bigger font, or no borders, duplicate one and edit the copy.
Once you have a style you like, set it as the default so new slicers start with it. To reuse it in another file, paste a slicer that uses it.
I hope you found this article helpful.
Other Excel articles you may also like:
