There may be times when you are given a full name and need to remove the middle name so that you are left with the first and last name only.
You’ll be glad to know that there are multiple ways to get this done in Excel.
In this tutorial, I’m going to show you six easy ways to remove the middle name from the full name. I’ll start with the fastest method (Flash Fill) and other methods such as formulas and Find and Replace.
Removing the Middle Name Using Flash Fill
Flash Fill is a useful feature that when turned on, detects patterns.
Once you enter the expected result for one of the cells, subsequent rows can then automatically be filled using Flash Fill (which it does by detecting and following the pattern).
Let’s see how to use Flash Fill to remove a middle name from a full name, and then automatically populate the rest of the cells in the column.
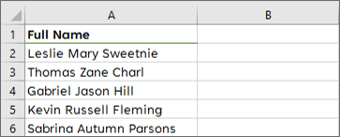
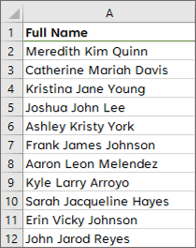
In our sample dataset below, we have a list of full names (including the middle names), and we want to remove the middle name from these.
Below are the steps to remove the middle name using Flash Fill.
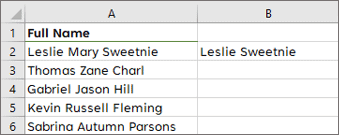
- In cell B2, enter the text Leslie Sweetnie and press Enter. Note that this is the expected result based on the name in cell A2
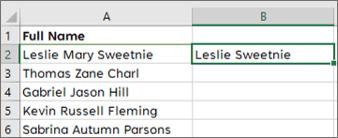
- Now select cell B2 as shown below.
- Go to the Data Tab, and in the Data Tools group, click on the Flash Fill icon

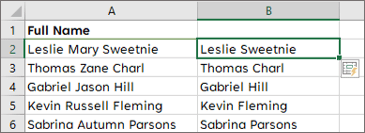
- Flash Fill is smart enough to detect the pattern (that the middle name has been removed). Thus, you should see the following.
Pro Tip: You can also use the keyboard shortcut Control + E, to apply Flash Fill once you have selected cell B2.
Note: The result that you get after using Flash Fill is static, which means that it would not update if you make changes to your data set.
Just be aware that while Flash Fill worked perfectly in our example, there may be times when this is not the case. It is possible that Flash Fill may not recognize the right pattern and then not return the right results. So ensure that you double-check your results when using Flash Fill.
Removing the Middle Name Using Find and Replace
Another quick and easy to remove the middle name from the full name is by using the Find and Replace feature in Excel.
In our sample dataset below, we have a list of full names (including the middle names), and we want to remove the middle name from these.

Below are the steps to remove middle name using Find and Replace:
- Select the cells with the names
- Press Ctrl+H on the keyboard in order to open the ‘Find and Replace’ dialog Box.
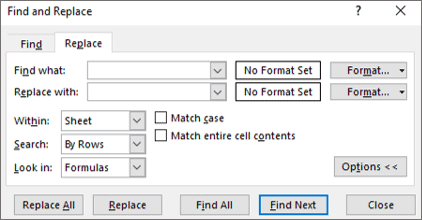
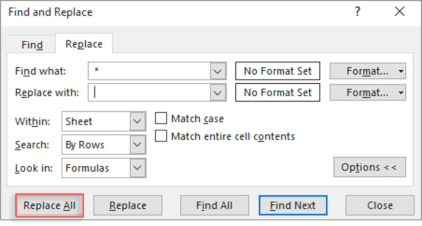
- In the Replace Tab, in the ‘Find what:’ field, enter * (press space first, then an asterisk, and then space character again). This is basically using a wildcard character (asterisk in this case) that represents any number of characters between two space characters. This would find all the middle names flanked with space characters.

- In the ‘Replace with:’ textbox, just enter a space character
- Now click on the ‘Replace All’ button.
- A notification will pop up detailing how many replacements were made. In this case, there were five replacements.
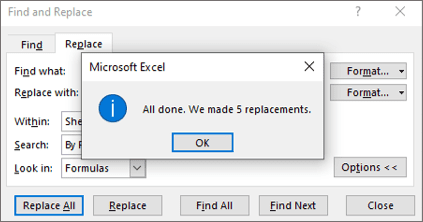
6) Click Ok and then Close. You should see the following.
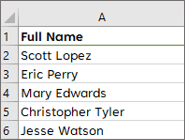
The above steps would remove the middle name from the selected cells.
Note that this method changes the selected cells, so in case you need to have the original names data with the middle names, either make a backup copy of the file or copy the names to some other column and then use Find and Replace.
Note: This method will work even if we have a mix of names (with and without the middle name)
Also read: Switch First and Last Name with Comma in Excel (Flip Names)
Removing the Middle Name Using Text to Columns
We can also remove the middle name from a full name using the Text to Columns Wizard.
The Wizard will take you through the steps needed to separate text, into individual strings based on a delimiter.
This delimiter can be a space, tab, comma, semicolon, or another specified delimiter of your choice.
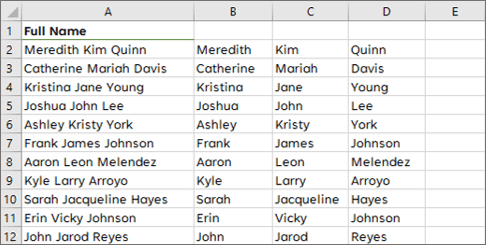
In our sample dataset below, we have a list of full names. We can see that the delimiter in this case is a space. Since the three words are separated by a space.
Below are the steps to use Text to Columns to get rid of the middle name:
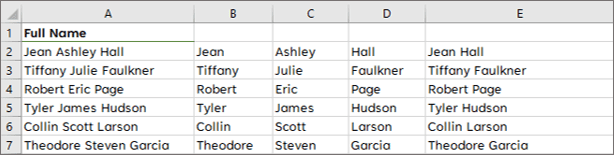
- Select the range A2:A12.

- On the Data Tab, in the Data Tools Group, click on Text to Columns Wizard.

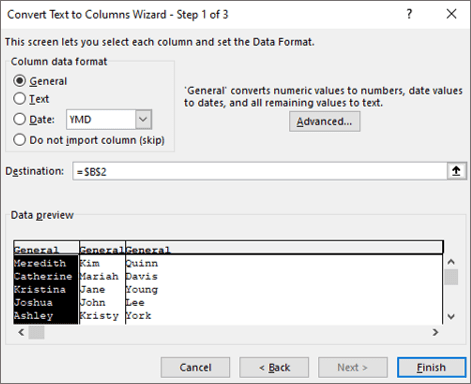
- You should see the Convert Text to Columns Wizard. Select the Delimited option.
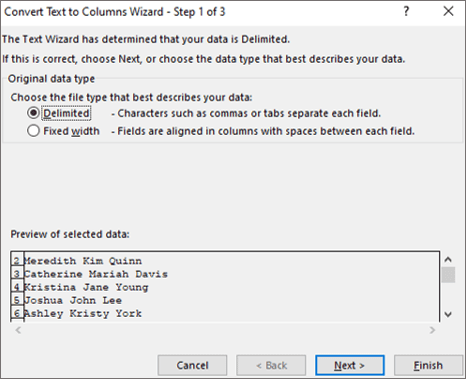
- Click on the Next button.
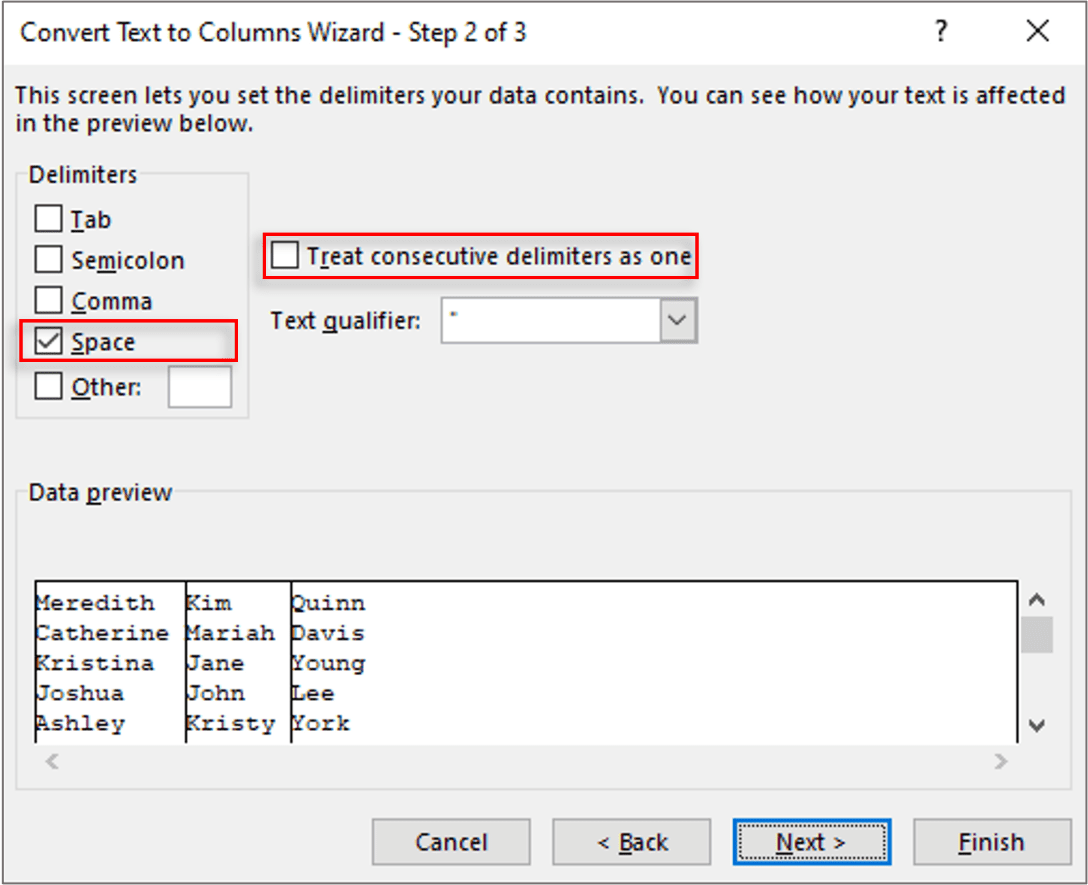
- Make sure all the other options are unchecked, and only the Space option is checked. Make sure the ‘Treat consecutive delimiters as one‘ option is unchecked.
- Select cell $B$2 as the destination, as shown below.
- Click on the ‘Finish’ button and the result is the following
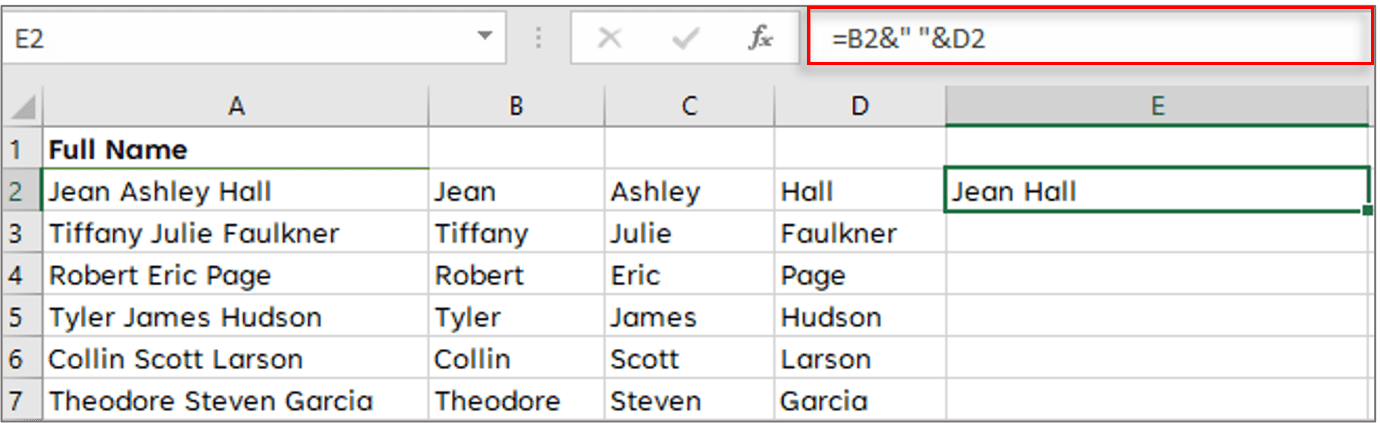
- Enter the following formula in cell E2.
=B2&" "&D2
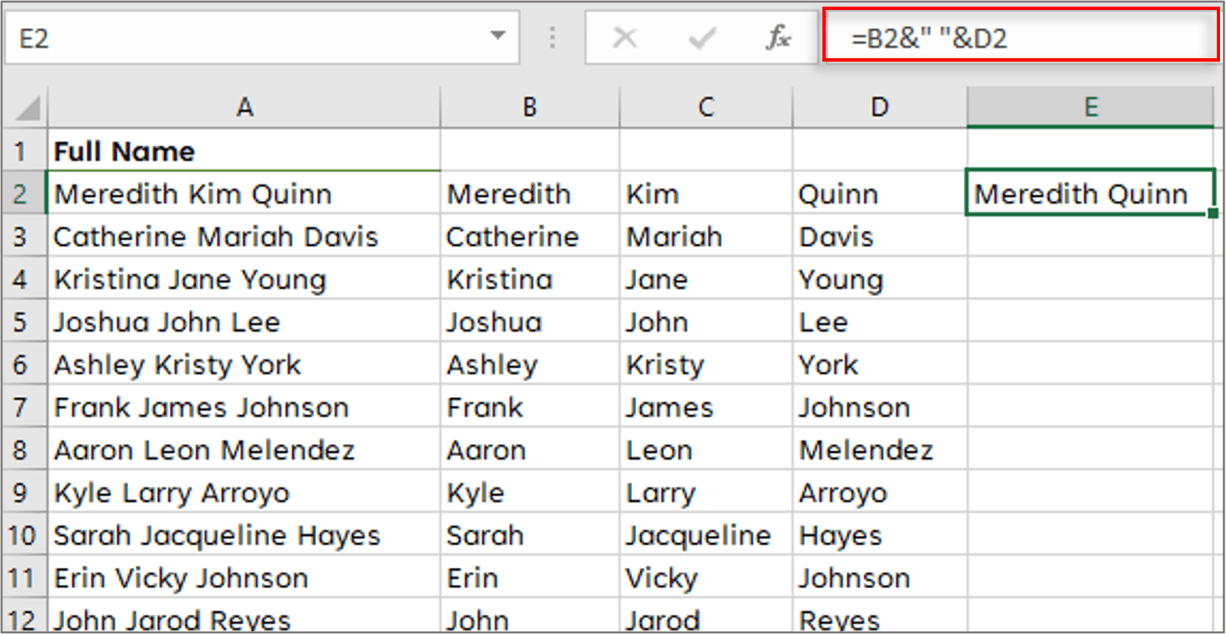
- Drag the formula down the column, to see the following.
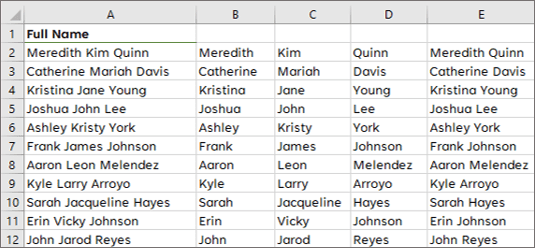
The above method works by first splitting each part of the name (first, middle, and last) into separate columns, and then a simple ampersand operator is used to combine the first and the last name.
Also read: How to Extract Part of Text in a Cell in Excel
Removing the Middle Name Using the TEXTSPLIT Function
We can remove the middle name from a full name, by using the TEXTSPLIT Function.
The TEXTSPLIT Function is a new function available to Office 365 subscribers, and it allows one to split a single text string into multiple strings.
The results spill over into multiple cells automatically. It is quite simple and easy to use and is the formula version of the Text to Columns Wizard.
The syntax of the TEXTSPLIT Function is:
=TEXTSPLIT(text, col_delimiter, [row_delimiter], [ignore_empty], [match_mode], [pad_width])
- text – the text to split. This is a required value.
- col_delimiter – this refers to a character that specifies where Excel should split the text across the columns.
- row_delimiter – this refers to a character that specifies where Excel should split the text across the rows. This is an optional value.
- ignore_empty – this specifies whether Excel should ignore empty values. It can either be TRUE or FALSE. FALSE is the default value, and in this case, Excel creates an empty cell when delimiters are consecutive.
- match_mode – this specifies case-sensitivity. This is an optional value.
- pad_width – this specifies what value Excel should use instead of missing values. The default returned is the #N/A value.
In our source example below, we have a list of full names including middle names.

Below are the steps to use the TEXTSPLIT function to split the first, middle, and last name, and then combine to get only the first and the last name.
- In cell B2 enter the following formula:
=TEXTSPLIT(A2," ")
- Press Enter. This is a dynamic array formula, so once you press Enter, the results spill across the columns

- Drag the formula down the column to get the following.
- Now in cell E2 enter the following formula:
=B2&” “&D2
- Drag the formula down the column, to get the following.
Pro Tip: If you don’t need the original data anymore, make sure you convert the formula results to static values, before deleting the original data. You can do that using the Paste as Values option (copy the range, right-click, and then paste as values)
Removing the Middle Name Using the LEFT, MID, FIND, and LEN Functions
If you’re not using Excel with Microsoft 365 and don’t have access to the TEXTSPLIT function, you can still remove the middle name using the older text functions.
We can remove the middle names from a list of full names by using a combination of the LEFT, MID, FIND, and LEN Functions.
These functions are available in both older and newer versions of Microsoft Excel. They are admittedly a little bit more complicated to use, than the newer Excel TEXTSPLIT function, but it gets the work done.
In our source example below, we have a list of full names including middle names.

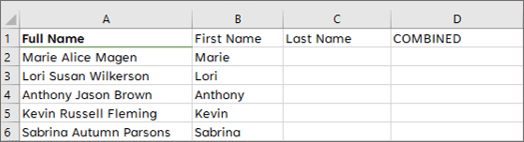
What we want to do is in cell B2, use the LEFT Function in conjunction with the FIND Function to extract the first name only.
- In cell B2, enter the following formula:
=LEFT(A2,FIND(" ",A2)-1)
- Press Enter
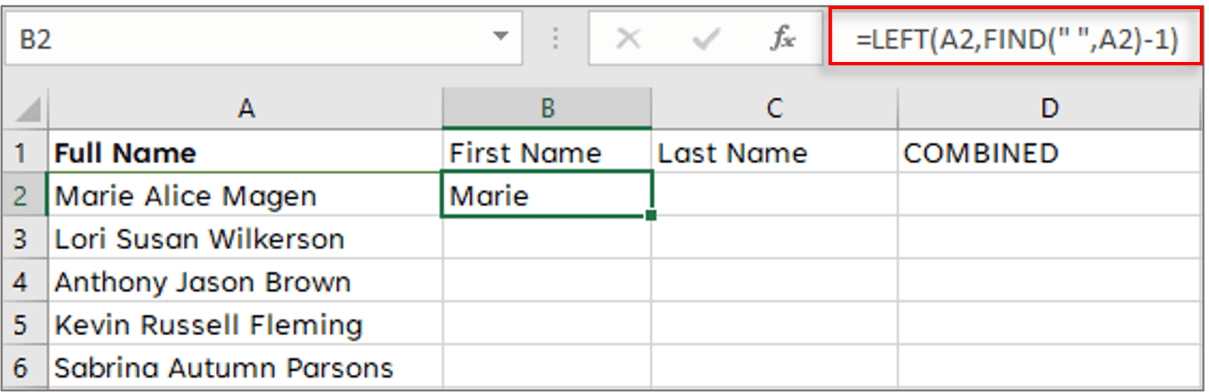
- Drag the formula down the column to get the following.
Now the next thing we need to do is, extract the last name and we are going to use a combination of the MID, FIND and LEN Functions in a formula.
- So, in cell C2, enter the following formula:
=MID(A2,FIND(" ",A2,FIND(" ",A2)+1)+1,LEN(A2))
- Press Enter.
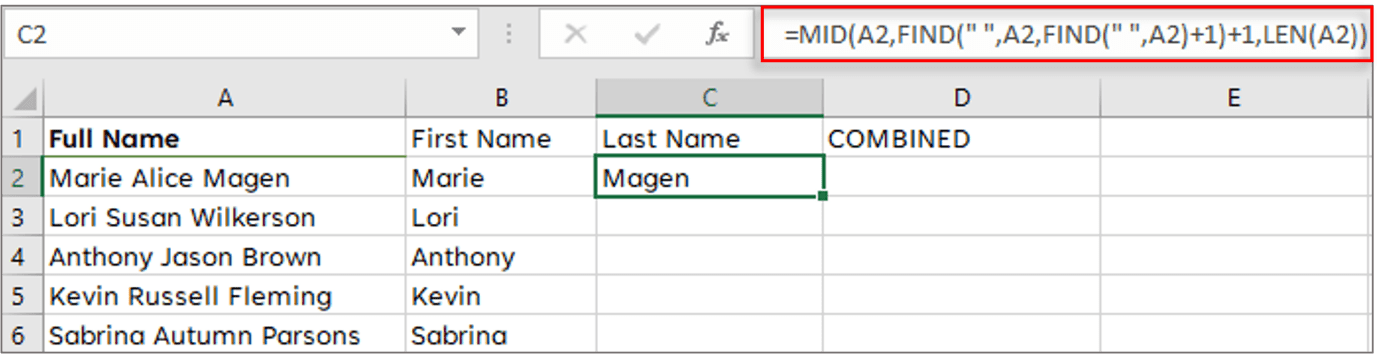
- Drag the formula down the column to get the following.

- Now combine the two formulas as shown below in cell D2.
=LEFT(A2,FIND(" ",A2)-1)&" "&MID(A2,FIND(" ",A2,FIND(" ",A2)+1)+1,LEN(A2))
- Press Enter
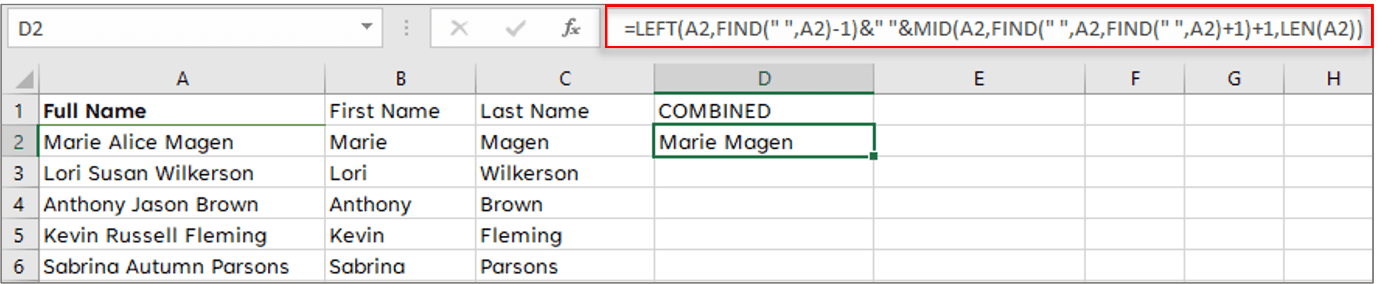
- Drag the formula down the column, to get the following.

Let me quickly explain what we did here:
There are two spaces that separate the three words. We start by using the LEFT Function in conjunction with the FIND Function to locate the first space. Since the first name occurs before the first space, 1 is subtracted in order to only get the characters for the first name without the space.
We then use a combination of the MID, FIND and LEN Functions in order to extract the last name only. We do this by locating the second space character and then extracting all the characters after the second space.
Afterward, we combine the two formulas in cell D2, with a space, in order to combine only the first and the last name.
Pro Tip: Make sure there are no leading, trailing, or double spaces in the names in column A. In case there are, it’s best to use TRIM(A2) instead of A2 in the formula.
Removing the Middle Name Using the TEXTBEFORE and TEXTAFTER Text Functions
We can remove the middle names from a list of full names, by using a combination of the TEXTBEFORE and TEXTAFTER Text Functions.
The TEXTBEFORE and TEXTAFTER Functions are new TEXT functions available to Office 365 subscribers.
- The syntax of the TEXTBEFORE Function is:
=TEXTBEFORE(text, delimiter, [instance_num], [match_mode], [match_end], [if_not_found])
- text – the original text that one wants Excel to extract characters from. This is a required value.
- delimiter – this indicates the point at which you want to extract. So, all the characters in other words before this point will be extracted. This is a required value.
- instance_num – this indicates the instance of the delimiter. The default value is 1. This is an optional value.
- match_mode – this indicates whether the search should consider the case. If 0 is chosen, then this indicates a case sensitive search. If 1 is input, then this indicates a case-insensitive search. The default is 0. This is an optional value.
- match_end – this treats the end of the text as a delimiter. The default is an exact match.
- if_not_found – this allows one to specify what value should be returned if no match is found. The default value is #N/A.
The syntax of the TEXTAFTER Function is:
=TEXTAFTER(text, delimiter, [instance_num], [match_mode], [match_end], [if_not_found])
- text – the original text that one wants Excel to extract characters from. This is a required value.
- delimiter – this indicates the point at which you want to extract. So, all the characters in other words after this point will be extracted. This is a required value.
- instance_num – this indicates the instance of the delimiter. The default value is 1. This is an optional value.
- match_mode – this indicates whether the search should consider case. If 0 is chosen, then this indicates a case sensitive search. If 1 is input, then this indicates a case insensitive search. The default is 0. This is an optional value.
- match_end – this treats the end of the text as a delimiter. The default is an exact match.
- if_not_found – this allows one to specify what value should be returned if no match is found. The default value is #N/A.
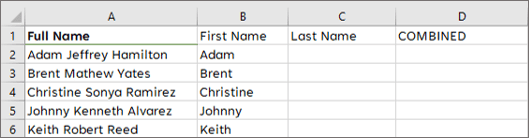
In our source example below, we have a list of full names including middle names.
- In cell B2 enter the following formula:
=TEXTBEFORE(A2," ")
- Press Enter.
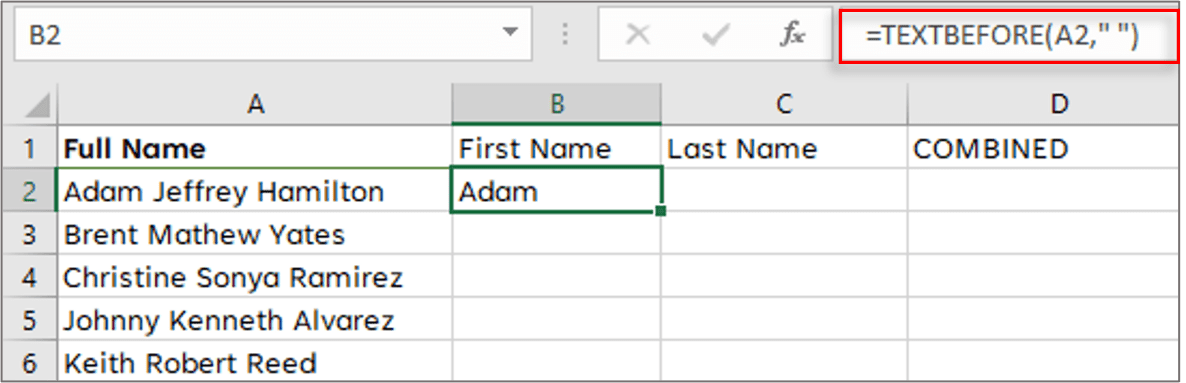
- Drag the formula down the column.
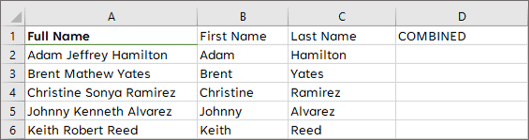
- Now in cell C2, enter the following formula.
=TEXTAFTER(A2," ",2)
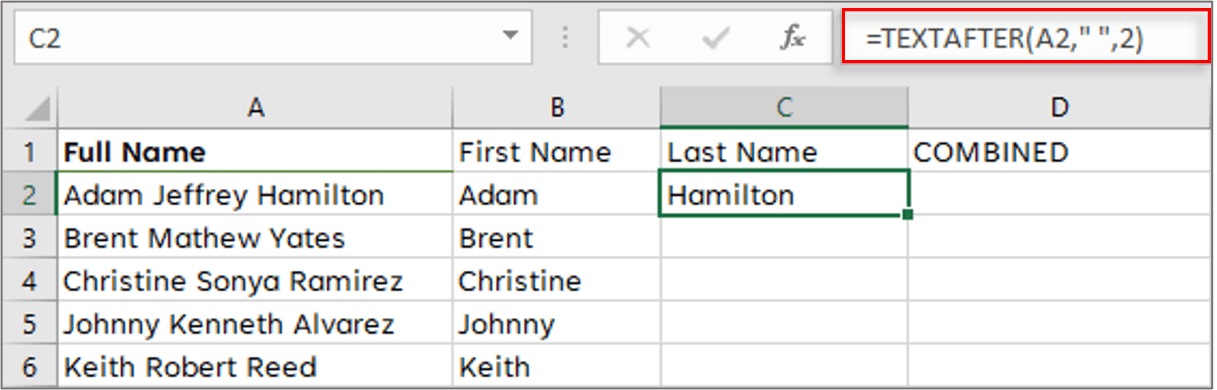
- Now drag the formula down the column.
- Now we have to combine the two formulas in cell D2, so enter the following formula:
=TEXTBEFORE(A2," ")&" "&TEXTAFTER(A2," ",2)
- Press Enter.
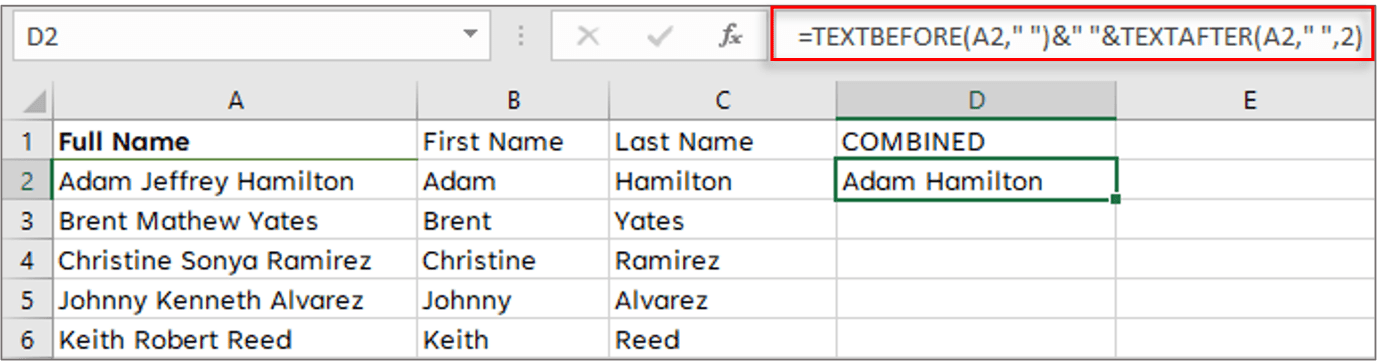
- Now, drag the formula down to get the following.

In this tutorial, we have gone over various methods that you can use to remove a middle name from a full name. You can use the in-built Flash Fill or Find and Replace method, or the Text to Columns to first split the names and then combine only the first and the last name.
I have also covered three different formula methods using simple text functions such as LEFT, RIGHT, MID, LEN and FIND. If you’re using Excel with Microsoft 365, you can use newer functions such as TEXTSPLIT, TEXTBEORE, or TEXTAFTER.
I hope you found this tutorial useful.
Other articles you may also like:
- How to Separate Names in Excel (5 Easy Ways)
- Extract Last Name in Excel – 4 Easy Ways!
- How to Generate Random Names in Excel
- How to Convert Month Name to Number in Excel?
- How to Merge First and Last Name in Excel (2 Easy Ways)
- How to Remove Text after a Specific Character in Excel (3 Easy Methods)
- How to Add Text to the Beginning or End of all Cells in Excel
- How to Separate Address in Excel?