Excel has a feature where it allows you to divide a worksheet into two or four panes.
This helps as you can treat each of these panes separately and can scroll and move within each pane.
This was introduced as a productivity feature as it allows you to work with large datasets with ease.
But what if you want to remove the panes from the worksheet (so you see everything as one single worksheet)?
Remove the Panes with Double-Click (Shortcut)
Another quick way to remove the panes is to simply double click on the line that separates the two panes (a thick gray line).
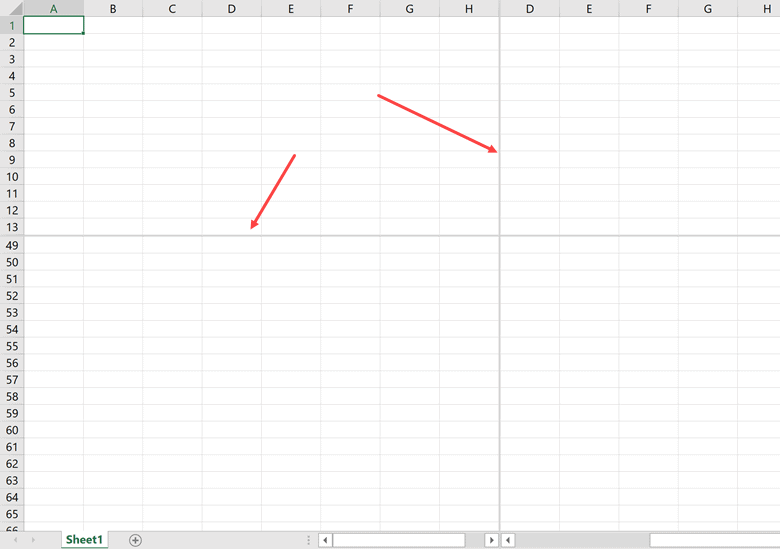
As soon as you double-click on the line separating the two panes, the line would go away.
In case you have your worksheet divided into four panes you need to double-click once on the horizontal line and once on the vertical line.
If you’re not a huge fan of using the mouse and would rather prefer a keyboard shortcut to get rid of the panes use the below one:
ALT + W + S
Also read: How to Remove Page Breaks in Excel?
Remove the Panes using the Ribbon
Below are the steps to remove the panes from an Excel worksheet:
- Click the View tab in the ribbon
- In the Window group, click on the Split option
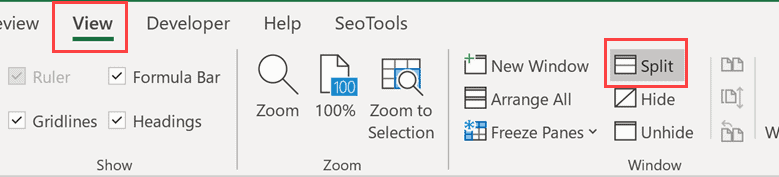
The above steps would remove all the panes and give you back a single wholesome worksheet.
So these are two simple ways to remove the panes from a worksheet in Excel.
I hope you found this Excel tutorial useful!
Other Excel tutorials you may like:
- How to Remove Dashes (-) in Excel?
- How to Remove Dotted Lines in Excel
- How to Remove Commas in Excel (from Numbers or Text String)
- How to Remove Apostrophe in Excel
- How to Press Enter in Excel and Stay in the Same Cell?
- How To Go to the Top of the Page in Excel (Shortcuts)
- How to Remove Gridlines in Excel (Shortcut + VBA)
- Apply Border to Cells in Excel (Shortcut)
- How to Remove Borders in Excel?
- Shortcut to Freeze Panes in Excel