There are times when you may need to remove the year component from a date in Excel.
For example, before you send the list of company employees’ birth dates to the person tasked with sending birthday wishes, you may need to remove the year from the employees’ dates of birth to protect their privacy.
This tutorial shows you four techniques on how to remove the year from a date in Excel.
Method #1: Remove Year from Date Using Format Cells Dialog Box
We can use the Format Cells dialog box to change the format of the date to display only the day and the month.
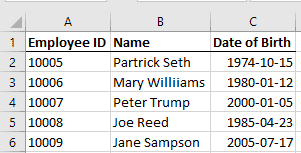
Let’s consider the following dataset of employee data.
We want to remove the year from the dates using an Excel built-in date format that displays only the day and the month.
We use the following steps:
- Select the range C2:C6 from which we want to remove the year.

- Press Ctrl + 1. This opens the Format Cells dialog box.
- Click the Number tab, select the Date category, choose either of the two format options indicated below, and click OK. In this case, we go with the second option.

The dates are displayed without the year.

Note: The above method does not change the date you get as the result. While you may not see the year in the date in the result, in the back-end, the date continues to be the same serial number as it was before. All we have done is change the format of the cell so that the date is displayed without the year. However, this can easily be changed to show the year if you want by changing the format of the cells.
Also read: How to Convert Text to Date in Excel?
Method #2: Remove Year from Date Using Number Format Drop down in the Ribbon
We can use the Number Format drop-down on the Ribbon to change to a date format that displays only the day and month.
Suppose we have the following dataset of employee data.

We want to remove the year from the dates using a format on the Number Format drop-down.
We use the following steps:
- Select the range C2:C6 from which we want to remove the year.

- Click the Home tab, open the Number Format drop-down in the Number group and select the short date format.

The dates are displayed without the year.

Note: Only use this technique if you want to send this dataset as a printout. Otherwise, someone can easily display the full date of birth by changing the date format.
Method #3: Remove Year from Date Using Custom Number Format
We can apply a custom number format that displays only the day and month parts of a date.
Let’s consider the following dataset of employee data.

We want to apply a custom number format that excludes the year part in the display of the employee birth dates.
We use the following steps:
- Select range C2:C6.
- Press Ctrl + 1. This opens the Format Cells dialog box.
- Click the Number tab, select the Custom category in the Category box on the left, select the dd-mmm format in the Type box on the right, and click OK.

The dates are displayed without the year part.

Custom number format allows you to do a lot more customizations as compared with the options you get in the format drop-down (method covered before this one).
In this example, I have used the custom format that shows the day value, followed by a hyphen and then the year value. Below are some formats you can use:
- dd-mmmm – will show the day and the full month name (such as 15-October)
- dd mmmm – will show the day and the full month name without the hyphen in between (such as 15 October)
- dd-mm – will show the day number and the month numbers (such as 15-10)
- ddd, dd-mmm – will show the short day name, followed by the day and the month (such as Sat, 15-Oct)
- dddd, dd-mmm – will show the full day name, followed by the day and the month (such as Saturday, 15-Oct)
Method #4: Remove Year from Date Using the TEXT Function
We can use the TEXT function to remove the year from a date in Excel. The TEXT function changes a value to a text string in a specific number format.
Let’s consider that we have the following dataset of employees’ data.

Using the TEXT function, we want to remove the year from each employee’s date of birth. Instead, we want to display only the day and the month.
Below are the steps to use the TEXT function to remove year from date:
- Select cell D2 and enter the following formula:
=TEXT(C2,"mmm-dd")

- Drag down or double-click the fill handle to copy the formula down the column. This will give you the result as shown below where the year value has been removed from all dates in column C

- Select range D2:D6 and press Ctrl + C to copy it.

- Press Ctrl + Alt + V. This opens the Paste Special dialog box. Select the Values option in the dialog box and click OK.

The dates without the year are pasted back into the range as values, not formulas.

- Click the letter header of column C to select the column. Right-click the column and select Delete on the shortcut menu that appears.

The command deletes column C, and we have our dataset with the year removed from the employees’ dates of birth.

Note: In general, dates are stored as numeric values in Excel, which allows us to use them in numeric calculations. However, in the above method, we have used the TEXT function, and the output of the TEXT function is a text string, which can not be used in formulas as dates.
Method #5: Remove Year from Date Using Combination of CONCAT, MONTH, and DAY Functions
We can apply a formula that combines the CONCAT, MONTH, and DAY functions to remove the year from a date in Excel.
The CONCAT function joins a range or list of text strings.
The MONTH function returns the month number, from 1 (January) to 12 (December). The DAY function returns the day of the month, a number from 1 to 31.
Let’s consider the following dataset of employees’ data.

We want to remove the year from each employee’s date of birth using a formula that combines the CONCAT, MONTH, and DAY functions. We want to display only the day and the month.
We use the following steps:
- Select cell D2 and type in the following formula:
=CONCAT(MONTH(C2),"/",DAY(C2))

- Click the Enter button on the formula bar to enter the formula. This enters the formula and leaves the cell selector as is. Copy the formula down the column by double-clicking on the fill handle or dragging it down.

- Select the range D2:D6 and press Ctrl + C to copy it.

- Press Ctrl + Alt + V. This opens the Paste Special dialog box. Select the Values option in the dialog box and click OK.

The dates without the year are pasted back into the range as values and not formulas.

- [Optional] Delete column the column that has the dates that include the year

In case you want to show the day as numbers but the month as text, you can use the below formula.
=CONCAT(DAY(C2),"-",TEXT(MONTH(C2),"mmm"))
The output of this formula is a text string, so you won’t be able to use the resulting date as a numeric value in formulas
In this tutorial, I covered five techniques to remove year from a date in Excel.
If you want to keep the date intact and only change the way how it’s shown in the cell in Excel, you can do that by changing the format of the cell
Other Excel articles you may also like:
- How to Separate Date and Time in Excel
- How To Combine Date and Time in Excel
- Calculate Days Between Two Dates in Excel (Workdays/Weekends)
- How to Calculate the Number of Months Between Two Dates in Excel?
- How to Change Date and Time to Date in Excel
- How to Convert Days to Years in Excel (Simple Formulas)
- How to Convert Date to Month and Year in Excel
- How to Insert Date in Excel?