A lot of times, when I download data from a database or from the web, it has the time as well as the date in the same cell.
And many times, users often enter the data where there is a date as well as time.
Now, what if I don’t want the time part and want the cells to show the date portion (and remove or hide the time portion).
There is not one, but many different ways to change date and time values in a cell to only date in Excel.
In this tutorial, I am going to show you how to remove/hide the time from the date in Excel so that you only see the date in the cell. We will be using some in-built cell formatting methods, a simple formula, as well as the VBA method.
Format Cells Method to Hide Time and Only Show Date
The Format Cells method is by far the easiest and simplest way to change the date and time to only the date in Excel.
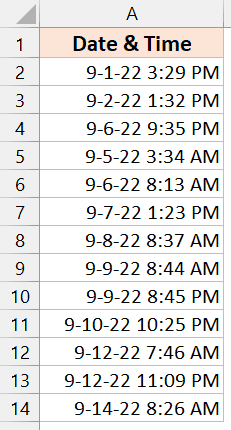
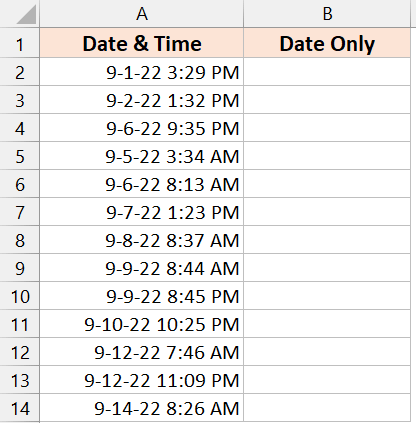
Below you will see a data set where there is a list of dates and times in column A. We will remove the time portion so that you only have the date in this cell.
Here are the steps to change the cell format remove the time part and only show the date:
- Click on the cell or range of cells that you want to format.
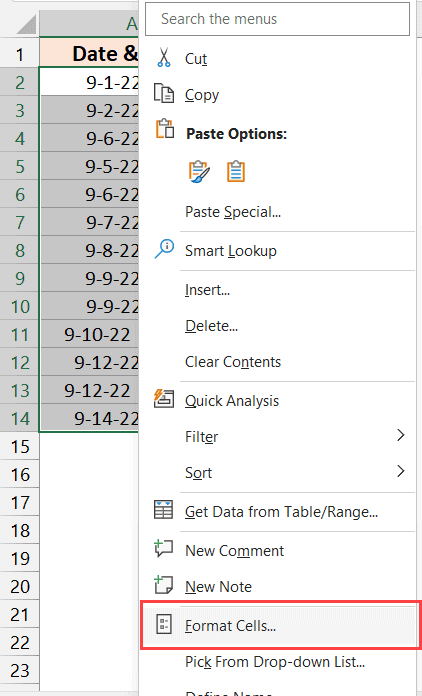
- Right-click on the selected cells
- Click on the Format Cells option. This will open the Format Cells dialog box.
- If not selected already, select the ‘Number’ tab, and within the Category options, select the ‘Date’ option
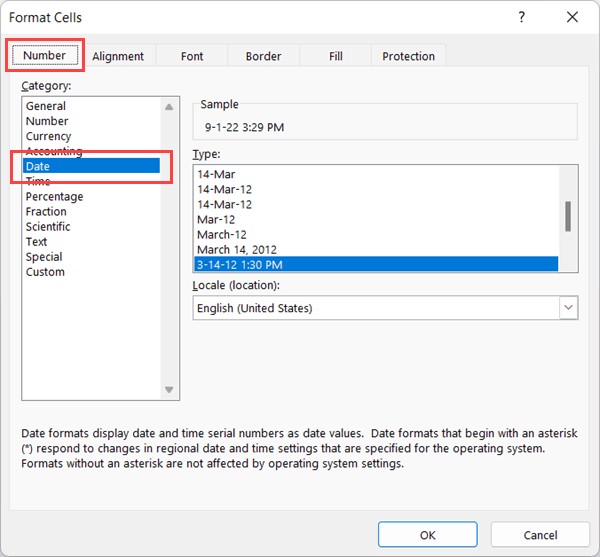
- In the Type options, select the option that only shows the date and doesn’t show the time
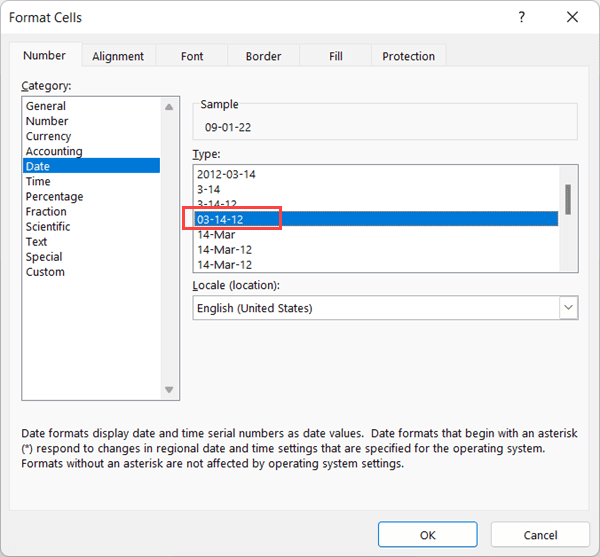
- Click Ok
The above steps would change the formatting of the cell so that the time part is removed and you only see the date in each cell
Note that with this method, we are not changing the content of the cell. We are only changing what is being shown to the user. In this method, when you’re done with all the steps, you would not see the time part in the cell, but it does not mean that it has been removed. All we have done is change the format of the cell so that it only shows the date and not the time. In reality, the values in the cellar exactly the same as before.
Also read: How to Separate Date and Time in Excel (7 Easy Ways)
Using MONTH, DAY, and YEAR Function to Create the Date
When you want to pull the date from the date and time you can also use the MONTH, DAY, and YEAR functions to pull the month, day, and year values respectively, and then you create the date yourself.
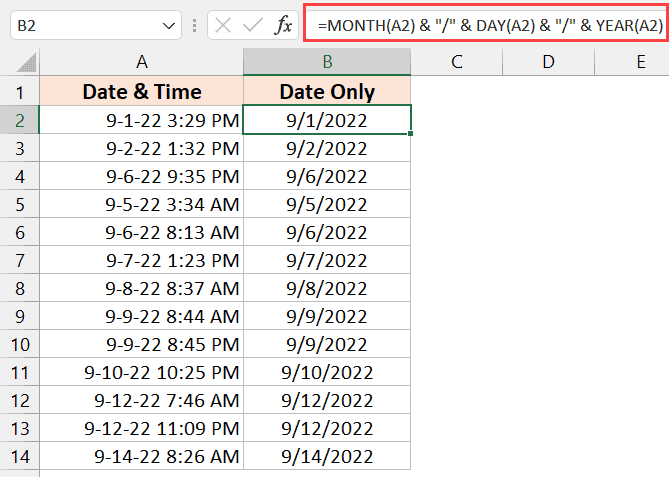
Below you will see a data set where there is a list of dates and times in column A. In Column B we will output only the date with the time removed.
And here is the formula to do this:
=MONTH(A2) & "/" & DAY(A2) & "/" & YEAR(A2)
Enter this formula in the first cell (cell B2 in our example), and then drag this formula down the sheet for all the rest of the rows that you are attempting to complete this for.
In the above formula, the MONTH, DAY, and YEAR functions extract a value that would represent the month, day, and year for the given date.
And then, we used the ‘&’ operator along with the forward slash (/) to create the date.
Unlike the previous method, where we used format cells to only change how the data is being shown in the cell, in this method, we have actually changed the value in the cell that shows only the date part.
Also, since we have used a formula, we have got our result in a separate column, and the resulting value in that column is dependent on our original dates data set.
If you want to delete the original data, you’d also need to make sure that you convert the formula values in column B into static values.
Note: If you’re working with people in different time zones, this may not be the best method for you to use. this is because the dates in the UK and in EU S are treated differently. For example, 10/1/2022 would mean 1st October in the US, but it would mean 10th January in the UK.
Also read: How to Insert Date in Excel?
Using the INT Formula to Extract the Date and Remove the Time
INT function allows you to extract the integer portion from a number that has the integer as well as the decimal part.
Now here’s something important for you to know – dates and time values are stored as numbers in the back end of Excel, their whole numbers represent the number of days, and the integer portion represents the time.
To give you an example, the number 44927.25 represents the date 01 Jan 2023, where the time part is 06:00 AM.
Excel time calculation starts from 01 Jan 1900, so 44927 means that these many days have passed since 1st January 1900, and 0.25 means that much time in that day has elapsed (which means that the time it represents is 06:00 AM
Now, if you want to remove the time pattern only keep the date part in a cell, what you have to do is get rid of the decimal portion.
And this can easily be done using the INT function.
Below I have a data set where I have the date and time values in column A, and I want to show the date only in column B.
And here is the formula that could do this for me:
=INT(A2)
Enter this formula in cell B2 and drag it down to apply it to all the other cells.
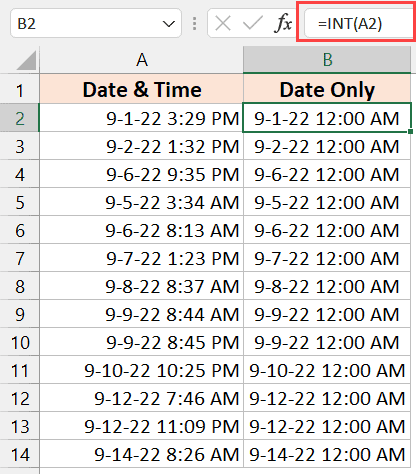
But as you can see, we are still not there yet.
While the time part has been removed, exit often borrows the formatting from the adjacent cell, and we’ll show you the date as well as the time part (where the time would always be 12:00 AM as we have removed the decimal portion from column A.
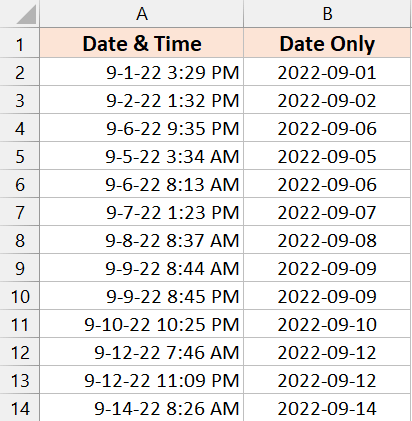
And this has an easy fix – change the formatting of this cell to show the date only.
To do this, select all the cells in column B that have the result, click on the Home tab, and in the Number group, click on the formatting dropdown, and select the Short date or the Long date format.

This will give you the result as shown below:
If you need more control over how the date is displayed, you can use the Format Cells dialog box options.
Also read: How to Calculate the Number of Months Between Two Dates in Excel?
VBA Method to Change Date and Time to Date
If you prefer to use VBA to accomplish your tasks, don’t worry, we have you covered.
Below is the dataset where
- Activate the sheet that has the date dataset
- Select the cells that have the date data from which you want to remove the time part.
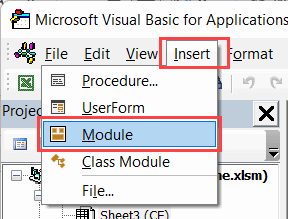
- Open VBA Editor by pressing ALT + F11 (hold the ALT key and then use the F11 key)
- Click the Insert option in the menu and then click on Module. This will insert a new module for that workbook.
- Copy and paste the below VBA code into the Module code window
'Code developed by Steve Scott from https://spreadsheetplanet.com
Sub DateTimeToDate()
For Each cell In Selection
    cell.Copy cell.Offset(0, 1)
    cell.Offset(0, 1).NumberFormat = "mm/dd/yy"
Next cell
End Sub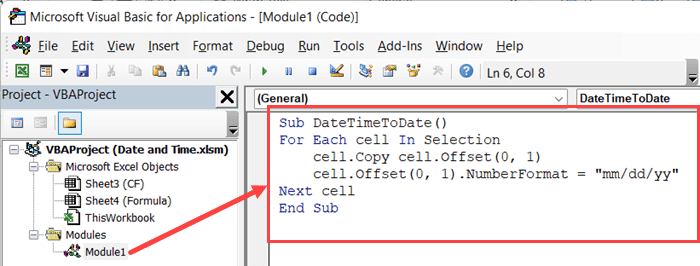
- To execute the macro code, place your cursor anywhere in the code and hit the F5 key (or click on the green triangle play icon in the toolbar)

Let me quickly explain what this code does.
The above code goes through each cell in the selection (using the For Next loop), and copies it in the adjacent column.
So the cell is copied in the adjacent column, and the format of that cell is changed to “mm/dd/yy” so that it shows you the date in the specified format.
In case you don’t want the result to be shown in a different column, and instead want to change the date in the existing column itself, you can use the below VBA macro code:
'Code developed by Steve Scott from https://spreadsheetplanet.com
Sub DateTimeToDate()
For Each cell In Selection
    cell.NumberFormat = "mm/dd/yy"
Next cell
End SubNote that you can use any accepted date format such as MM-DD-YYYY or MM, DD, YYYY, etc.
Note: Keep in mind that the changes done by the VBA code are irreversible. so if you may need your original data back in the future, make sure to create a copy and then use the VBA code.
Regardless of the method that you choose to extract the date from the date and time dataset, you will obviously notice that one may work better for you than some of the other methods.
If you don’t want to change the values in the cell but remove the time portion from the date, you can use the number formatting method or the VBA method.
and if you want to remove the time part from the date completely so that you only have the date, you can use the formula methods (INT or MONTH)
Other Excel articles you may also like:
- How to Autofill Dates in Excel (Autofill Months/Years)
- Using IF Function with Dates in Excel (Easy Examples)
- Convert Time to Decimal in Excel
- Why are Dates Shown as Hashtags in Excel? Easy Fix!
- How to Convert Date to Day of Week in Excel (3 Easy Ways)
- How to Convert Serial Numbers to Date in Excel
- How to Calculate Hours between two Times in Excel?
- Convert Military Time to Standard Time in Excel (Formulas)
- How To Combine Date and Time in Excel
- How to Remove Year from Date in Excel?
- Convert GMT to EST in Excel
Changing format would be my go-to, but it’s not working for me now for some bizarre Micropeen reason…?