When you have to enter a sequence of dates in a column in Excel, you don’t need to do it manually.
Excel has some amazing features using which you can easily fill a column with a series of dates (be it dates or months or years).
In this article, I will show you how to use the autofill option in order to populate a list with dates, months, years, or working days.
You will also see how to use the new SEQUENCE function to quickly generate a list of dates.
So let’s get started!
Autofill Sequential Dates in Excel
The easiest way to fill the date series is to use the Fill handle Option.
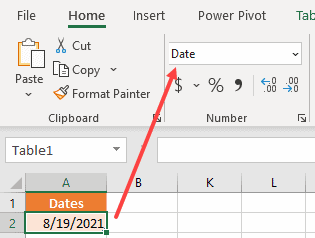
First, you need to enter an initial date and be sure that it’s formatted as a date.
In our case, in cell A2, the date 8/19/2021 is entered. Let’s say that you want to populate column B with all dates until the end of the month (8/31/2021).

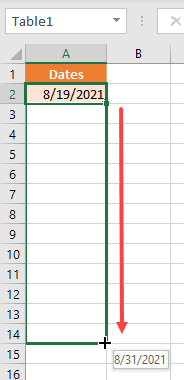
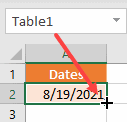
- Select the first cell with a date (A2) and position a cursor in the bottom right corner of the cell, until the small black cross appears. That’s called the fill handle, which you can use to autofill data (such as numbers or dates).

- Drag the fill handle and drop it in the cell where you want to end the series of dates. In this example, you want to fill until 8/31/2021, so you’ll drop it in cell A14. As you move the fill handle down, on the right side, you will see the future value in that cell.
Finally, in column A, cells A2:A14, you have the series of dates between 8/19/2021 and 8/31/2021.
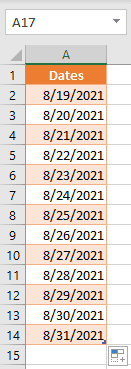
As you can see, all cells are formatted to dates, because the format is copied from the initial cell (A2).
Also read: How to Turn Off AutoFill in Excel?
Autofill Months in Excel
Similar to dates, you can also autofill months based on the initial date.
If you, for example, have 8/19/2021 as the first date, your list will have 9/19/2021, 10/19/2021, etc.
So, the months will change sequentially, while the day in the month will remain the same.
Let’s use the same example again and autofill 12 months from the starting date that we have specified (until 7/19/2022).
- Enter the first date manually in cell A2. Make sure the date you enter in cell A1 is in a date format (and not in text format which Excel won’t be able to recognize as date)
- Select the first cell with the date (A2) and position a cursor in the bottom right corner of the cell, until the small black cross appears. That’s the fill handle, which you can use to autofill data.

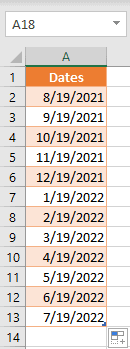
- Drag the fill handle and drop it in the cell where you want to end the series of dates. In this example, you want to fill months until 7/19/2022, so you’ll drop it in the cell A13. As you move the fill handle down, you will see the sequence of dates in the tooltip. Don’t worry about these, we will change these to months in the next step.
- By default, dates (and not months) are populated sequentially. To change this, you need to click on the Auto Fill Options icon in the right bottom corner of the selection. From the drop-down list, choose Fill Months.
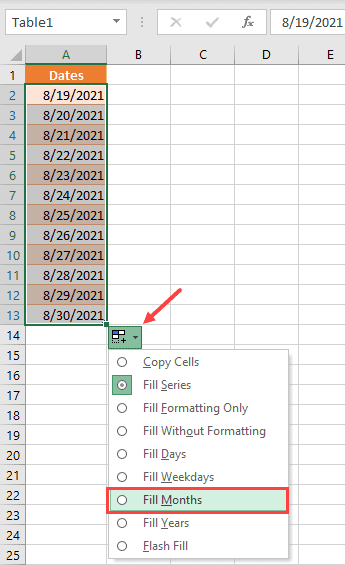
Now you have the list of sequent months in cells A2:A13 (8/19/2021-7/19/2021).
Also read: How to Calculate the Number of Months Between Two Dates in Excel?
Autofill Years/Weekdays in Excel
As you saw in the previous example, the autofill option also enables you to fill years and weekdays.
Let’s see how to autofill and make a list of sequent years based on the initial date.
- In cell A2, enter the date for which you want to generate series of dates in sequential years. In this example, I will generate dates for the next 5 years

- Select the first cell with a date (A2) and position a cursor in the bottom right corner of the cell, until the small black cross appears. That’s the fill handle, which you can use to autofill data.
- Drag the fill handle and drop it in the cell where you want to end the series of dates. In this example, you want to fill years until 8/19/2026, so you’ll drop it in the cell A7. As you move the fill handle down, you will see sequent dates in the corresponding cell.
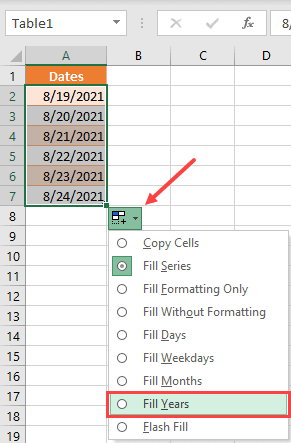
- Now, the cells are populated as a series of dates by default. To change them to years, you have to click on the Auto Fill Options icon in the bottom right corner of the selection and choose Fill Years.
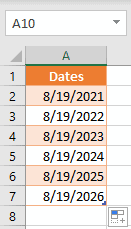
Finally, cells A2:A7 are now populated with sequent years (8/19/2021-8/19/2026).
Just like the way we have used autofill to get sequential years, you can also use it to get weekdays dates. This could be useful when you’re creating a list of dates where you want to exclude the weekends and only have weekdays.
Also read: Excel Fill Series Not Working
Autofill Every Second Date (Alternate Dates)
You saw Excel by default automatically populates a series of dates, weekdays, months, and years. But how can you force it to use a custom step while populating dates?
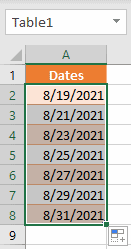
Let’s say that you have the starting date 8/19/2021 in cell A2, and you want to fill every second day until the end of August (8/31/2021).
In order to achieve this, you need to give Excel the pattern that you want to use.
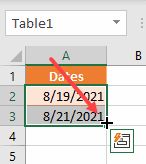
In this case, you need to enter the first two dates in cells A2 and A3 (8/19/2021 and 8/21/2021), and then use the autofill feature. This way, Excel will know that you want to populate every second date in a list.

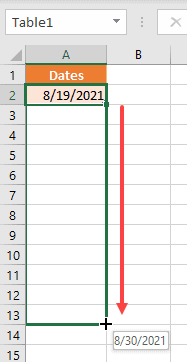
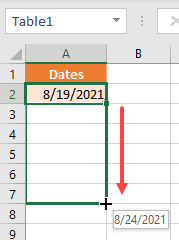
- Select the first two cells with dates (A2:A3) and position a cursor in the bottom right corner of the selection, until the small black cross appears. That’s the fill handle, which you can use to autofill data.
- Drag the fill handle and drop it in the cell where you want to end the series of dates. In this example, you want to fill every second date until 8/31/2021, so you’ll drop it in the cell A8. As you move the fill handle down, you will see sequent dates in the corresponding cell.
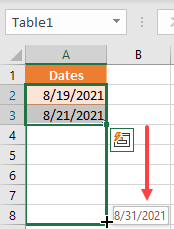
As you can see, Excel recognized the pattern that you provided and populated every second date until 8/31/2021.
Also read: Add Days To Date In Excel
Create a Series of Dates Using the SEQUENCE Function
SEQUENCE is a new function in Excel 365 (available in both Windows and Mac).
It returns the sequence of numbers/dates based on the specified values.
Since dates are stored in Excel as numbers, you can use this function to create a list of dates as well.
In Windows, Excel stores dates as numbers, starting from 1/1/1900. So January 1, 1900 has the value 1, and every new day is increased by 1. In Mac, the dates start from January 1, 1904.
Excel SEQUENCE Function Syntax
The SEQUENCE function allows you to create a list of numbers in a given range. The parameters of the function are:
= SEQUENCE(rows, [columns], [start], [step])
- Rows – number of rows that you want to populate
- Columns – number of columns that you want to fill (optional)
- Start – a starting value in the list (an initial number)
- Step – a step for incrementing a number list
Series of Dates by SEQUENCE Function
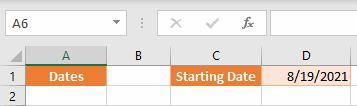
Let’s say that you want to populate 10 dates in column A, starting from 8/19/2021.
The starting date is in cell D1, and the list of numbers should start from cell A2.
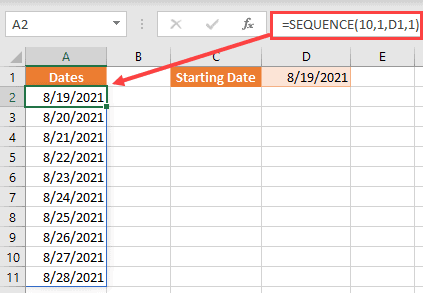
In cell A2, enter the formula:
=SEQUENCE(10,1,D1,1)
Since you want to create a series of sequent days, the step parameter must be 1. In case you want alternate dates, you can use 2 here.
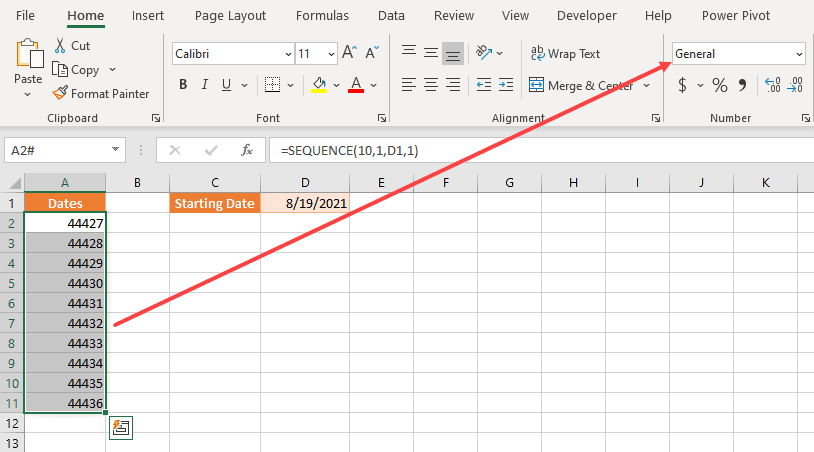
In case you don’t get dates, but get numeric values instead, nothing to worry about. Just select the data and change the formatting to date (you can find this option in the Home tab in the Number drop-down).
In this example, I have used a cell reference (D1) to get the date in the formula, but you can also do this by using the DATE formula and specifying the values there.
For example, the below formula will also give you the same result, where I have mentioned the date right in the formula:
=SEQUENCE(10,1,DATE(2021,8,19),1)
Note that the new SEQUENCE formula is an array formula and the resulting values are spilled to the other cells. For example, in our example, although I entered the formula in cell A2, the result was spilled to the cells till A11. In case any of the cells already has something in it, the SEQUENCE formula will give the #SPILL! error.
Now, let’s understand how this function works.
If you select all dates in the list (A2:A11) and change their format to General, you will get a list of numbers (44427-44436) instead of dates.
As we already explained at the beginning, all dates are stored as numbers in Excel.
The starting date (8/19/2021) has the value 44426, and that’s the reason why the SEQUENCE function created a list of numbers 44427-44436.
Similar to this example, you can create a list of dates with different steps. So, if you want days incremented by 7, the step should be 7, etc.
So these are some of the ways to autofill dates in Excel, where you can populate a sequence of dates, months, or years.
I hope you found this tutorial useful!
Other Excel tutorials you may also like:
- How to Fill Blank Cells with Value above in Excel
- How to Copy Formatting In Excel
- How to Add Consecutive Numbers in Excel
- Highlight Cell If Value Exists in Another Column in Excel
- How to Auto Format Formulas in Excel
- How to Convert Month Name to Number in Excel?
- SPILL Error in Excel – How to Fix?
- How to Group by Months in Excel Pivot Table?
- How to Change Date and Time to Date in Excel
- How to Highlight Dates Before Today in Excel?