Sometimes, you may get data that needs to be transposed. For example, you may get a data set where the data is listed in columns, and you want it to be in rows (or vice versa).
In my experience, this is often the case when I download the data from databases or copy from the web, where I need to transpose the data to get into an analysis-ready state.
In this tutorial, I will show you multiple ways to convert columns into rows in Excel (also called ‘transpose’ the data).
Method 1: Using the Transpose Feature
An easy and quick way to convert columns into rows in Excel is by using the transpose feature.
For demonstration purposes, I am going to use a sample data set of units sold by various representatives in different regions, where the row heading shows the regions and the column heading shows different representatives.

Now I’ll show you how you can convert the column into rows using the transpose method:
- Select all the data for which you want to convert columns into rows

- Now copy the data. To copy right-click anywhere on the selection and choose the Copy option or press CTRL + C from the keyboard.

- Now left-click on any cell (where you want to paste the table in transpose) and click on the option Transpose (T) under Paste Options:

This will convert all the selected columns into rows as shown below.

Tip: This method is quite easy to use. Just right-click from the mouse and choose the transpose option. So I would recommend you use this method for quickly converting columns into rows. Moreover, you can use this method to convert columns into rows as well.
Caution: When choosing the destination cell, where you get the transposed results, make sure that there is enough space to accommodate the transposed data. If there are any cells that are already filled, these will get overwritten
Also read: How to Transpose Multiple Rows into One Column in Excel
Method 2: Using Paste Special
Another fast and easy way to convert columns into rows in Excel is by using the Paste Special feature.
In this method, you have to first copy the column’s data and then paste the transpose of data using Paste Special.
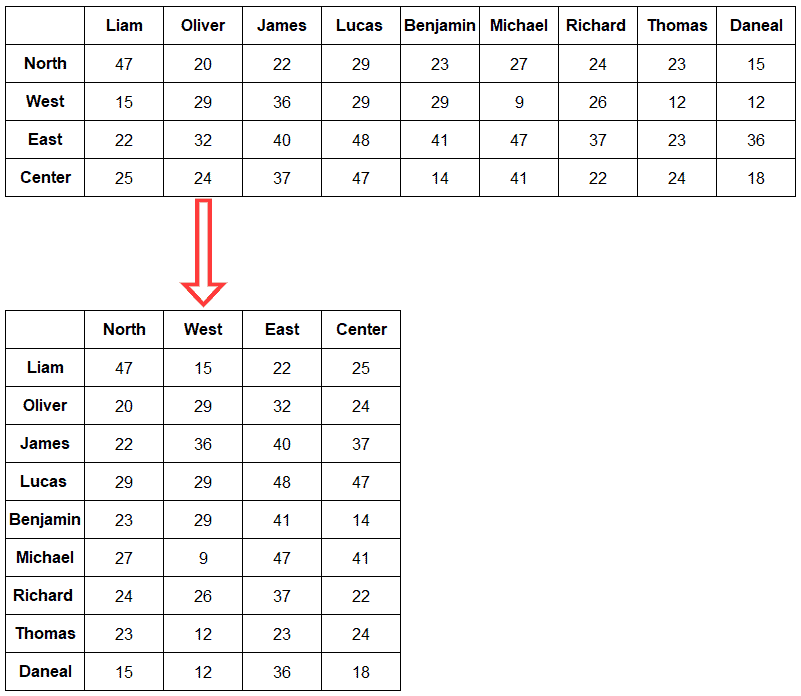
Below I have a dataset where I have region values in rows and employee values in columns, and I want to convert the columns into rows.

Below are the steps to do this using Paste Special technique:
- Select all the data for which you want to convert columns into rows.

- Copy the data for which you want to convert columns into rows. To copy right-click anywhere on the selection and choose the option Copy or press CTRL + C from the keyboard.

- Left-click on any cell (where you want to paste the transposed data) and choose the Paste Special option.

- This will open the Paste Special dialog box. In the Paste options, select All and then check the ‘Transpose’ option as shown in the screenshot.

- Click ok

Doing so will convert all the columns into rows as shown in the below screenshot
Your formatting will remain the same when using this method. For instance, if you applied the blue background color to all the regions, the same formatting will be applied to the converted data. Similarly, you can also use this method to convert rows into columns as well.
Also read: How to Swap Columns in Excel?
Method 3: Using Keyboard Shortcuts To Change Columns to Rows
You can also use a simple keyboard shortcut to quickly convert columns into rows using Paste Special dialog box.
Here is the keyboard shortcut:
ALT + E + S + E + Enter
Here is how to use this keyboard shortcut:
- Select the data that you want to transpose
- Copy the data by right-clicking and then clicking on Copy or by using the keyboard shortcut Control + C (or Command + C if using a Mac OS)
- Select the destination cell
- Use the above keyboard shortcut ALT + E + S + E + Enter. Press one key after the other
The above steps would instantly paste the data while also transposing it.
ALT + E + S is the keyboard shortcut to open the Paste Special dialog box, and when you also hit the E key after ALT + E + S, it checks the Transpose option in the dialog box.
Also read: Transpose in Excel (Shortcuts)
Method 4: Using the TRANSPOSE Function
You can also convert the columns into rows using Excel’s built-in TRANSPOSE function.
Below I have a dataset that I want to transpose.

Now I’ll show you how you can convert the columns into rows using the TRANSPOSE function.
Select the first cell where you want to get the transposed data and enter the following formula in the selected cell
TRANPOSE(A1:J5)

Doing this will convert all the column data into rows as shown in the screenshot.

A couple of important things to know when using the TRANSPOSE function to convert columns to rows in Excel:
Transpose Function Can Give SPILL Error
When you use the TRANSPOSE function to convert columns to rows, you need to make sure that it has enough empty cells so that the resulting data can be accommodated.
In case any cell that is supposed to get the data from the transpose function is already filled, you will see the SPILL error as the result of the formula.
To remove the SPILL error and get the result, just delete the filled cell that’s in the way of the result of the Transpose function
Blank Cells in the Original Data Are Converted to 0
If your data set has blank cells and you use the transpose function to convert columns to rows, in the resulting data set you would get zeros instead of the blank cells.
In most cases, this is not a problem, but in case you want to get the blank cells only, You need to first convert the formula into values in the resulting data, and then select all the cells with 0 in it and then delete it.
Can Not Change Any Cell in the Array
TRANSPOSE is an array function, and when you use it to convert columns into rows, you won’t be able to edit or delete any one single cell in the resulting data.
If you delete any cell in the resulting data set, nothing will happen. And if you enter any number or text string manually in the cell in the resulting data of the transpose function, you will see the SPILL error
If you need to change the data once you have got the transposed data, you need to convert the formulas to values, and only then you will be able to make any changes.
In this tutorial, I showed you how to quickly convert columns into rows in Excel using various methods.
You can do this quickly by using a simple keyboard shortcut or using the Paste Special option that allows you to transpose the data and also choose what kind of data you want to copy and paste (i.e., values only or formatting only your formulas only, etc.).
You can also use the TRANSPOSE function in case you want to keep the original data and also convert it from columns to rows.
And if this is something that you need to do quite often, you can consider using the Power Query method, where you can connect power query to the source data (which could be an Excel table in the same workbook or any other workbook) and then use the Transpose feature within Power Query.
Other Excel articles you may also like:
- How to Rearrange Rows In Excel (4 Easy Ways)
- Split Text to Rows in Excel
- How to Remove Blank Columns in Excel? (Formula + VBA)
- How to Flip Data in Excel (Columns, Rows, Tables)?
- How to Move a Row to Another Sheet Based On Cell Value in Excel?
- How to Split One Column into Multiple Columns in Excel
- Merge or Unmerge Cells in Excel (Keyboard Shortcut)
- Row vs Column in Excel – What’s the Difference?
thank you very much. your post help me very much
This is the clearest explanation for transposing columns to rows that I’ve found. Great use of highlighted screenshots as well. Are you a financial analyst? Do you prepare business proforma forecasts?