Charts are a great way to get a visual representation of your data. Excel provides a host of options to create and customize charts. It usually displays your created chart on the same page as your data.
This would make sense most of the time. However, you might find your chart blocking the view of your data.
Under such circumstances, it is desirable to have your chart moved to a separate sheet.
Sometimes, to have a more organized workbook, you might want to have all the sheets of a workbook moved to a single sheet so that you can have all your data visualizations in one place (such as in a dashboard where you only show the charts).
When moving a chart to a new sheet, there are usually two options:
- Moving the chart as an object into another worksheet.
- Moving the chart to a new Chart Sheet
Both the above points may sound like the same thing, but there’s a difference, and this difference can be seen even in the look and use of the chart.
Difference between a Chart Object and a Chart Sheet
Charts can be displayed either within a chart object of a regular sheet or within its own chart sheet.
- A chart object is basically a graphical object, just like any other Excel object ( like pictures, shapes, etc.). It is embedded in and as part of a regular worksheet.
- A chart sheet is a separate sheet in your workbook, that looks similar to any other worksheet (it has a separate tab at the bottom of the Excel window). The difference is that the sheet does not have cells and gridlines like a regular sheet. Instead, it contains a chart.
Both the above types of sheets have different properties, and as such, you cannot perform the same actions on both.
For example, you cannot resize a chart on a chart sheet. It usually takes up the entire space of the sheet and you have to make peace with that. You will find all the resizing options for it disabled.
You can, however, move a chart object to a chart sheet and vice-versa.
How to Move a Chart in Excel
In this tutorial, we will see how to:
- move a chart as an object in a new Excel Sheet.
- move a chart to a new Chart Sheet.
Besides using the Excel menus and tools, we will also see how you can use VBA code to move charts from all the sheets in a workbook to a single new sheet in Excel.
Moving a Chart to a New Worksheet (or an Existing Worksheet) in Excel
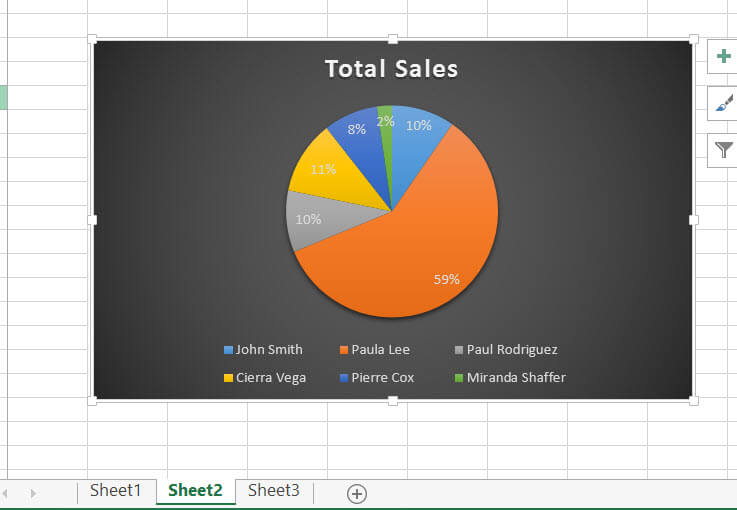
Let’s say you have a chart in a regular Excel sheet as shown below:

Here’s how you can move it to another regular sheet:
- Create a new sheet by clicking on the ‘+’ symbol at the bottom of the Excel window. This will be the sheet you want to move your chart to.
- Select the tab of the worksheet containing the chart you want to move.
- Select the chart by clicking anywhere on it.
- This will display a new set of tabs for the Chart Tools option on the ribbon.

- Under Chart Tools, click on the Design tab.
- Under the Design tab, from the Location group, select the Move Chart button. If you’re on a Mac, click on Move Chart under the Chart Design tab.

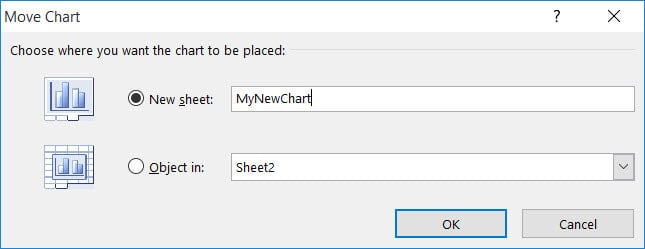
- This will open the Move Chart dialog box, where you will be given two options – New sheet and Object in.
- Since you want to move this chart as an object in another worksheet, select the radio button for the Object in option. Then select the dropdown arrow from the input box next to it.
- Select the name of the newly created worksheet (to which you want to move the chart).

- Click OK.
You will find your chart moved from the active worksheet to the newly created worksheet.
Note that this is an embedded chart object, so you can resize it and move it around anywhere on the sheet.
Note: In this example, we created a new sheet in Step 1. You can also move the chart to any existing worksheet that you have in the workbook. Just select that sheet name in step 9.
Moving a Chart to a New Chart Sheet
If you have a chart in a regular Excel sheet and you want to move it to a new chart sheet, here are the steps you need to follow:
- Select the tab of the worksheet containing the chart you want to move.
- Select the chart, by clicking anywhere on it.
- This will display a new set of tabs for the Chart Tools option on the ribbon.
- Under Chart Tools, click on the Design tab
- Under the Design tab, from the Location group, select the Move Chart button. If you’re on a Mac, click on Move Chart under the Chart Design tab.
- This will open the Move Chart dialog box, where you will be given two options – New sheet and Object in.
- Since you want to move this chart to a new chart sheet, select the radio button for the New Sheet option.
- Then type the name that you want to give to the newly created chart sheet (to which you want to move the chart).
- Click OK.
You will find your chart moved from the active worksheet to a newly created chart sheet.

You will notice that the chart is fitted to take up the entire space of the sheet, and it is fixed. As such, you cannot move it or resize it. The chart has basically been designed to fit the sheet.
Note: You can also move other charts into this sheet. When you do that, the newer charts will be embedded as chart objects, and will thus float on top, while the first chart serves as the background.

Batch Moving Charts using VBA
The above methods work great if you’re just moving one or two charts to a new sheet. However, what if you want to move all the charts in your workbook into a single new worksheet? The only way to do this in one go is by using VBA.
So, here’s the code that we will be using:
Sub moveAllCharts()
Dim chartObject As Object
Dim newSheet As Worksheet
Dim sourceSheet As Worksheet
ActiveWorkbook.Worksheets.Add(Before:=Application.Worksheets(1)).Name = "NewSheet"
Set newSheet = Application.Worksheets("NewSheet")

For Each sourceSheet In Application.ActiveWorkbook.Worksheets
    If sourceSheet.Name <> "NewSheet" Then
        For Each chartObject In sourceSheet.ChartObjects
            chartObject.Chart.Location xlLocationAsObject, "NewSheet"
        Next chartObject
    End If
Next sourceSheet

End SubFollow these steps to use the above code:
- From the Developer Menu Ribbon, select Visual Basic.
- Once your VBA window opens, Click Insert->Module. Now you can start coding. Type or copy-paste the above lines of code into the module window. Your code is now ready to run.
- Press F5 from the keyboard or select the Run button (the green play button) from the toolbar at the top of the VBA window. Alternatively, you can navigate to Developer->Macros-> moveAllCharts ->Run from your regular worksheet.
- Close the VBA window.
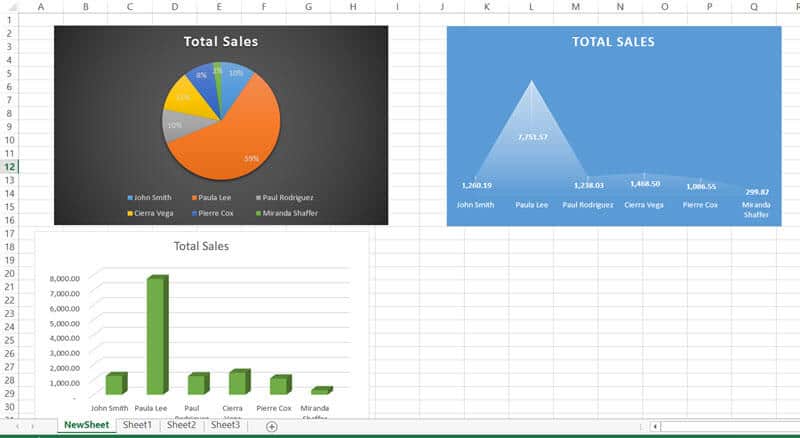
- You will notice a new tab in your workbook, named “NewSheet”. Click on this tab.
You will find all the charts from all sheets in your workbook transferred to this sheet. You can now rearrange and resize your charts as required.
Explanation of the Code
In the above code, we first created a new sheet named “NewSheet”. We specified that the newly created sheet be displayed as the first tab in the workbook:
ActiveWorkbook.Worksheets.Add(Before:=Application.Worksheets(1)).Name = "NewSheet"We then used a ‘for Each’ loop to go through each sheet in the workbook (except “NewSheet”):
For Each sourceSheet In Application.ActiveWorkbook.Worksheets
If sourceSheet.Name <> "NewSheet" Then
End If
Next sourceSheet
For each sheet, we went through every chart object and transferred it to “NewSheet”:
For Each chartObject In sourceSheet.ChartObjects
chartObject.Chart.Location xlLocationAsObject, "NewSheet"
Next chartObject
So we got a sort of nested loop like this:
For Each sourceSheet In Application.ActiveWorkbook.Worksheets
If sourceSheet.Name <> "NewSheet" Then
For Each chartObject In sourceSheet.ChartObjects
chartObject.Chart.Location xlLocationAsObject, "NewSheet"
Next chartObject
End If
Next sourceSheetThe loop goes through each sheet, and for each sheet, it goes through each chart object.
Well, that’s it!
Eventually, you get all the charts from all the sheets of the active workbook transferred to “NewSheet”!
In this tutorial, we showed how you could move a chart to a new sheet as a chart object as well as how you can move a chart to a new chart sheet.
We also explained the difference between the two types of charts. Finally, we demonstrated how you can move all sheets of a workbook to a new sheet at a time using VBA.
We hope you found this tutorial useful and easy to understand.
Other Excel tutorials you may like:
- How to Center the Worksheet Horizontally on the Page in Excel
- How to Group and Ungroup Worksheets in Excel
- How to Copy Multiple Sheets to a New Workbook in Excel
- How to Save Selection in Excel as PDF
- How to Save an Excel Table as Image
- How to Switch Axis in Excel
- How to Create Bar of Pie Chart in Excel?
- How to Insert Chart Title in Excel?
- How to Delete Chart in Excel? (Manual & VBA)
- How to Left Align a Chart in Excel