To ensure a formatted and symmetrical look in our worksheets, we often need to merge a few cells together and center the contents of the merged cell.
For example, you might have two columns with the same theme, like the ones shown below:
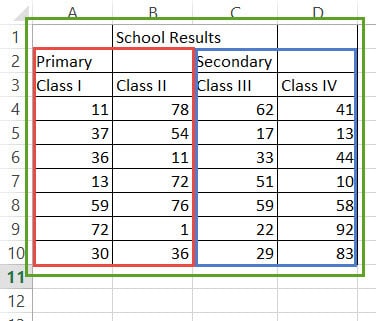
In the above image, columns A and B belong to the Primary section, while columns C and D belong to the Secondary section.
Moreover, all four columns can be grouped under the theme of ‘School Results’.
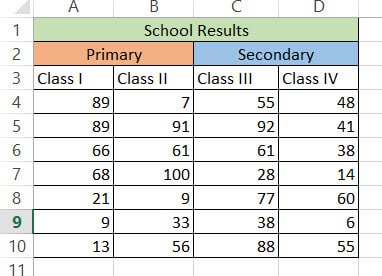
In this case, you would need to merge the headers for similar columns into one like this (colors have been added to help you see the grouping more clearly):
To bring together these similar column header cells, you might think of clicking the Merge and Center button, which makes sense.
Now, what if you select and highlight the cells you want to merge, but when you go to option to do it, you find that the Merge and Center button is grayed out?

Well, lucky for you, we have some tips that might help get you out of this problem.
In this tutorial, we will help guide you in diagnosing what is causing your Merge and Center button to be grayed out (or deactivated).
Once you’ve found the cause, we will also help you get it reactivated.
Finally, we will demonstrate some alternatives to using Merge and Center because this button is often not the best way to center contents in cells.
What does the Merge and Center Button do?
The Merge and Center button is used to merge two or more consecutive cells together into one large cell.
For example, to merge the cells A1 to D1 in the worksheet shown below, you just need to highlight the cells and click on the merge and center button.

Below is what you will see when you merge these cells

The cells now get merged into one, with the contents centered across the merged cell.
If you want to unmerge the cell back to its original contents, you can simply click on the merged cell and click on the Merge and Center button again.
Therefore, the Merge and Center button lets you do both. You can use it to merge a set of cells into one and you can use the same button to unmerge a merged cell into separate cells.
Also read: Merge Cells Without Losing Data in Excel
Where is the Merge and Center Button in Excel?
You will find the Merge and Center button in the ribbon under the Home tab.
If you look in the Alignment group, you will see the Merge and Center button, along with a dropdown arrow.
When you click on the arrow, you will see a number of merging options like:
- Merge and Center
- Merge Across
- Merge Cells
- Unmerge Cells
Why is Merge and Center Grayed Out? – 3 Possible Reasons
You might want to use the Merge and Center button to either merge a set of cells or unmerge an already merged set of cells.
In both cases, it can be awfully frustrating to find the button grayed out.
To solve the problem, it is important to first determine why it happened.
Here are three possible reasons your Merge and Center button might be greyed out:
The worksheet might be protected:
Worksheets or workbooks downloaded from the internet are often in Protected mode.
This is usually done to prevent users from changing, moving, or deleting information from the sheet, either accidentally or deliberately.
An Excel user can also protect a worksheet to disallow users from making selected changes to a sheet, like inserting columns, formatting rows, etc.
Putting a worksheet in protected mode usually allows the user to edit certain parts of the sheet, while most features are disabled to protect the data.
This often includes disabling the Merge and Center button too.
The workbook might be protected:
For the same reason as above, it is possible that the whole workbook itself is in Protected mode.
This could also cause the Merge and Center button to be deactivated.
The workbook might be shared:
Newer versions of Excel (from 2010 onwards) allow users to share workbooks. With the emphasis on remote collaboration, more and more people are making use of these collaboration facilities.
When you share a workbook you are allowing other users to access and make changes to your workbook concurrently.
This is great because both users are working and editing in real-time and there’s no hassle of creating multiple copies of the same workbook.
However, since Excel has to keep track of changes made by both users to a cell, it does not allow any user to merge cells while it is in shared mode.
This is done to minimize the risk of one of the cell references from disappearing
How to Find out why Merge and Center is Greyed Out
So now you know the possible reasons for your Merge and Center button to be grayed out.
It’s time to diagnose which of the three reasons is making this happen on your workbook/ worksheet.
Here’s what you need to do:
Check if the Workbook is Shared
First, check if the Merge and Center button is deactivated because your worksheet is in Protected mode.
For this, follow the steps below:
- Click on the Review tab of your Excel window
- From the ‘Changes’ group click on ‘Share Workbook’.
- This will open the ‘Share Workbook’ dialog box. Select the ‘Editing’ tab in this box.

- Right on the top portion of this window, you will see a checkbox that says ‘Allow changes by more than one user at the same time. This also allows workbook merging’. If the checkbox is checked, that means your workbook is in ‘Shared’ mode.

Check if the Worksheet is Protected
There are a number of ways to tell if your worksheet is protected. Here are the easiest two ways:
- Right-click on the sheet’s tab at the bottom of the Excel Window.
- This will make a popup menu appear.
- If one of the options in the popup menu is ‘Unprotect sheet’, it means the sheet is protected.

Here’s another giveaway:
- Click on the Review tab of your Excel window
- Look at the items under the ‘Changes’ group of this ribbon. If ‘Unprotect Sheet’ is one of the options, then the sheet is protected. If instead, you see a ‘Protect Sheet’ button, that means the sheet is not protected.

Check if the workbook is protected
- Click on the Review tab of your Excel window
- Look at the items under the ‘Changes’ group of this ribbon. If ‘Unprotect Workbook’ is one of the options, that means your workbook is protected. If instead, you see a ‘Protect Workbook’ button, it means the workbook is not protected.
- Sometimes, even if the workbook is protected, it doesn’t show as a button on the Review tab’s ribbon. In such cases, try clicking the Protect Workbook button. If it asks for a password, that means the workbook is protected.

How to Enable Merge and Center if Disabled
Once you have determined the cause of the problem, solving it is only a matter of a few clicks.
Here’s what you need to do to solve each of the above problems.
Unshare Workbook
- Click on the Review tab of your Excel window
- From the ‘Changes’ group click on ‘Share Workbook’.
- This will open the ‘Share Workbook’ dialog box. Select the ‘Editing’ tab in this box.
- Uncheck the box that says ‘Allow changes by more than one user at the same time. This also allows workbook merging’.

- Click OK to close the Share Workbook dialog box.
- You will get a prompt asking you if you are sure you want to remove the workbook from shared use. Click on Yes.
- Your book should now be free from the ‘Shared’ mode.
- Go back to the Home tab to see if the Merge and Center button is reactivated.

Did this solve the problem? If yes, then congratulations! If not, then keep reading.
Disable Protection
If the worksheet or workbook is in ‘Protected’ mode, then follow these steps:
- Click on the Review tab of your Excel window
- Look at the items under the ‘Changes’ group of this ribbon. If you see a button that says ‘Unprotect Workbook’ select it to unprotect it.
- Similarly, if you see a button that says ‘Unprotect Worksheet’ select it to unprotect it too.
- If the sheet or workbook was protected with a password, you will be asked to enter a password. Enter the password (if you know it) or find it out from the person who protected the sheet/ workbook.
- Click OK.
- Once you see the Unprotect button toggled back to ‘Protect Workbook’ or ‘Protect Worksheet’, your job is done.

- You can now go back to the Home tab to see if the Merge and Center button is reactivated.
Why it is better to Avoid using Merge and Center
You may think that Merge and Center is a good formatting tool.
After all, it helps combine multiple cells into a single large one and even centers the text across several columns (or rows).
Unfortunately, merging cells can create a number of problems for you in the long run.
You will notice that you cannot sort, filter, copy, paste or move rows and columns that have merged cells.
If you especially have a large number of merged cells in large datasets, finding out the merged cells can be quite frustrating.

As such, it is generally advised to avoid using Merge and Center as far as possible.
What you Can use Instead of Merge and Center
Due to the issues posed by cells that are merged and centered, more and more Excel experts are advising the use of the “Center across Selection” option instead.
This option gives a similar result to the Merge and Center feature, without posing problems to your spreadsheet.
To use Center Across Selection instead of Merge and Center, here’s what you need to do:
- Select the cells you want to bring together.
- Right-click on your selection.
- This will cause a popup menu to appear. Select the Format Cells option from this menu.
- The Format Cells dialog box should open now. Select the Alignment tab from this dialog box.
- Under the Text Alignment group, select the dropdown below the Horizontal menu.
- Select Center Across Selection from this dropdown.
- Click OK to close the dialog box.

Your selected cells should now look like they have been merged and centered. In essence, though, they are still separate cells.

This means you can work with them as you would work with any regular cell, minus the problems that come with Merge and Center!
Note: Center Across Selection only works horizontally, so for vertical groups of cells you may still need to merge cells.
In this tutorial, we showed you how to find out why the Merge and Center option has been grayed out for you.
We also showed what you can do once you successfully diagnose the cause of the problem.
Finally, we suggested an alternative to using Merge and Center, since this feature usually causes a number of issues when you try to edit cells and columns that they exist in.
We hope this was a helpful tutorial and that we could help you understand in-depth the issue of the Merging and Centering.
Other Excel tutorials you may like:
- How to Merge First and Last Name in Excel
- How to Split One Column into Multiple Columns in Excel
- How to Make all Cells the Same Size in Excel (AutoFit Rows/Columns)
- How to Unmerge All Cells in Excel?
- Can’t Type In Excel: 6 Possible Reasons and Solutions!
- SPILL Error in Excel – How to Fix?
- Excel Shortcuts Not Working – Possible Reasons + How to Fix?
- Arrow Keys Not Working in Excel
Thank you! Unsharring worked.
The align center icon on my excel is greyed out. This is because there is another command for centering. So, on my quick access toolbar I added the command “center” instead of “align center”.