
If you need to add ten or twenty blank rows to a sheet, inserting them one at a time is the slow way to do it. And most people get stuck there because Excel’s Insert command looks like a one-row-at-a-time thing.
It isn’t. Excel inserts as many rows as you have selected, and once that clicks, everything else is just a faster way to make the selection.
In this article I’ll show you ten ways to insert multiple rows in Excel, from the right-click menu to a macro.
Method #1: Using the Right-Click Insert Menu
This is the one I reach for most. It works in every version of Excel and there’s nothing to memorize.
Below I have an order log in cells A1:E11. The orders run from ORD-1001 in row 2 down to ORD-1010 in row 11, and three late Denver orders need to go in right under ORD-1004.
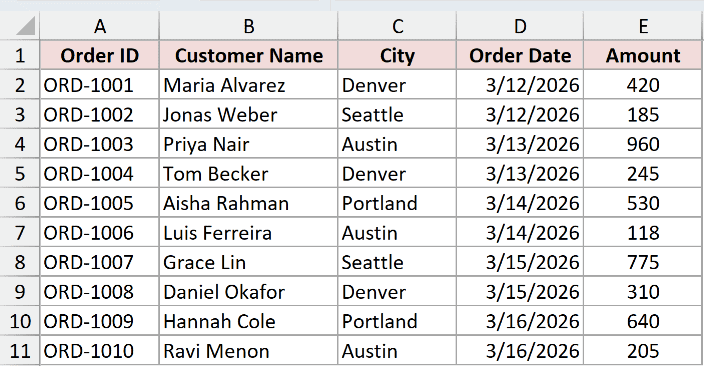
ORD-1004 sits in row 5, so the new rows need to land at row 6. Here are the steps to insert three rows there:
- Click the row header for row 6, hold Shift, then click the row header for row 8. That selects three whole rows.
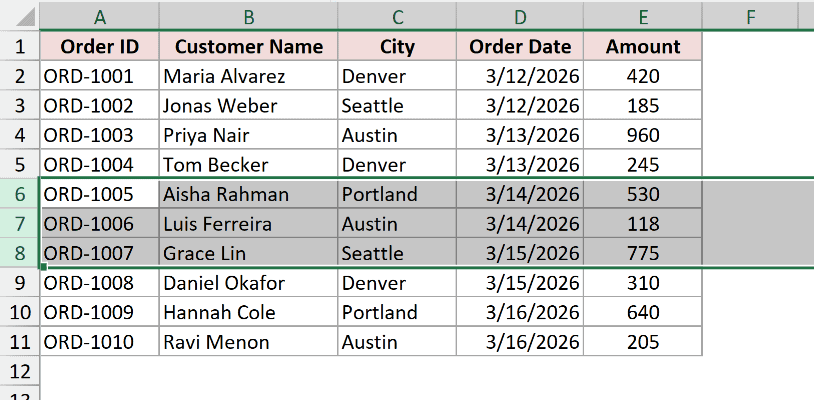
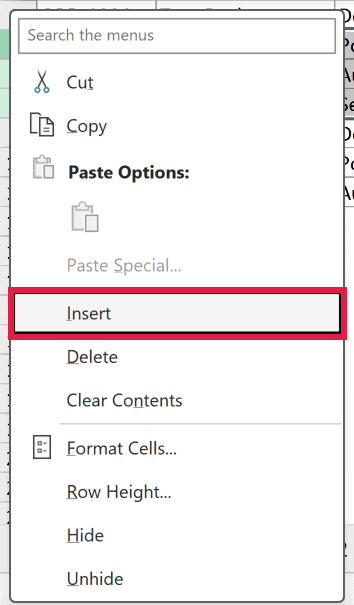
- Right-click anywhere on the selection and click Insert.
Three blank rows appear at rows 6, 7 and 8, and ORD-1005 moves down to row 9. Nothing gets overwritten.
The count is the whole trick. Select three rows, get three rows. Select twelve, get twelve. If you are not sure how to grab a block of rows quickly, here is how to select multiple rows in Excel.
Note: Excel always inserts the new rows above your selection, never below. So select the row that you want the new rows to sit on top of.
Method #2: Using the Ctrl + Shift + Plus Shortcut
Here’s the same thing without touching the mouse twice. Once you insert rows a few times a day, this is the one worth learning.
I’m working with the same order log in A1:E11, and I still want three blank rows under ORD-1004 in row 5.
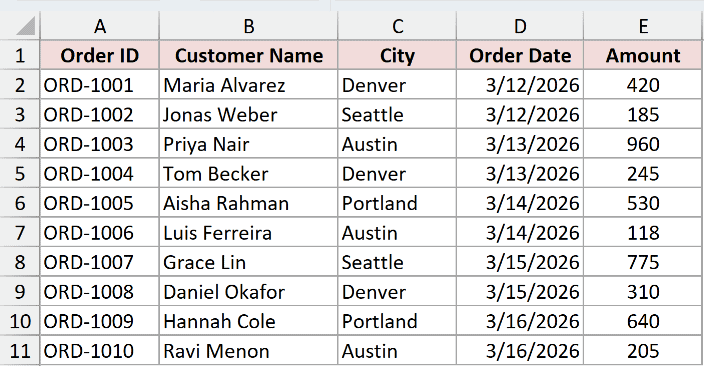
Here are the steps to insert three rows with the keyboard:
- Select rows 6 to 8. You can click the row headers, or click any cell in row 6, press Shift + Spacebar to grab the whole row, then hold Shift and press the Down arrow twice.
Now press Ctrl + Shift + Plus. That’s the plus sign sharing a key with the equals sign on the top row, so in practice you are pressing Ctrl + Shift + =.
If your keyboard has a number pad, Ctrl and the plus key on the pad does the same job.
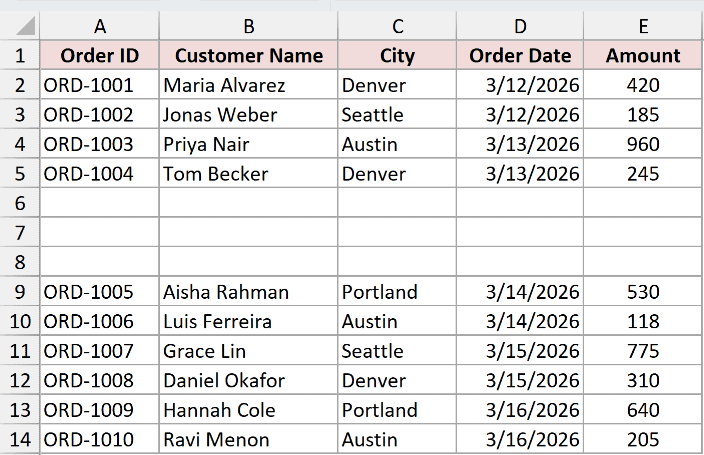
Three rows drop in and the rest of the table shifts down. On a Mac the combination is the same, Ctrl + Shift + =.
Note: If a dialog box pops up asking whether to shift cells right or down, you had cells selected rather than whole rows. Press Escape, press Shift + Spacebar to expand the selection to full rows, and try again.
That dialog is usually why this shortcut looks broken. There’s more on the keyboard shortcut to insert a row if you want the key combination on its own.
Method #3: Using the Insert Button on the Home Tab
If you’d rather stay on the ribbon, the Home tab has the same command spelled out in full, which makes it easier when you can never remember whether a command inserts rows or cells.
Same order log in A1:E11, same goal. Three blank rows under ORD-1004.
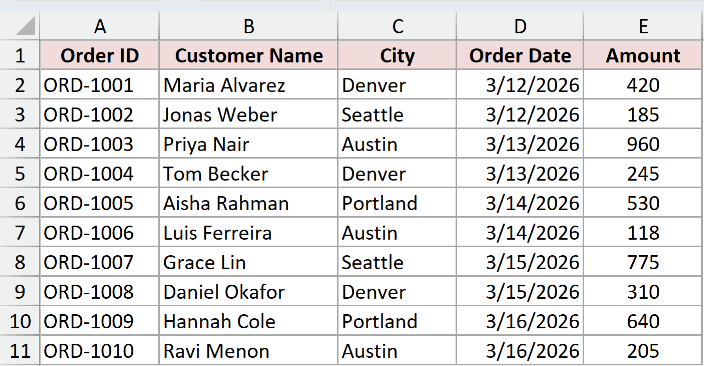
Here are the steps to insert rows from the ribbon:
- Select rows 6 to 8 using the row headers.
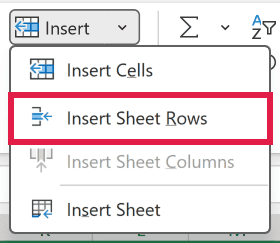
- On the Home tab, in the Cells group, click the arrow next to Insert, then click Insert Sheet Rows.
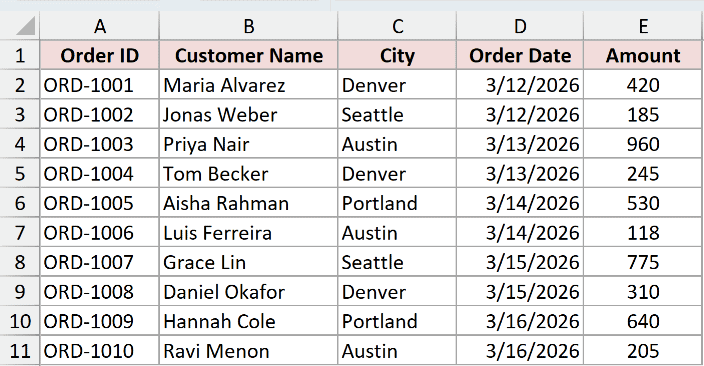
Three rows appear above the selection, exactly like the other two methods.
Insert Sheet Rows is worth knowing by name because it always inserts whole rows, no matter what you had selected. Clicking the top half of the Insert button instead inserts cells, which is where a lot of accidental mess comes from.
Method #4: Using the Name Box
Selecting three rows by dragging is easy. Selecting two hundred is not. The Name Box, that little box to the left of the formula bar, lets you type the selection instead of dragging it.
Here’s the same order log. This time I want 100 blank rows under ORD-1004, because a full month of orders is about to be pasted in.
Here are the steps to insert 100 rows at once:
- Click in the Name Box and type 6:105, then press Enter. That selects rows 6 through 105, which is 100 rows.
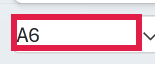
- Right-click the selection and click Insert, or just press Ctrl + Shift + =.
You get 100 blank rows starting at row 6, and you never scrolled once.
The arithmetic catches people out, so count it the boring way. The last row number minus the first, plus one. Rows 6 to 105 is 105 minus 6, plus 1, which is 100.
Method #5: Using F4 to Repeat the Insert
If you don’t want to work out row numbers at all, you can insert a batch once and then tell Excel to do it again. F4 repeats your last action, and inserting rows is an action like any other.
The order log again, and this time I want 100 blank rows under ORD-1004 without touching the Name Box.
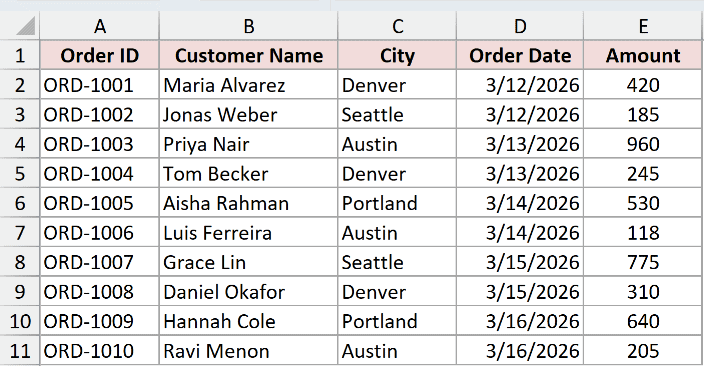
Here are the steps to build up 100 rows in batches of ten:
- Select rows 6 to 15. That’s ten rows, and Excel shows the count next to your pointer while you drag.
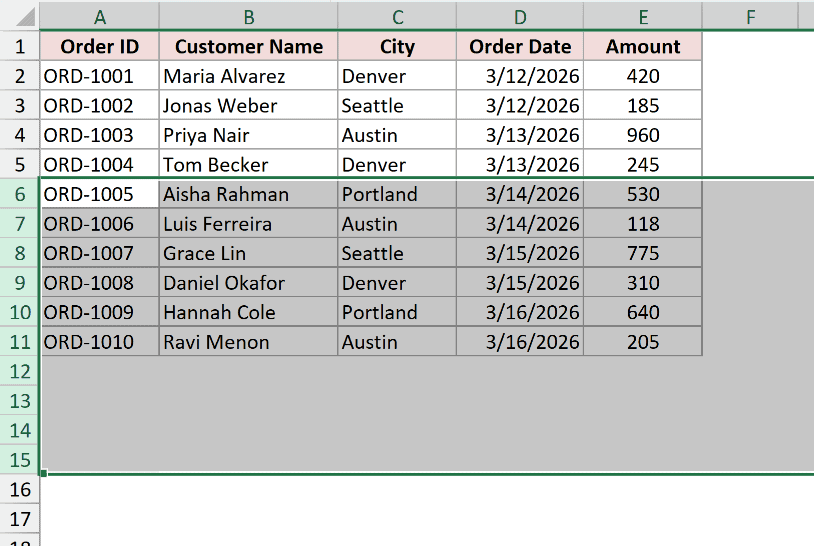
- Insert them with any method above, then press F4 nine more times. Each press inserts another ten rows.
One insert plus nine repeats gives you ten batches of ten, so 100 blank rows.
Ctrl + Y does the same thing if F4 is taken over by your laptop’s function keys.
Note: F4 repeats whatever you did last, so it only keeps inserting rows for as long as inserting rows is the last thing you did. Click a cell, type something, or even change a font, and F4 starts repeating that instead.
Method #6: Using Insert Copied Cells
The methods so far give you empty rows. Insert Copied Cells gives you rows that already have something in them, and it slots them in without overwriting whatever was there.
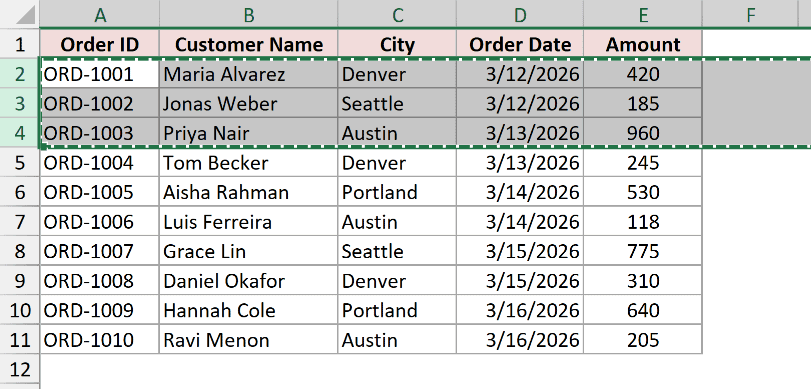
Here’s the order log. Say the first three orders repeat every month, and I want a copy of them sitting just above ORD-1008 in row 9.
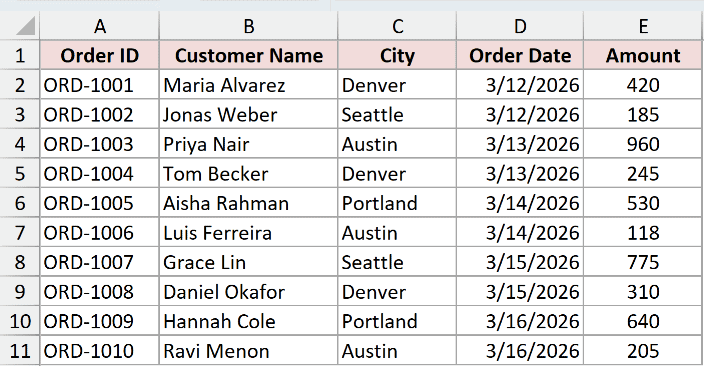
Here are the steps to insert copied rows:
- Select rows 2 to 4 using the row headers and press Ctrl + C.
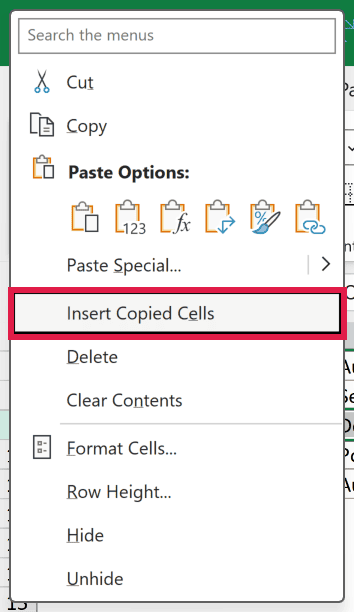
- Right-click the row header for row 9 and click Insert Copied Cells.
Three new rows appear at rows 9, 10 and 11 carrying copies of the first three orders, and ORD-1008 moves down to row 12.
This is also the neatest way to get blank rows that keep your table’s borders and fill. Copy a few blank rows from inside the formatted area rather than from the empty space below it, and the formatting rides along.
If you copied a block of cells rather than whole rows, Excel asks whether to shift cells down or to the right before it inserts them.
Method #7: Using the Fill Handle
This one is pure mouse. You don’t need a menu or a key combination, and you can watch the rows appear as you drag.
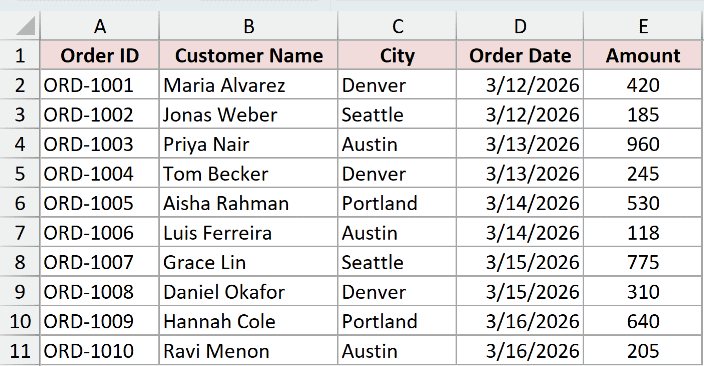
Same order log, and I want a handful of blank rows under ORD-1004 in row 5.
Here are the steps to drag new rows in:
- Select row 6 by clicking its row header, then hover over the small green square at the bottom right corner of the selection. That square is the fill handle.
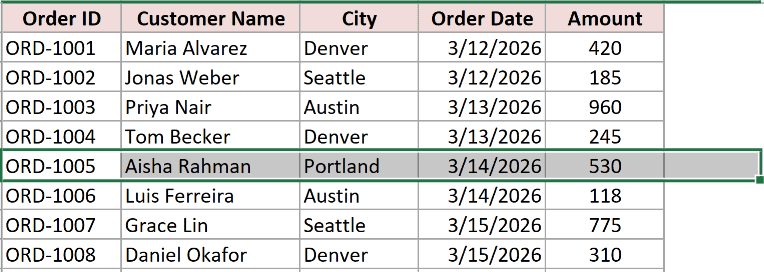
- Hold Shift, then click and drag the fill handle straight down. The mouse pointer changes to a split two-bar cursor, which is Excel telling you it is about to insert rather than fill.
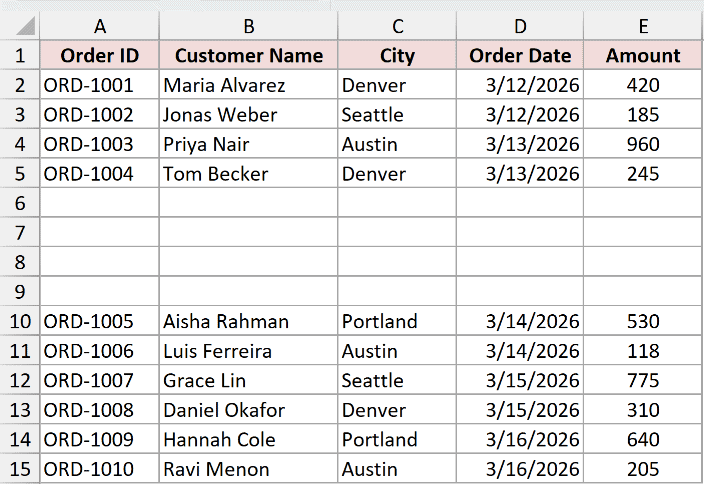
Drag down four rows and you get four blank rows. Drag back up and Excel takes them away again, which makes this the easiest method to fine-tune.
Method #8: Inserting Non-Adjacent Rows With Ctrl
Everything so far puts a block of rows in one place. Sometimes you want a single spacer row in several places at once, and you don’t want to do it four separate times.
Here’s the order log again. The orders are grouped by date, two per day, and I want one blank row before each new date so the days are easier to read.
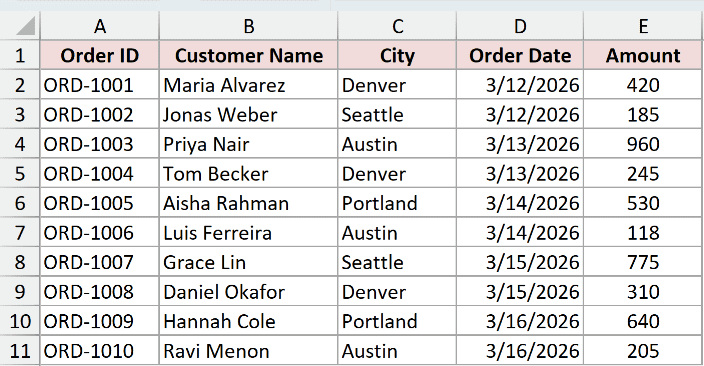
The dates change at rows 4, 6, 8 and 10. Here are the steps to insert a row above each of them in one go:
- Click the row header for row 4. Then hold Ctrl and click the row headers for rows 6, 8 and 10.
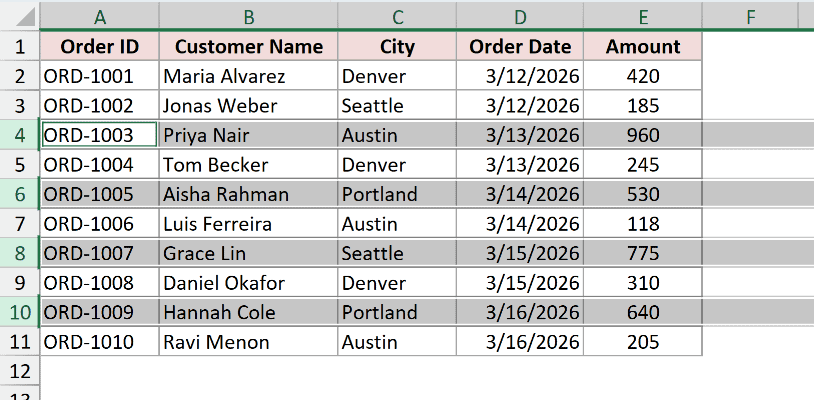
- Right-click any of the selected row headers and click Insert.
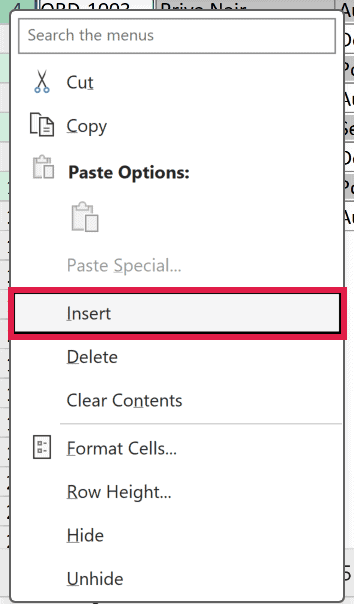
Excel puts one blank row above each selected row, so you end up with four spacers in four different places. On a Mac, hold Cmd instead of Ctrl.
You can mix this with the counting trick too. Ctrl-click a two-row block and a three-row block, and Excel inserts two rows in the first spot and three in the second.
Method #9: Using Table Rows Above in an Excel Table
If your data is a proper Excel Table rather than a plain range, you get an insert command that only affects the table. Nothing else on the sheet moves, and the new rows come with the table’s formatting already on them.
Here’s the same order log converted to a table with Ctrl + T, with a Total Row turned on at the bottom. The Amount column totals 4,388.
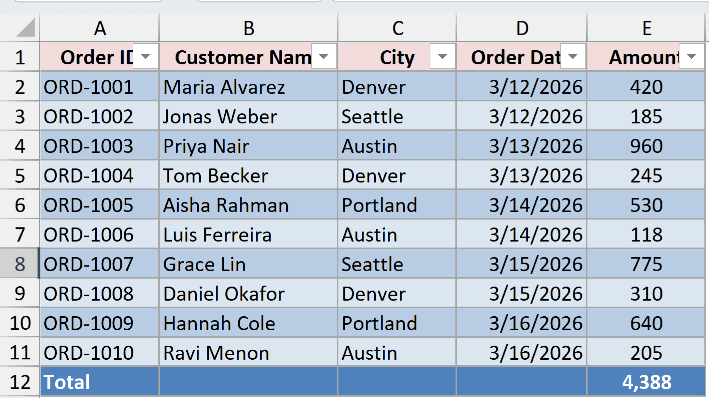
Here are the steps to add two rows inside the table:
- Select two cells stacked on top of each other inside the table, anywhere in the rows holding ORD-1005 and ORD-1006.
- Right-click the selection, point to Insert, then click Table Rows Above.
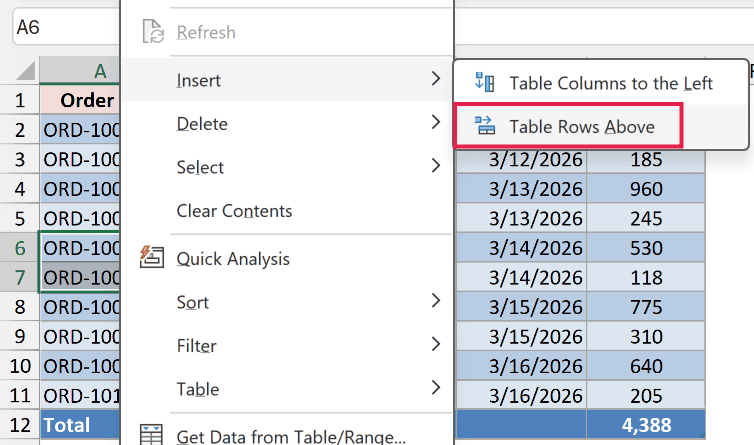
Two blank rows appear inside the table with the banded colors already applied, and the Total Row stays where it belongs at the bottom.
The total still reads 4,388, because the two new rows are empty. But the formula behind it grew to cover them:
=SUBTOTAL(109,[Amount])
That is what makes a table worth the extra step here. A structured reference like [Amount] means the whole column, so it stretches on its own every time you add a row.
Type an amount into one of the new rows and the total updates straight away.
Note: To add a row at the very bottom of a table, click the last cell of the last row and press Tab. Excel adds a new table row for you without going near a menu.
Method #10: Using a VBA Macro
If you insert the same rows in the same place every week, or you have to do it across a stack of sheets, a macro turns the whole thing into one click.
Here’s the order log one more time. This macro asks which row to insert above and how many rows you want, then does it.
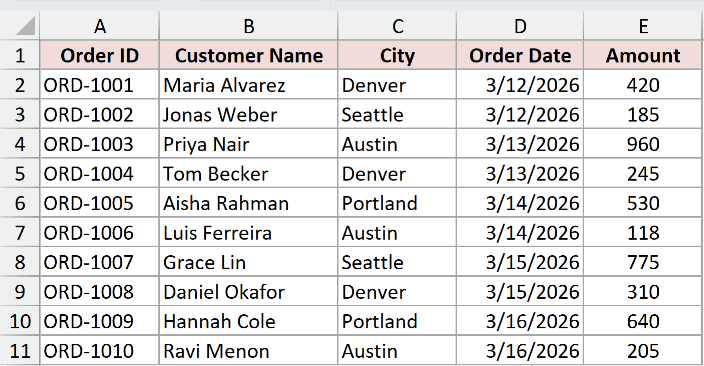
Here is the VBA code:
Sub InsertMultipleRows()
    Dim StartRow As Long
    Dim RowCount As Long

    StartRow = Application.InputBox("Insert above which row number?", "Insert Rows", Type:=1)
    RowCount = Application.InputBox("How many rows?", "Insert Rows", Type:=1)

    If StartRow < 1 Or RowCount < 1 Then Exit Sub

    ActiveSheet.Rows(StartRow).Resize(RowCount).Insert _
        Shift:=xlShiftDown, CopyOrigin:=xlFormatFromLeftOrAbove
End SubHere are the steps to use this macro:
- Press Alt + F11 to open the VBA editor
- Click Insert, then Module
- Paste the code above into the module
- Press F5 to run it
- Enter 6 when it asks for the row, then 3 when it asks how many
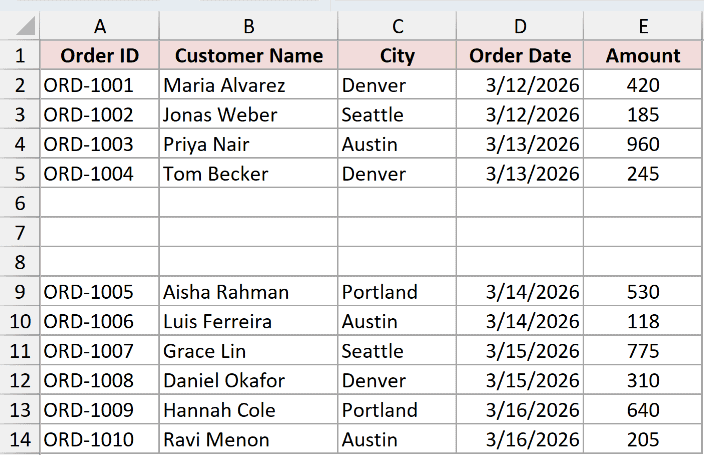
Three rows drop in at row 6, same as Method #1, but now it is repeatable.
Rows(6).Resize(3) is the part doing the work. It takes row 6 and stretches the reference down to cover three rows, so .Insert puts three rows in rather than one.
Change the numbers you type in and you change the result, without touching the code. CopyOrigin:=xlFormatFromLeftOrAbove tells Excel to give the new rows the formatting of the row above them.
There are more variations on this, including inserting a row after every other row, in the guide to VBA to insert a row in Excel.
Note: Save the workbook as a macro-enabled file (.xlsm) if you want to keep the macro. A normal .xlsx file throws the code away when you close it.
Additional Notes About Inserting Multiple Rows in Excel
- Excel always puts the new rows above your selection. The two exceptions are dragging the fill handle and picking Table Rows Below inside a table. If you want rows under a specific record, select the record below it.
- Watch for a SUM that stops right where you insert. If E12 holds
=SUM(E2:E11)and you insert a row at row 12, the formula slides down to E13 but the range stays E2:E11, so your new row is left out. Inserting anywhere inside rows 2 to 11 does expand the range, which is why a Table with a Total Row is safer for data you keep adding to. - Excel refuses the insert when the last row is in use. A sheet stops at 1,048,576 rows, so if anything sits in that final row, even just a fill color, you get the “can’t push non-empty cells off the worksheet” message. Select the rows below your data, delete them properly, and save before trying again.
- The same moves work on columns. Swap Shift + Spacebar for Ctrl + Spacebar to select whole columns, and everything on this page behaves the same way. The shortcut to insert a column covers that side of it.
- Ctrl + Z undoes an insert cleanly. If you insert 100 rows and realize you needed 50, undo and redo it rather than trying to delete multiple rows afterwards.
Frequently Asked Questions
Why does Excel open the Insert dialog box instead of inserting rows?
Because you had cells selected, not whole rows. Excel doesn’t know whether you meant rows, columns or cells, so it asks. Press Shift + Spacebar to expand your selection to full rows first and the dialog stops appearing.
Can I insert rows below the selected row instead of above?
Not with the Insert command, which always works upwards. Select the row underneath instead, or drag the fill handle down, or use Table Rows Below if your data is a table.
Do the new rows keep the formatting of the row above?
By default they copy the formatting from the row above. If that’s not what you want, click the Insert Options paintbrush that appears next to the new rows and choose Format Same As Below or Clear Formatting.
Why is the Insert option greyed out in Excel?
Usually because the sheet is protected, or the workbook is open in the old shared mode. Check the Review tab for an Unprotect Sheet button. There are several other causes worth ruling out in this guide to can’t insert a row in Excel.
How many rows can I insert at once?
As many as the sheet has room for. A worksheet holds 1,048,576 rows in total, and inserting pushes existing rows down, so the real limit is how much empty space sits below your data.
Conclusion
Inserting multiple rows in Excel comes down to one habit. Select as many rows as you want to add before you insert anything, and the rest is just picking your favorite route.
For most jobs I use the right-click Insert menu, and Ctrl + Shift + = when my hands are already on the keyboard. The Name Box is the one worth remembering for the day you need a few hundred rows.
Other Excel articles you may also like:
- How to Rearrange Rows In Excel (4 Easy Ways)
- Remove Blank Rows in Excel (5 Ways + VBA)
- Select Row (or Rows) in Excel (Shortcut)
- Unhide Rows in Excel (Shortcut)
- How to Group Rows in Excel?
- Delete Row in Excel (Shortcut)
- How to Delete Hidden Rows or Columns in Excel? 2 Easy Ways!
- How to Select Every Other Row (Alternate Row) in Excel?
- How to Repeat Rows
