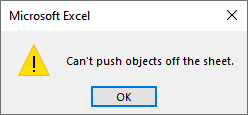
At times, when trying to insert rows or columns in a worksheet, it may fail, and Excel will display an error message stating, “Can’t push objects off the sheet,” as shown below:
This error typically arises when graphic elements like maps, embedded charts, text boxes, and shapes are located toward the right or bottom edge of the Excel grid (close to the end of the rows and columns in the worksheet).
Note: The error may also occur in older versions of Excel (2007, 2010, 2013) if the option “Nothing (hide objects)” is selected on the Excel Options dialog box in the “For objects, show” section.
Dimensions of an Excel Worksheet
In Excel, a worksheet can have a maximum of 1,048,576 rows and a maximum of 16,384 columns labeled alphabetically from A to XFD.
Excel cannot allow the placement of objects outside this range.
You are highly likely to encounter the “Can’t push objects off the sheet” error when graphic elements are present near the XFD column or row number 1,048,576.
This tutorial shows seven ways of fixing the “Can’t push objects off the sheet” error in Excel.
How to Fix the “Can’t push objects off the sheet” Error Caused by Objects Near the Edges of the Excel Grid
Suppose we have the following dataset:

The dataset is on a worksheet that has a rectangle shape in the vicinity of column XFD:

Notice that there is one column between the rectangle object’s right edge and the Excel grid’s right edge.
The worksheet also has a text box near row number 1,048,576:

Notice there is one row between the text box’s bottom edge and the Excel grid’s bottom edge.
If we try to insert two columns on the dataset, it fails, and Excel displays the “Can’t push objects off the sheet” error:

If we also try to insert two rows, Excel returns the error, “Can’t push objects off the sheet,” as shown below:

Note: We can only insert as many rows as there are between an object’s bottom edge and the Excel grid’s bottom edge.
The same goes for columns – we can only insert as many columns as there are between the right edge of an object and the right edge of the Excel grid.
We encountered an error while trying to insert two rows and two columns because the space between the bottom edge of the text box and the bottom edge of the Excel grid can accommodate only one row, and the space between the right edge of the rectangle and the right edge of the Excel grid can hold only one column.
We can fix the error using the following methods:
Method #1: Delete Blank Rows or Columns Equal to the Number of Rows or Columns to Be Inserted
We can delete blank rows or columns equal to the number of rows or columns we want to insert.
To delete, for example, two blank columns, do the following:
- Click the letter header of the first column and drag to the letter header of the next column:

- Right-click the selection and choose “Delete” on the shortcut menu:

Note: Similarly, to delete rows, click the numeric header of the first row, drag to the header of the next row, right-click the selection, and press “Delete” on the context menu.
After deleting the columns or rows, we can insert two columns or two rows in our dataset, and Excel will not return the “Can’t push objects off the sheet” error.
Also read: Can’t Insert a Row in Excel – How to Fix!
Method #2: Resize the Objects
We can make the objects smaller by resizing them to make room for the columns or rows we want to insert using the steps below:
- Press the keyboard shortcut “Ctrl + Right Arrow” to navigate to the last column and locate the rectangle object. Similarly, press “Ctrl + Bottom Arrow” to move to the last row and find the text box.
- Click the object to select it.
- Position the cursor over one of the corner handles. When the cursor changes to a diagonal double-headed arrow, click and drag the handle inward to resize the object proportionally.

Also read: How to Rotate Text in Excel?
Method #3: Move the Objects Away From the Edges of the Worksheet
We can move the offending objects further away from the edges of the worksheet to make room for the rows or columns we want to insert.
We use the steps below:
- Press the keyboard shortcut “Ctrl + Right Arrow” to navigate to the last column and locate the rectangle object. Similarly, press “Ctrl + Bottom Arrow” to move to the last row and find the text box.
- Click the object to select it.
- Hover the mouse pointer over the selected object until the pointer changes to a four-sided arrow.

- Click and hold the left mouse button while dragging the object to the desired location within the worksheet.
- Release the mouse button to drop the object in the new area.
Method #5: Delete the Offending Objects
If you do not require the objects causing the error, you can delete them.
To delete the rectangle object, use the keyboard shortcut “Ctrl + Right Arrow” to navigate to the last column.
Once you have located the rectangle, select it by clicking it and press the “Delete” key to remove it.
To delete the text box, use the shortcut “Ctrl + Bottom Arrow” to navigate to the last row. Select the text box by clicking it and press the “Delete” key to remove it.
Note: Sometimes, the objects may not be visible because the option “Nothing (hide objects)” is selected on the “Excel Options” dialog box in the “For objects, show” section.
You can press the shortcut “Ctrl + 6” to make the objects visible and then delete them.
If you want to delete all the objects on the worksheet at once, do the following:
- Press the keyboard shortcut “Ctrl + G” to open the “Go To” dialog box and click the “Special” button.

- On the “Go To Special” dialog box that appears, select the “Objects” option and click “OK.”

- Press the “Delete” key to remove all the selected objects from the worksheet.
Method #6: Move the Objects to a Different Worksheet
If the objects are not critical to the current worksheet, you can move them to a different worksheet within the workbook where more space is available.
You can move objects using the following steps:
- Press “Ctrl + Right Arrow” or “Ctrl + Down Arrow” to move to the last column or row and locate the object you want to move.
- Right-click the object and choose “Cut” on the shortcut menu:

Alternatively, you can use the shortcut “Ctrl + X” to cut the selected object.
- Click on the desired worksheet’s tab at the bottom of the Excel window to switch to it.
- Once on the destination worksheet, right-click any cell or location where you want to place the object and choose “Paste” from the context menu. Alternatively, you can use the keyboard shortcut Ctrl+V to paste the object.
The object is removed from the source worksheet and pasted into the new worksheet.
Also read: Excel Hyperlink Cannot Open the Specified File – Fix!
How to Fix the “Can’t push objects off the sheet” Error Caused by the “Nothing (hide objects)” Option
In case you’re working with older Excel versions (2007, 2010, 2013), you may encounter the “Cannot shift objects off worksheet” error message while trying to insert rows or columns into a worksheet even when you do not have objects near the edges of the Excel grid.
The error happens when you have the “Nothing (hide objects)” option selected under the “For objects, show” section in the “Excel Options” dialog box.
This issue is a known bug in the older versions of Excel.
While the “Nothing (hide objects)” option is not enabled by default, someone could accidentally activate it by pressing the keyboard shortcut “Ctrl + 6.”
To work around the bug, you need to adjust the setting from “Nothing (hide objects)” to “All.” The quickest way is to press “Ctrl + 6.”
Alternatively, you can change the setting in the “Excel Options” dialog box using the following steps:
- Click “File” on the Excel Ribbon to open the “Backstage” screen:

- Click “Options” on the left sidebar of the “Backstage” window:

- Click the “Advanced” category on the left sidebar of the “Excel Options” dialog box, scroll down to the “Display options for this workbook” section, select “All,” and click “OK.”

This tutorial showed seven techniques for fixing the “Can’t push objects off the sheet” error in Excel. We hope you found the tutorial helpful.
Other Excel articles you may also like: